

Selling online is complicated. You have a lot on your plate, and it's easy to fear that you've overlooked something. For one, you need customers to trust you, or else they'll turn away. This may have already been happening to you. In that case, you're probably wondering how to get customers to believe in your business.
It might just be that your website doesn't have enough content.
Your eCommerce website is not just an online store. Simply having product pages, categories, and a shopping cart is not enough. You have to tell customers who you are and why you're the best. You need to establish your authority. Content is the key to all this, so you need to add content pages to your website.
Adding content pages won't only increase customer trust. Content pages can also boost your SEO. You have probably heard the saying "content is king." This reflects search engines' preference for higher-value pages. Content is the only way to get that value.
Shift4Shop makes it simple to add content pages to your website. This article will be your guide to creating and using them.
What are Content Pages and Why Do You Need Them?
Content pages are any website page that includes informational text and images. Product pages do need to have content, but they are not "content pages" in this sense. Product pages exist to provide details and an Add to Cart button. Content pages, however, are a resource for your visitors.
Examples of content pages can include the following:
- Your website's home page
- Other content-rich pages on your site
- Blog posts
Content pages serve two important purposes. First, they provide information to customers. This can be any type of information relating to your brand or industry. Content pages can be guides, news, business history (your About Us page), and more.
The second purpose of content pages is that they are also a great opportunity for SEO. By using relevant keywords, your pages can earn rank. What's best thing about content pages for SEO? It's that you can create as many pages as you need to focus on different things. This way, you can target many more keywords than you could without content pages.
How to Make Content Pages on Your Shift4Shop Website
Shift4Shop makes it easy to create a website and fill it with content. Of course, that content should be useful to your visitors. It should also be keyword-optimized. These are both up to you, but all the tools you need are here!
There are multiple ways to make content pages in Shift4Shop:
- Use the built-in blog module
- Add content to your home page
- Create unlimited Extra Pages
First, we'll briefly go over each of these and then discuss the specific tools.
The Shift4Shop blog module is pretty straightforward. If you're at all acquainted with blogging, you know how it works. It allows you to post articles and updates using a familiar text editor. It also has built-in formatting tools. Blogs are great for frequent articles, guides, reviews, and more.
Your home page is the front page of your website. This page shouldn't be super heavy on content. You need just enough to introduce your business and catch customer interest. Don't go too deep into your history. You'll be saving that for the About Us page. (Customers often look specifically for the About Us page, so don't disappoint them.)
Last, and most versatile, are Extra Pages. Extra Pages are the Shift4Shop feature that lets you add content pages to your website. You can add unlimited Extra Pages and make subpages, too. Extra Pages can be used for things like:
- Your About Us page
- Your policy pages (returns, shipping, and privacy)
- Guides to choosing one of your products
- Manufacturer information
- Anything else you feel should be a core part of your website
Some website owners get confused as to which content is best for content pages versus their blog. A few types of pages are pretty obvious. You don't want your policies to get lost in the blog archives, so they should be pages. It's the same with the About Us page, although you could also write blog posts about your business milestones. Any page that should be part of your site's infrastructure should not be a blog.
Another consideration is if you'd prefer your blog to follow a certain theme. Maybe you only want it to be "tips and tricks" or another specific topic. If a visitor is reading through your archives, you wouldn't want them to encounter an off-topic post.
Creating the Content Pages
How you create a content page depends on its type. Your home page is already created when you build your Shift4Shop store. The blog only needs to be activated in your Modules. Extra Pages are slightly more involved, so we'll cover the procedure.
To create an Extra Page, click on Content in the left-hand navigation of your Shift4Shop Online Store Manager. Then click Site Content. Scroll down until you see Footer Extra Pages and then click the Edit button.
You will be brought to a screen that lists your existing Extra Pages. Each of these pages corresponds to a link in your site's footer. However, you can check Hide to hide the page from the footer. That way, the page will only be accessed in the way you intended.
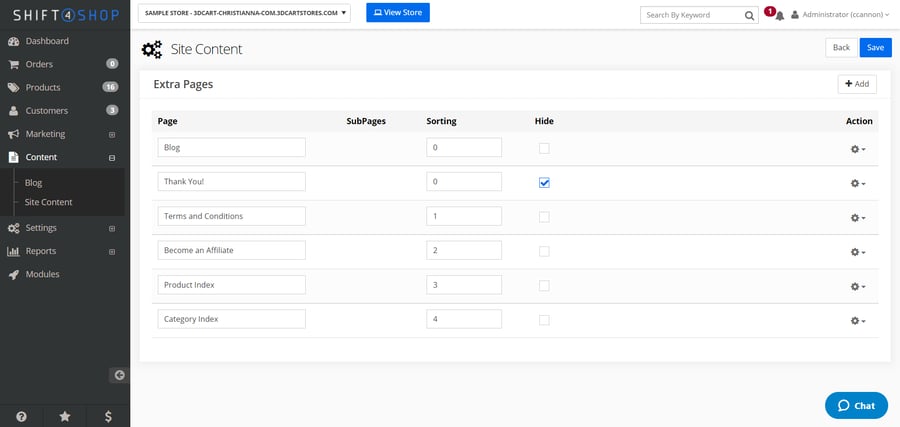
For example, notice that one of your Extra Pages is called "Thank You!" This is the page customers see when they complete their order. It's visible to you, in this list, because it's a page on your site. But customers can't see it until the right time. The Hide checkmark prevents it from being linked in the footer.
Your blog is also listed here, because it's recommended to have a footer link for it. However, don't be confused — this is just the front page of your blog. This interface is not for writing blog posts.
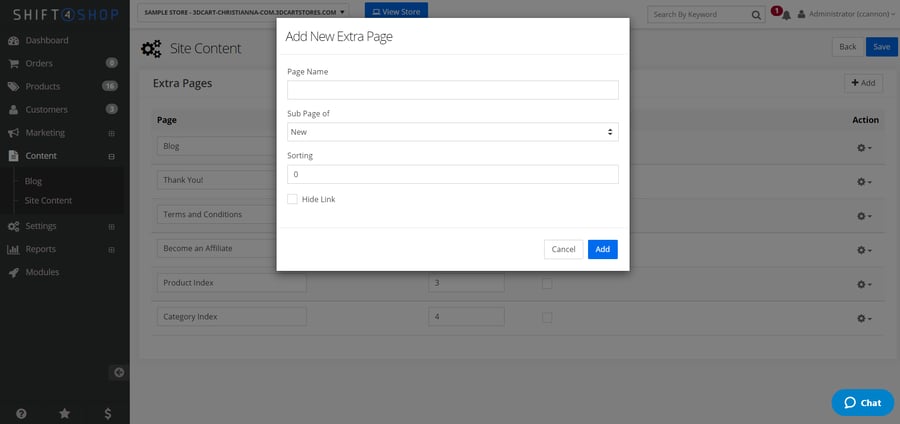
If you want to add a new page, click the +Add button. You'll be presented with a menu with some intuitive options. The Sub page of list will be populated with your other existing pages. Choose any of them to make your new page a subpage, or leave it on New to let it stand alone.
Now let's talk about editing your pages.
The Easiest Way to Edit Your Content Pages
Click the Action Wheel at the far right of the page's name in the list and select Content. This will bring you to its settings and editing tools. You have two options for editing your pages.
The best way is to use the Page Editor by clicking the Launch Page Editor button in the middle of the page. This opens up your page as it looks to your visitors, but with the Page Editor active.
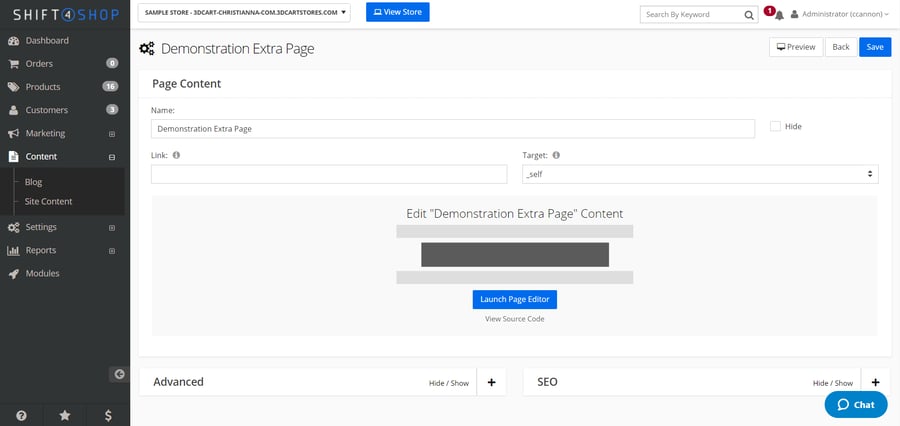
The Page Editor is a block-based page building tool that lets you add content and instantly see how it will look. You can add text, images, headings, and more. We'll explain how to use the Page Editor shortly.
If you want to use the older WYSIWYG editor, you can still access it. Instead of clicking the Page Editor button, click the View Source Code link beneath it. This brings you to the familiar WYSIWYG editor.
Please note that you can't use both the WYSIWYG editor and the Page Editor on the same page. It has to be one or the other. This is because the modular Page Editor format isn't compatible with older WYSIWYG edits.
What If the Page Editor Button is Missing?
There are a few reasons the Page Editor button may not appear.
- First, make sure you're using an updated Core theme.
- Next, make sure your website is using sitewide HTTPS.
- Finally, if there is existing WYSIWYG content in the editor, you'll need to remove it and save the page as blank. This doesn't mean you'll lose your content! Simply copy it into a file temporarily, delete everything from the WYSIWYG editor, and save the page. When it reloads, it will be empty, and the Page Editor will be available. You can now copy your previous content into the new editor.
There is one final consideration when getting ready to use the Page Editor on your website: a few Core themes are not fully compatible with it. This is because certain themes were originally developed by third parties and may not be completely integrated with the newest version of the Page Editor. If you are using one of these themes, you may still have access to some of the Page Editor tools, but the newest tools may be missing.
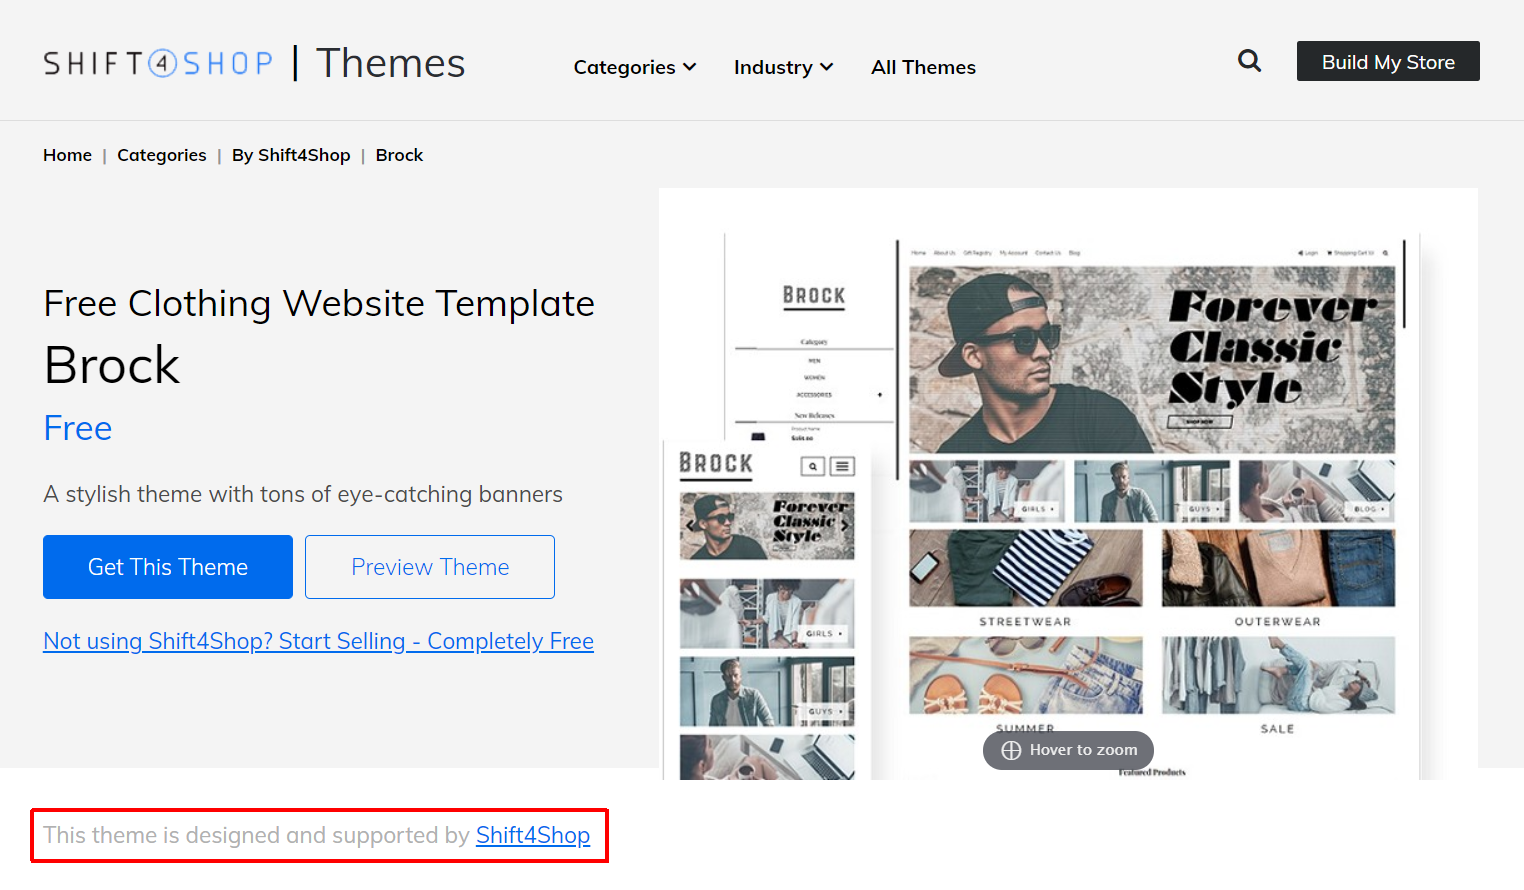
Any Core theme made in-house by Shift4Shop will be fully compatible with all the Page Editor tools. You can tell if a theme was made by our own designers by looking for "This theme is designed and supported by Shift4Shop" on the theme's page in the Theme Store, as seen below:
When picking a theme for your store, you can also limit your view to only Shift4Shop's in-house themes by selecting By Shift4Shop from the Categories menu:

Of course, you are free to use any theme you like. Just be aware that third-party themes may not have access to all the Page Editor's tools.
Why You Should Use the Shift4Shop Page Editor
The Page Editor is a fast and easy way to design a web page. You won't need to know any code, and you won't have to try to imagine what it will look like when it's complete. You'll work directly on the page, instead of an old-fashioned WYSIWYG/word processing box. With the Page Editor, you can build an awesome content page in minutes. Here's how it works.
Before you start working with the Page Editor, please note that your Shift4Shop store will automatically log you out for inactivity if you've been idle in the Shift4Shop dashboard for too long. So, make sure you save your changes frequently while working in the Page Editor to prevent lost work. For example, if you spend a long time writing content in the Page Editor without saving, the system may consider you idle, and log you out — and that work will be lost. So, save often! You can also write content ahead of time and paste it into the Page Editor as you go.
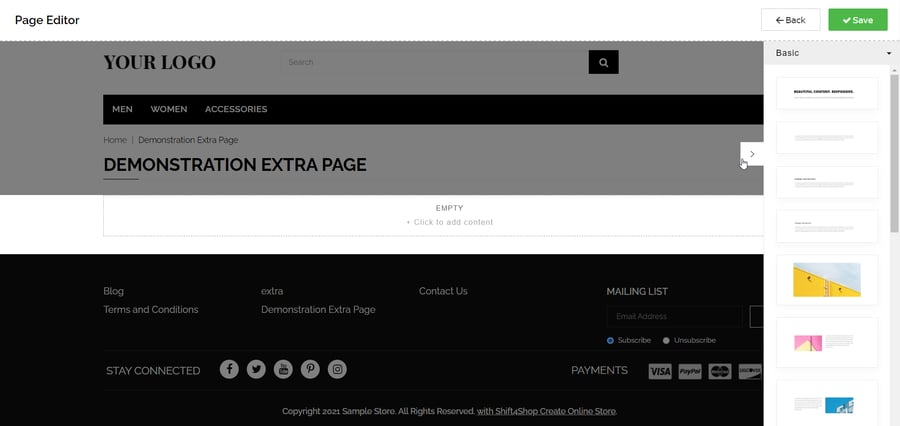
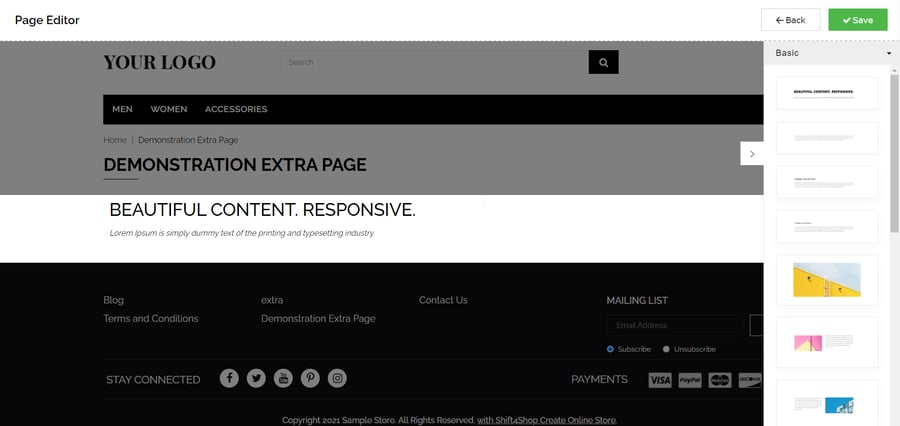
As soon as you click the Launch Page Editor button, you'll be brought to the page ready to edit. You will see an empty content area in the middle of the page. On the right-hand side, you'll also see a sidebar filled with "snippets," which are pre-made content templates you can drag and drop into the main content area.
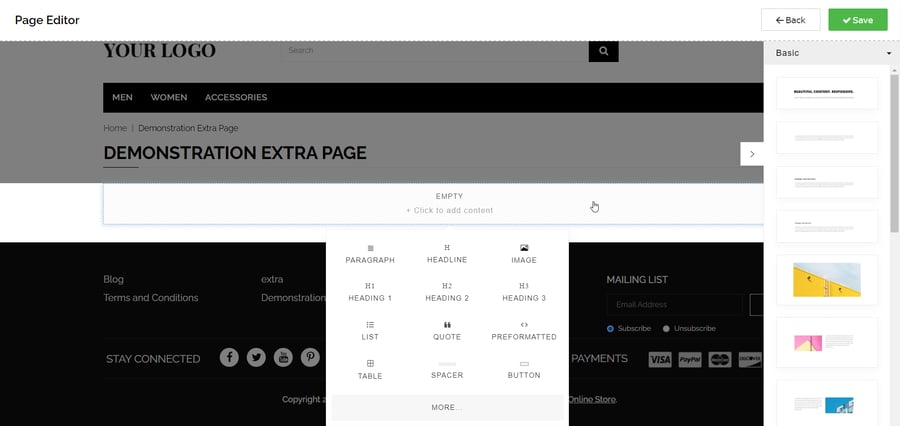
If you don't want to use any snippets, you can also click the content area itself. A menu will appear showing different types of content areas you can add.
However, for this demonstration, I'm going to use a few of the snippets — they make a great starting point that can help you better envision your finished page as you work on it. The snippet selected below is a template for a headline and small subheadline. Drag this snippet to the content area.
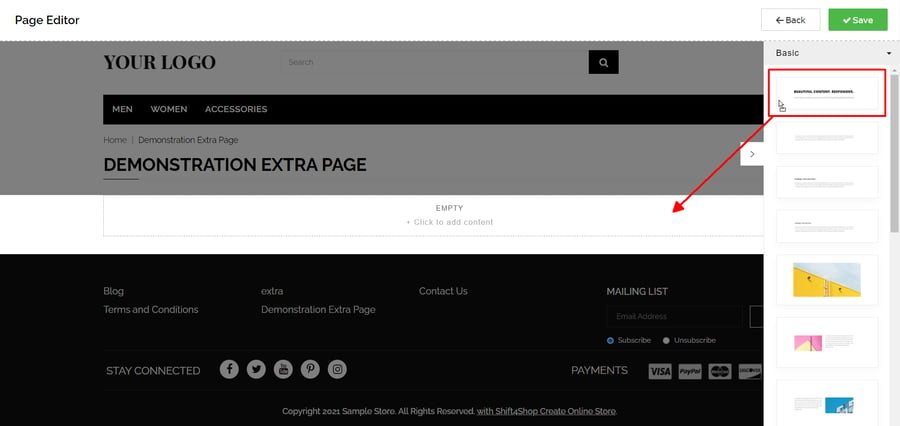
Drop the snippet there, and it appears with placeholder text so you can get an idea of how it will look.
The snippets currently visible in the sidebar menu are basic elements like this, but if you click the menu as shown below, you can access other snippet formats as well.
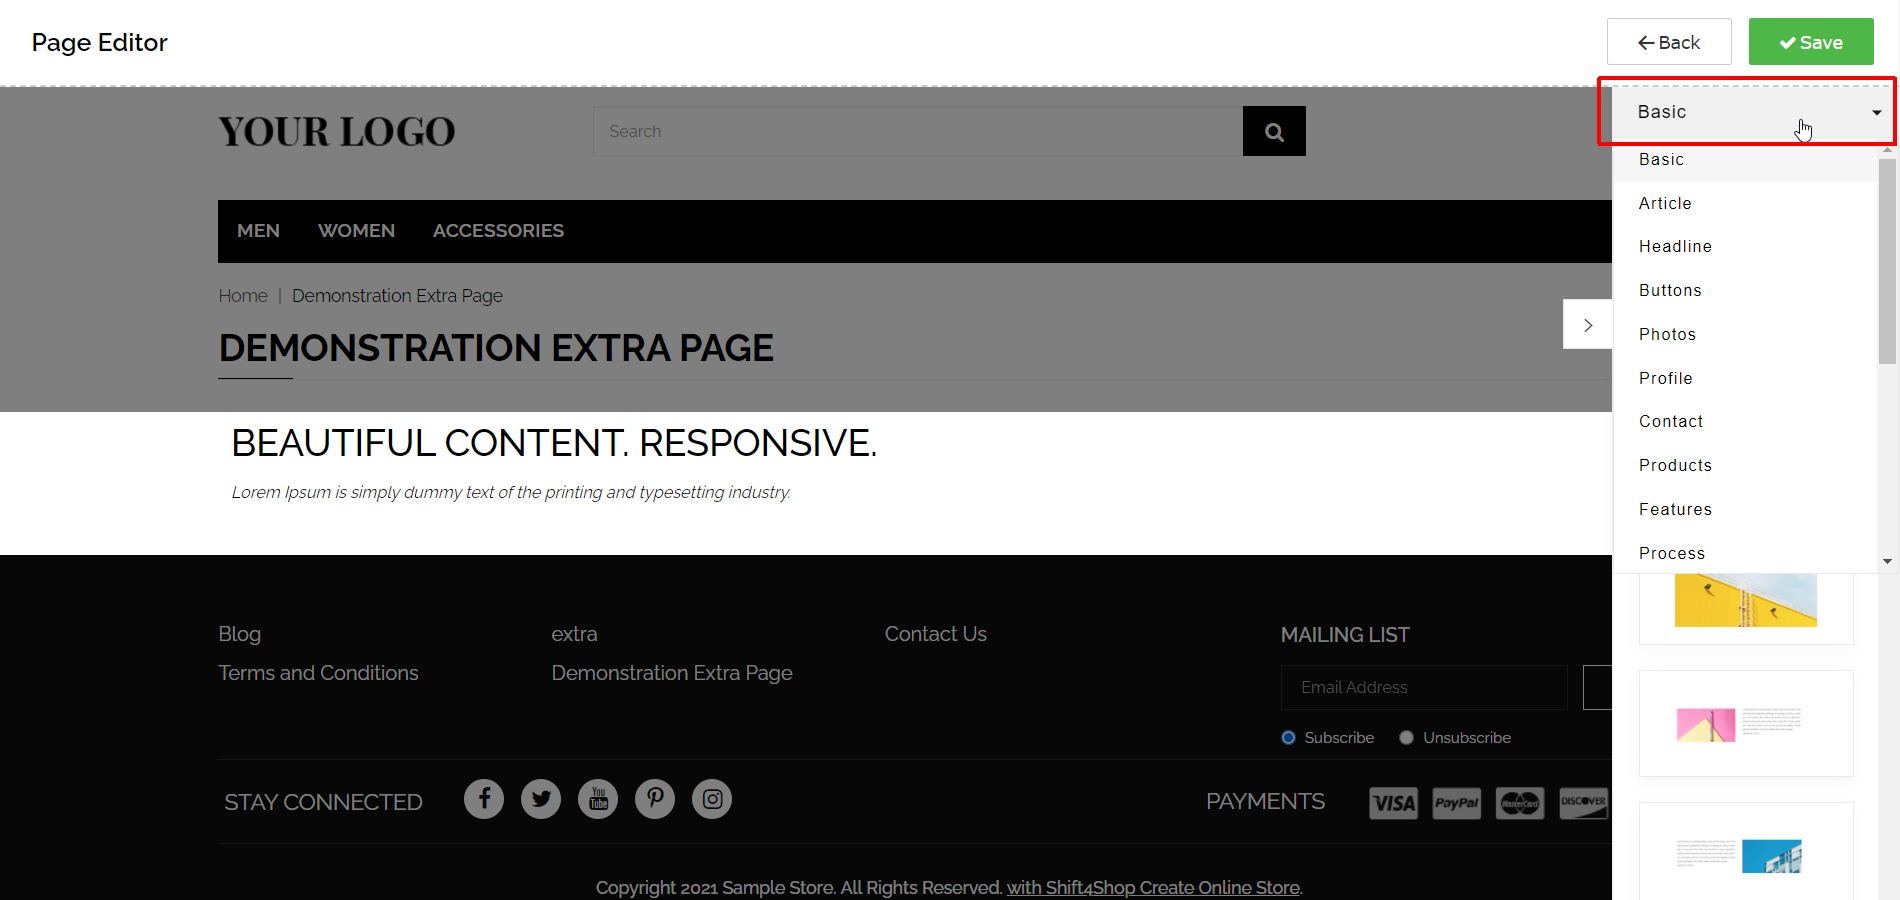
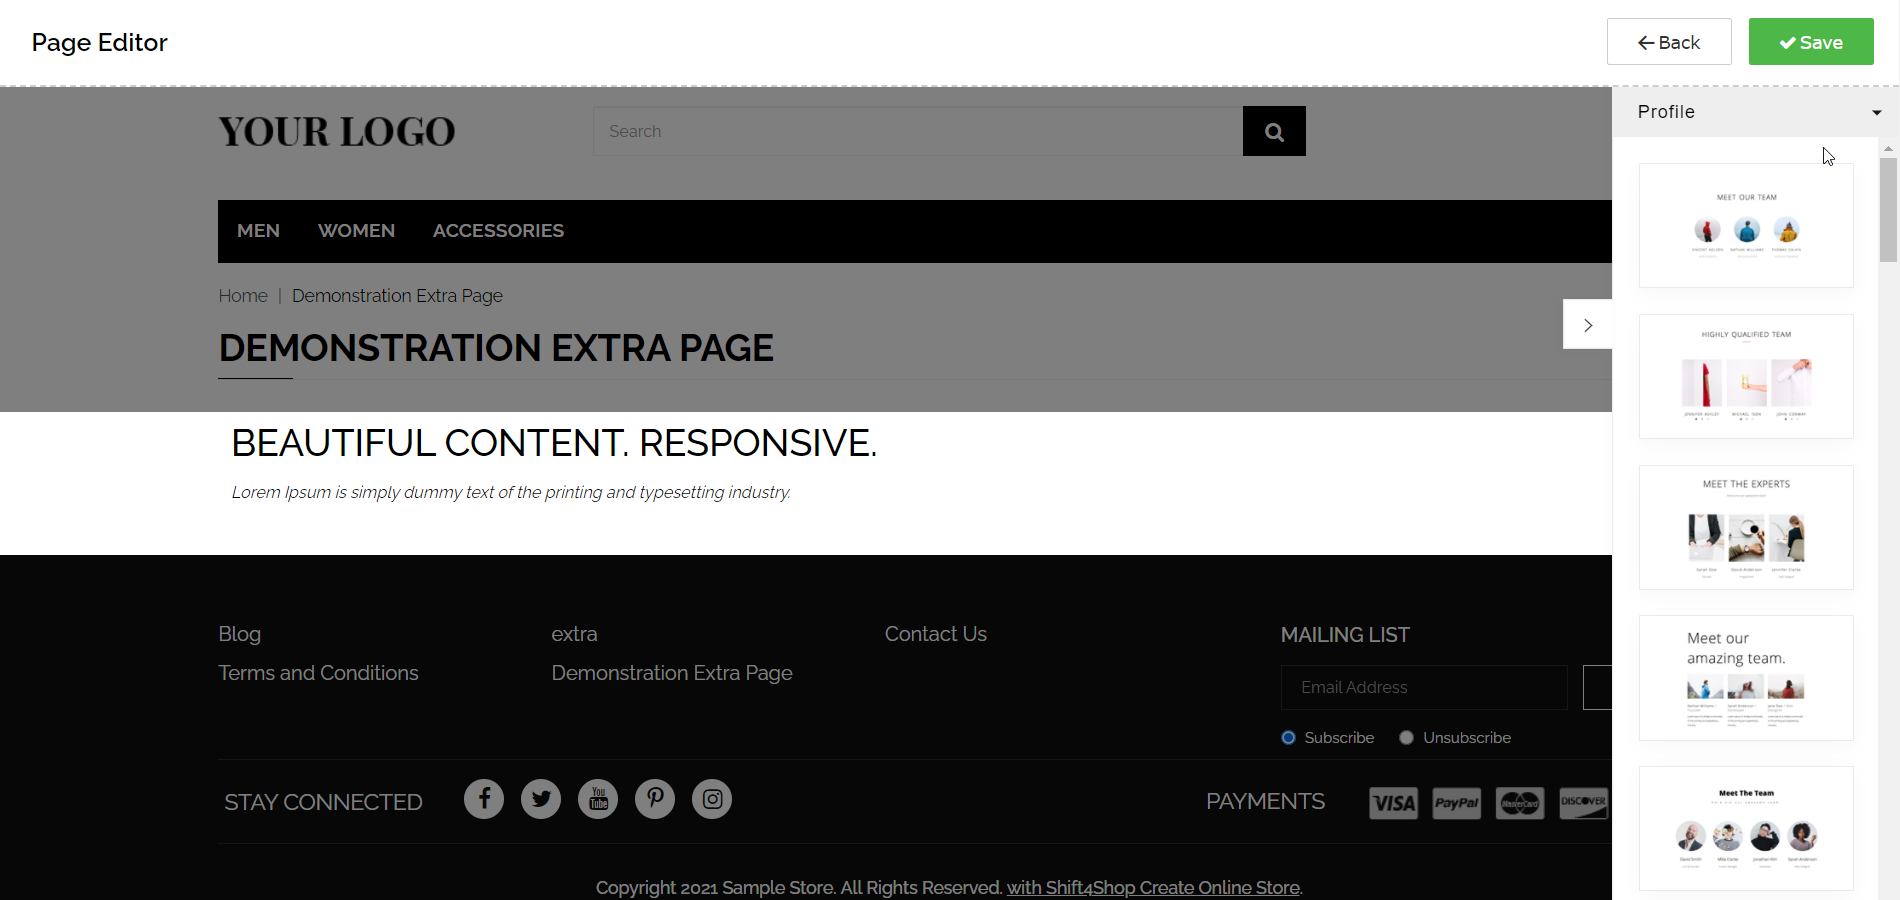
Each of these snippet categories includes multiple layouts of snippets for certain purposes. For example, the profile category is useful for setting up a page with information about your staff. You can see a few example snippets in the sidebar below, but I'm not going to use them right now.
I like the snippet I chose for setting up my page's headline, so it's time to customize the text. You can hide the snippet sidebar by clicking the small tab sticking out of its side, which gets it out of the way until you need it again. Hiding it makes it easier to customize the content areas you've placed.
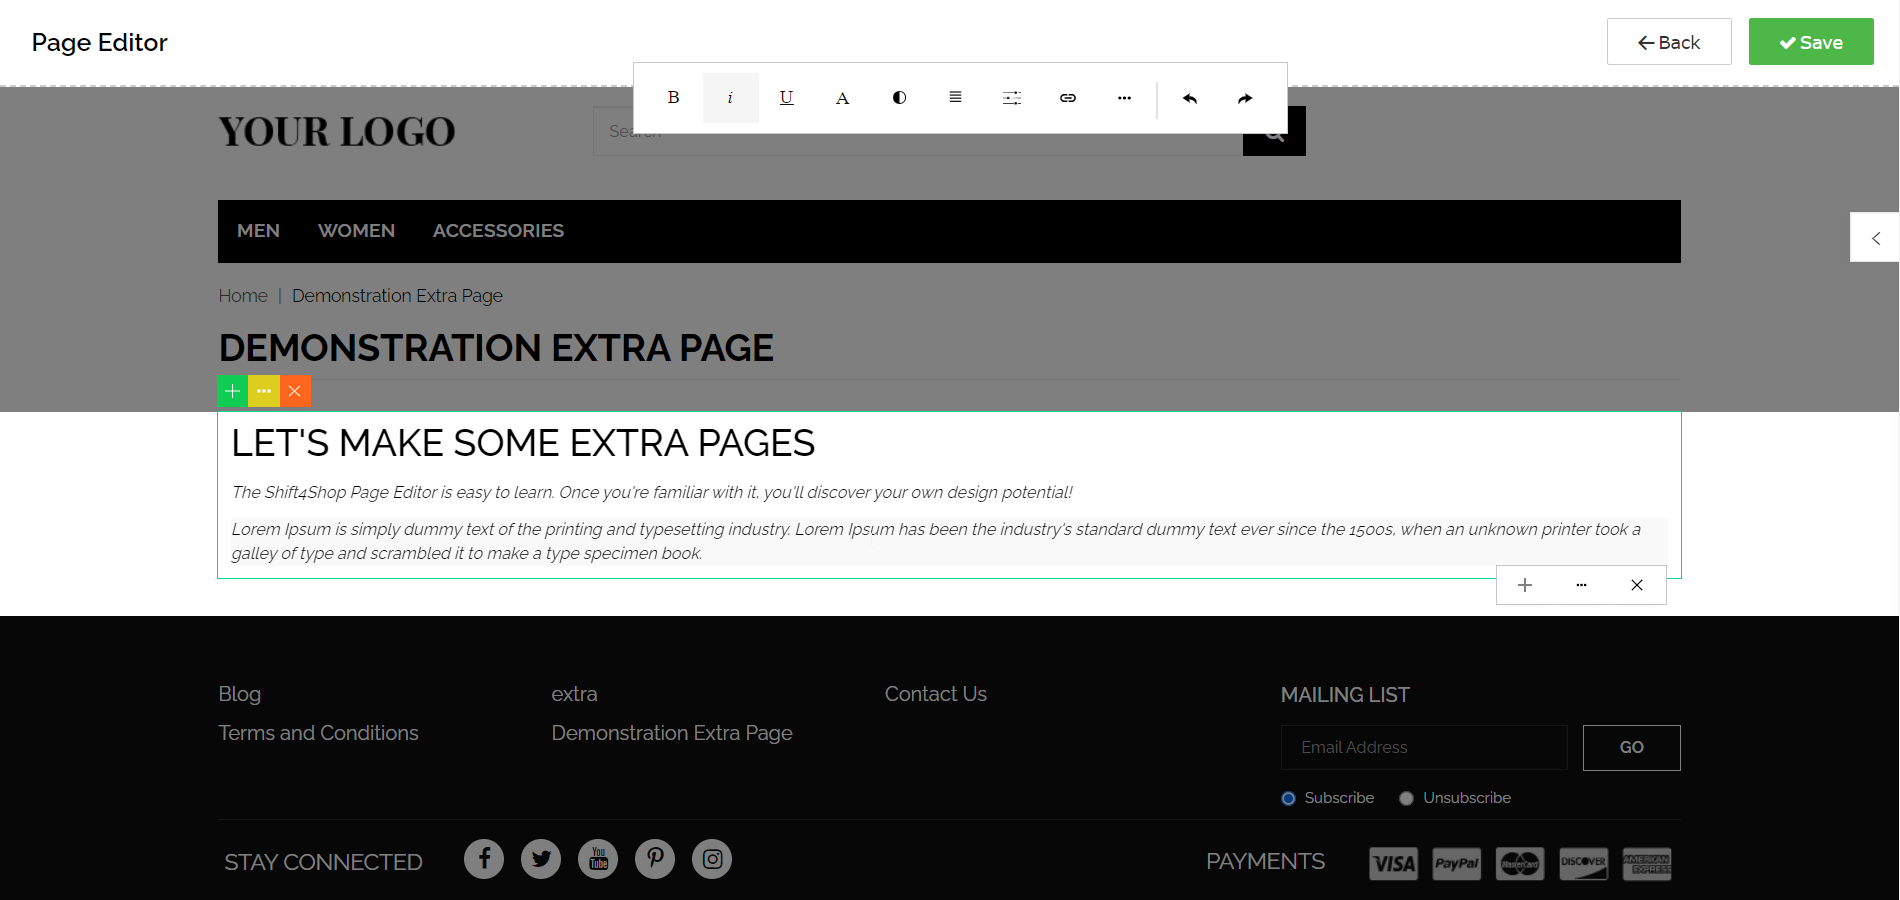
To edit the content you've placed on the page, click it. You can then select your text and change it to something appropriate for the page. A formatting menu also appears at the top of the page to help you fine-tune the look, and you can also Undo or Redo with the respective left- and right-pointing arrows.
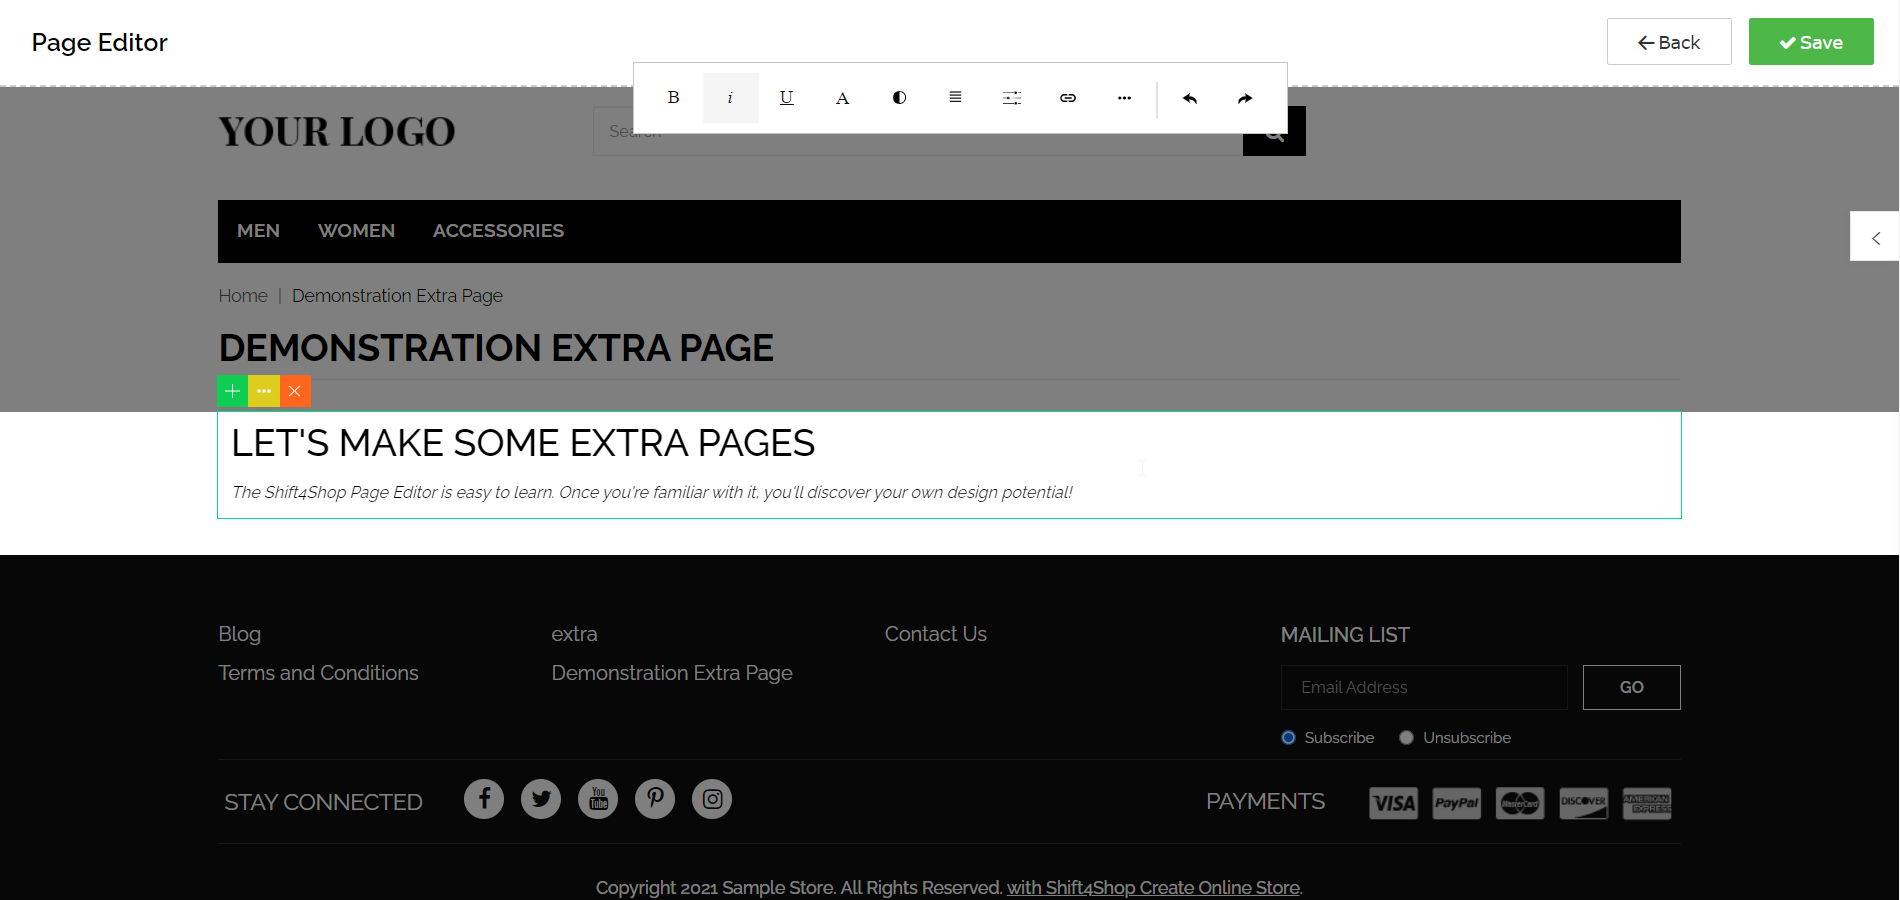
Clicking the content area highlights the selected block with an outline and brings up the block controls — the small, colorful panel on the top left of the content area. The green + (plus sign) button is for adding another block to the page, the yellow "…" is to access the current block's settings, and the red X is to delete the block.
First, let's look at adding another block. When you click the button, a menu appears. You can choose to add a new block to the left or right of the current one (like columns), or below it.
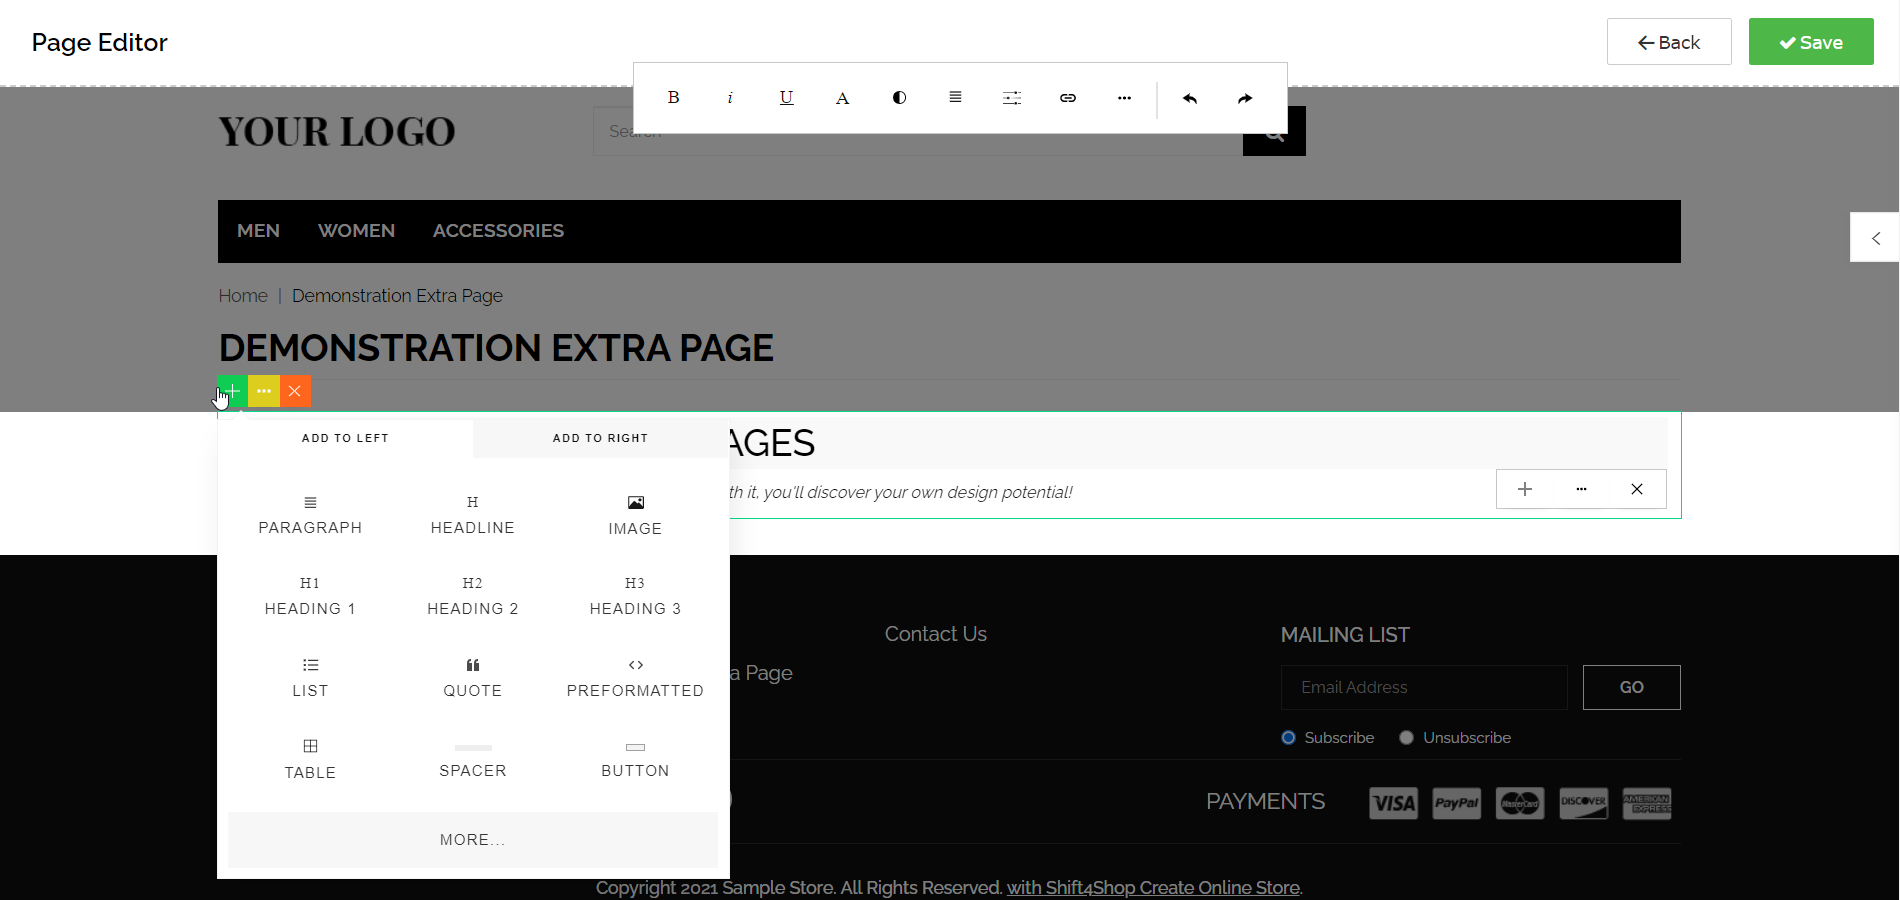
For example, I clicked Image in the Add to Left tab, and this is the result — a placeholder image in its own separate block to the left of the headline:
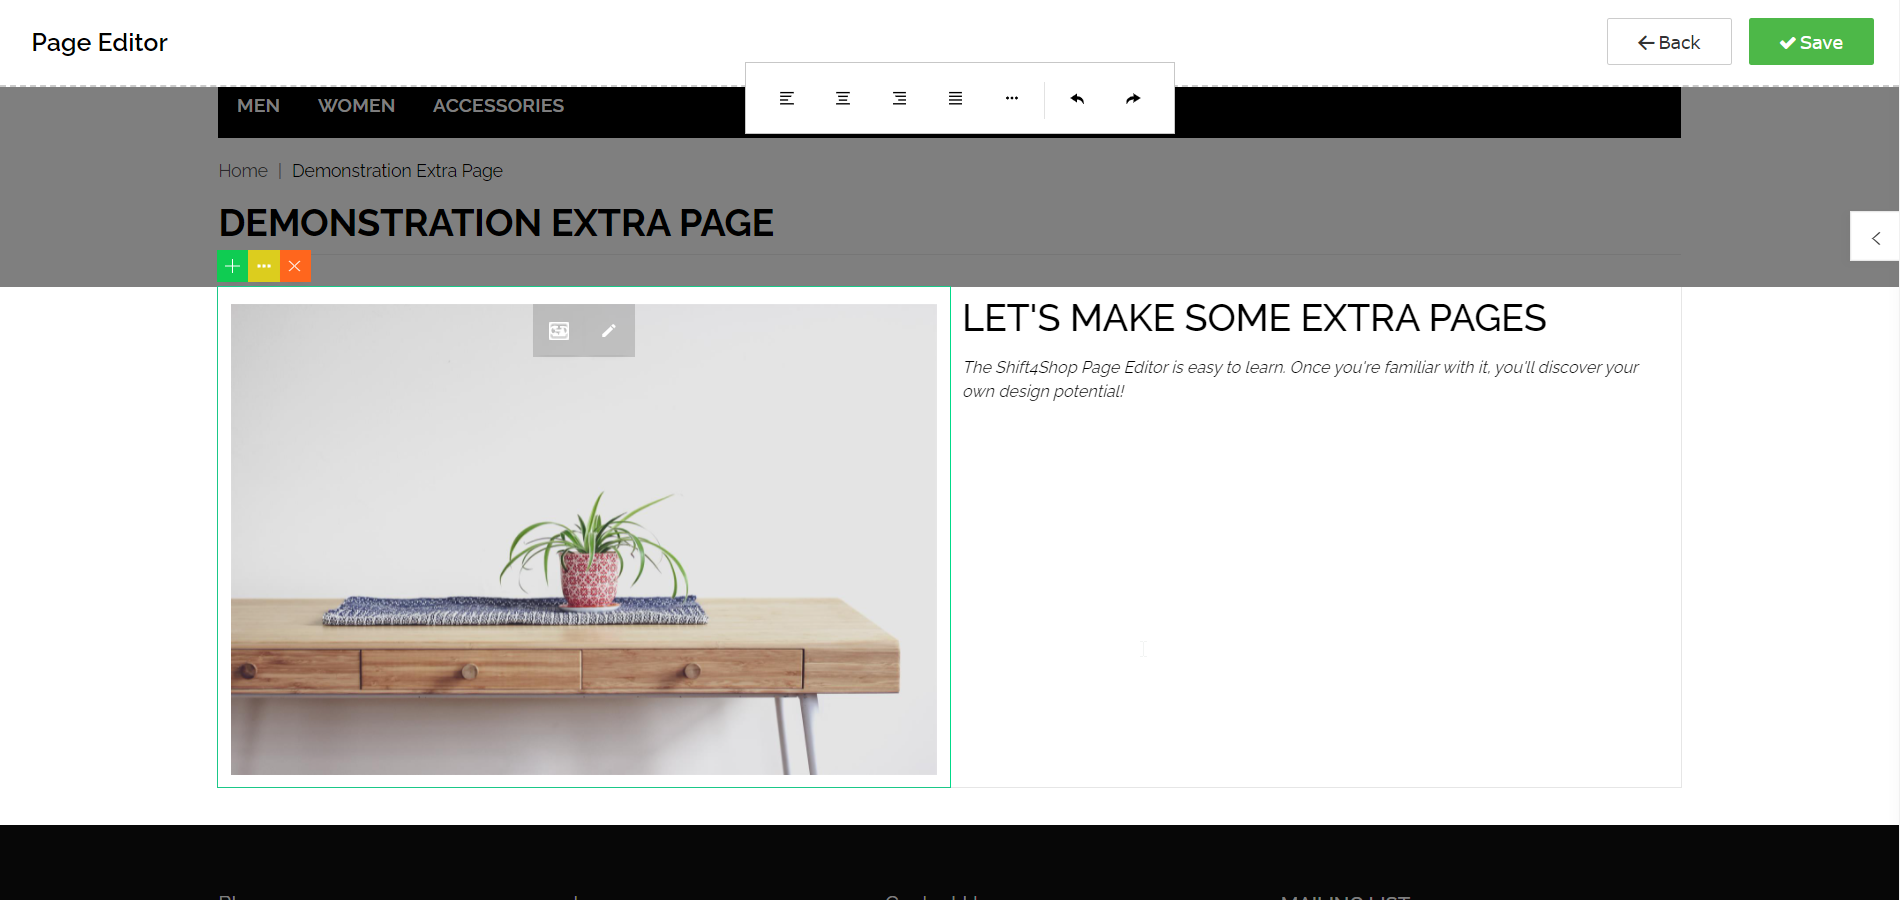
However, I don't actually want this on the page, so I delete it. Instead, I plan to add an image later, and focus on the rest of the settings for now.
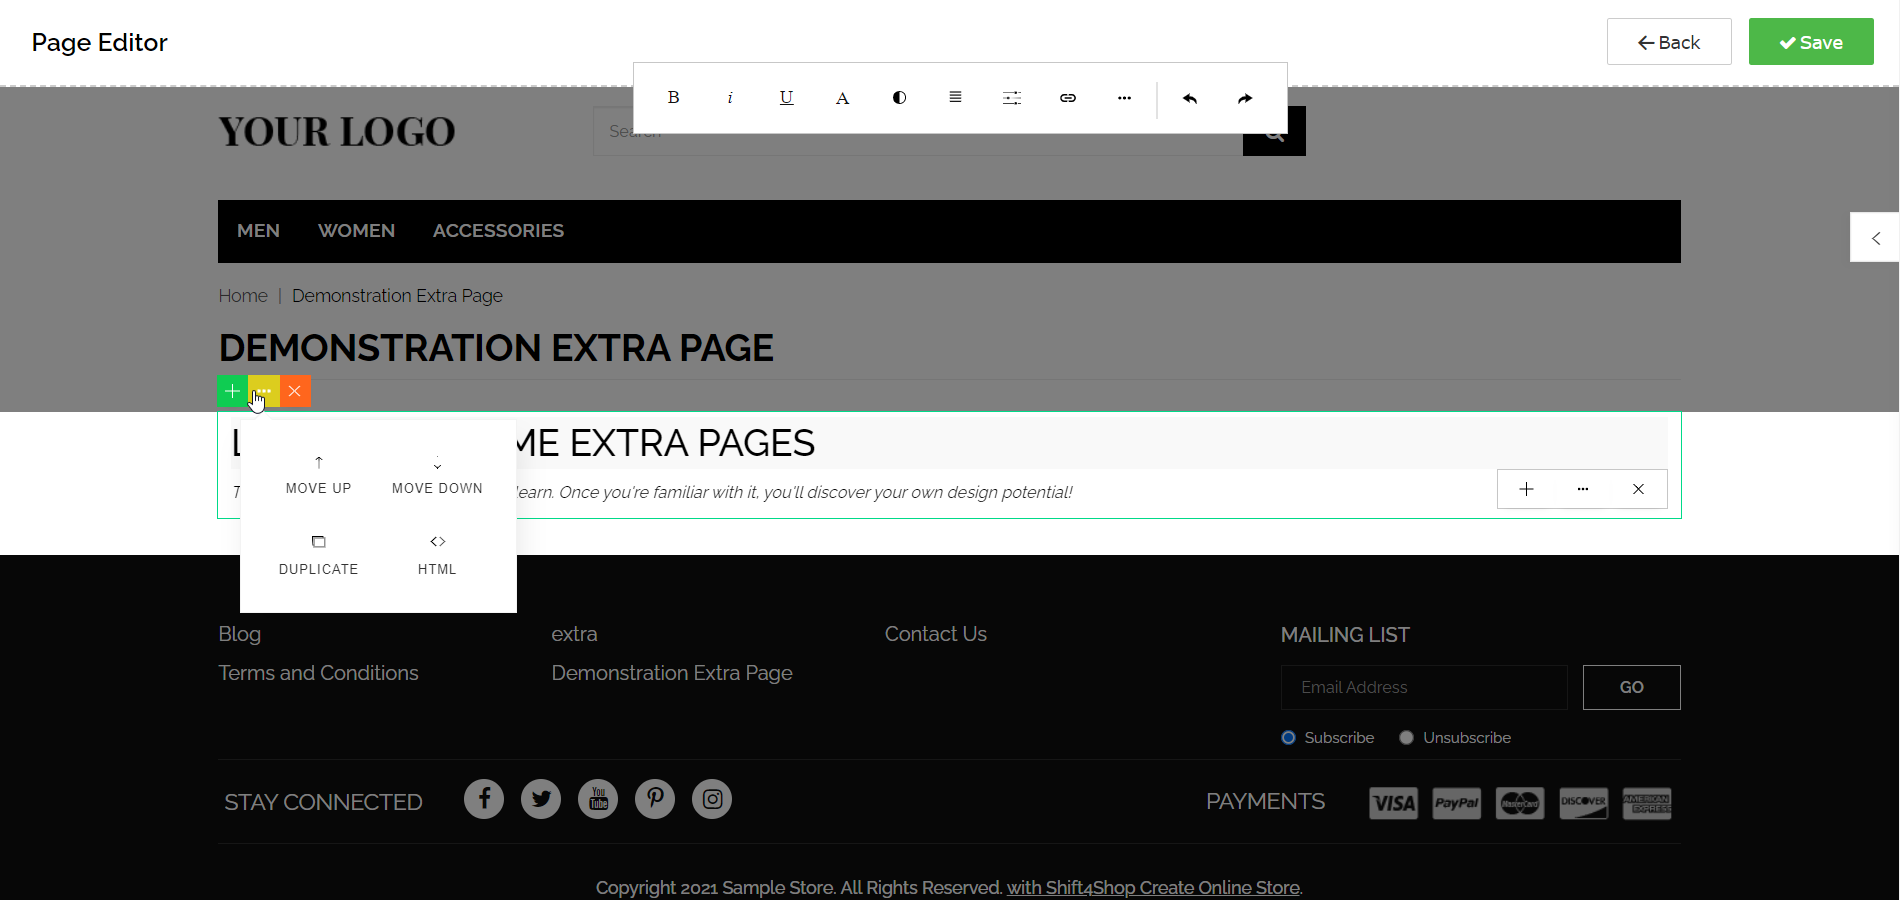
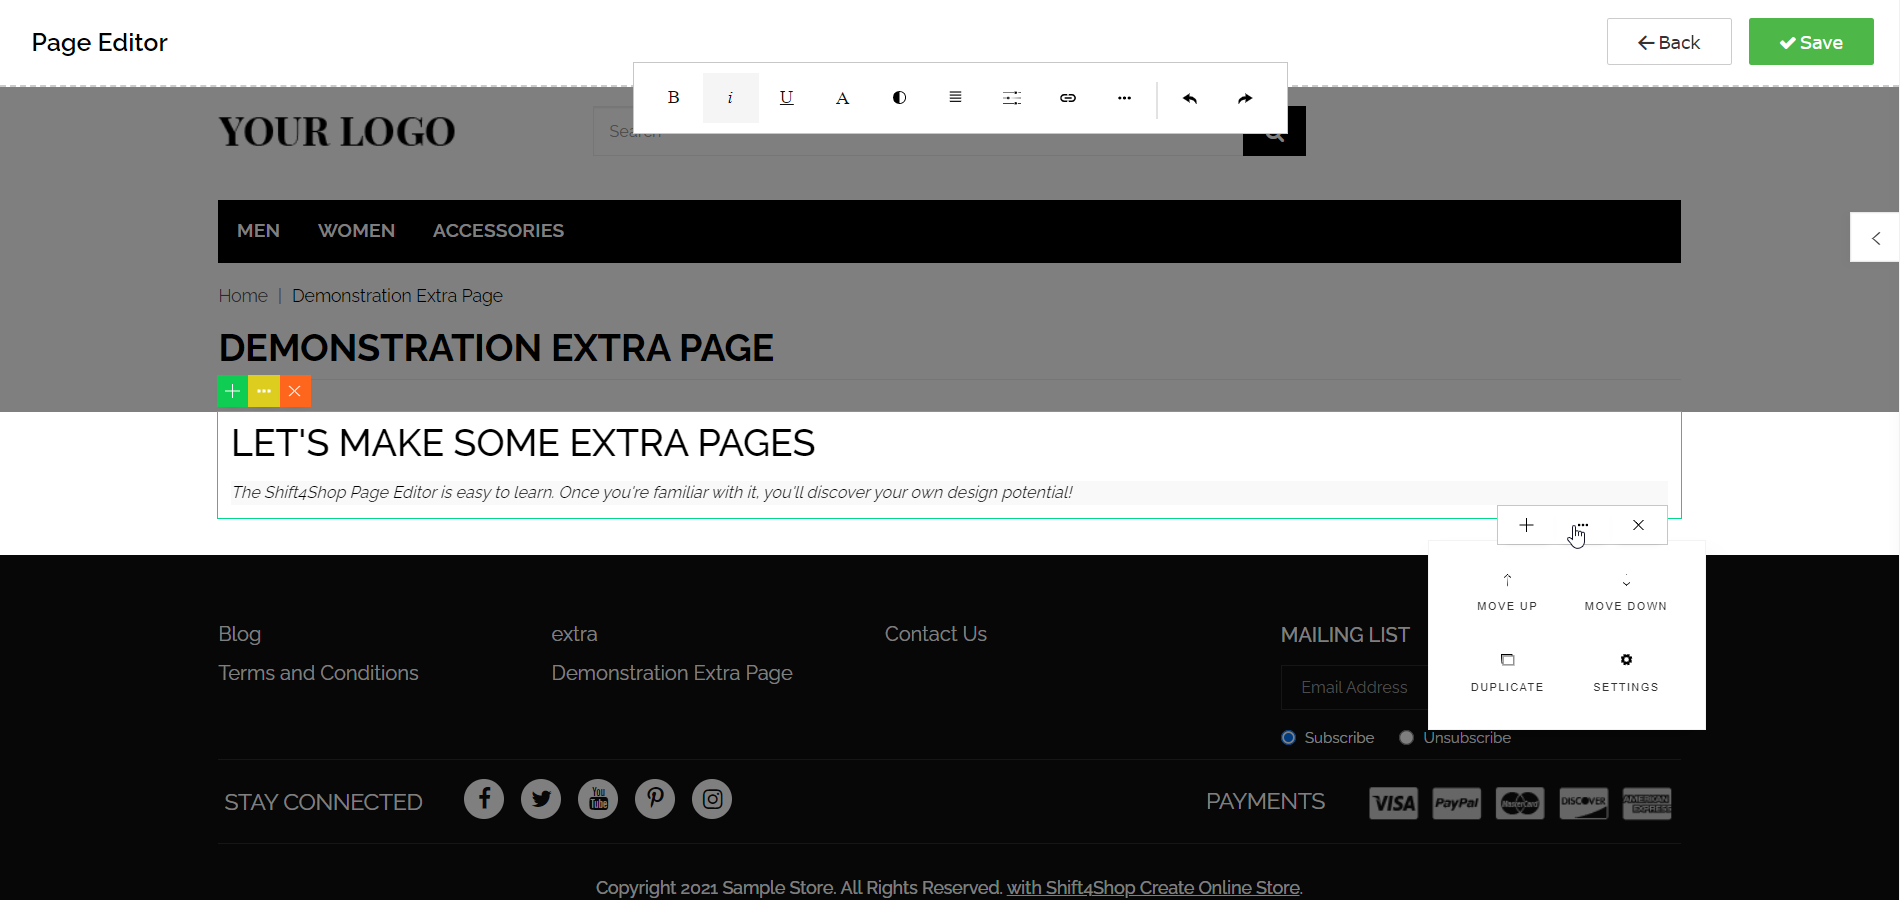
The yellow "..." settings button allows you to move the block up or down in relation to other blocks on the page, duplicate the block, or view its HTML source code.
The above settings are for the entire highlighted block, but you can also add and change elements within the same block rather than adding a whole new one. That's what the white buttons on the right side are for — they're similar to the block controls, but apply only to the selected element within the block.
For example, below, I've selected the subheadline, which is the lower of the 2 elements in the selected block.
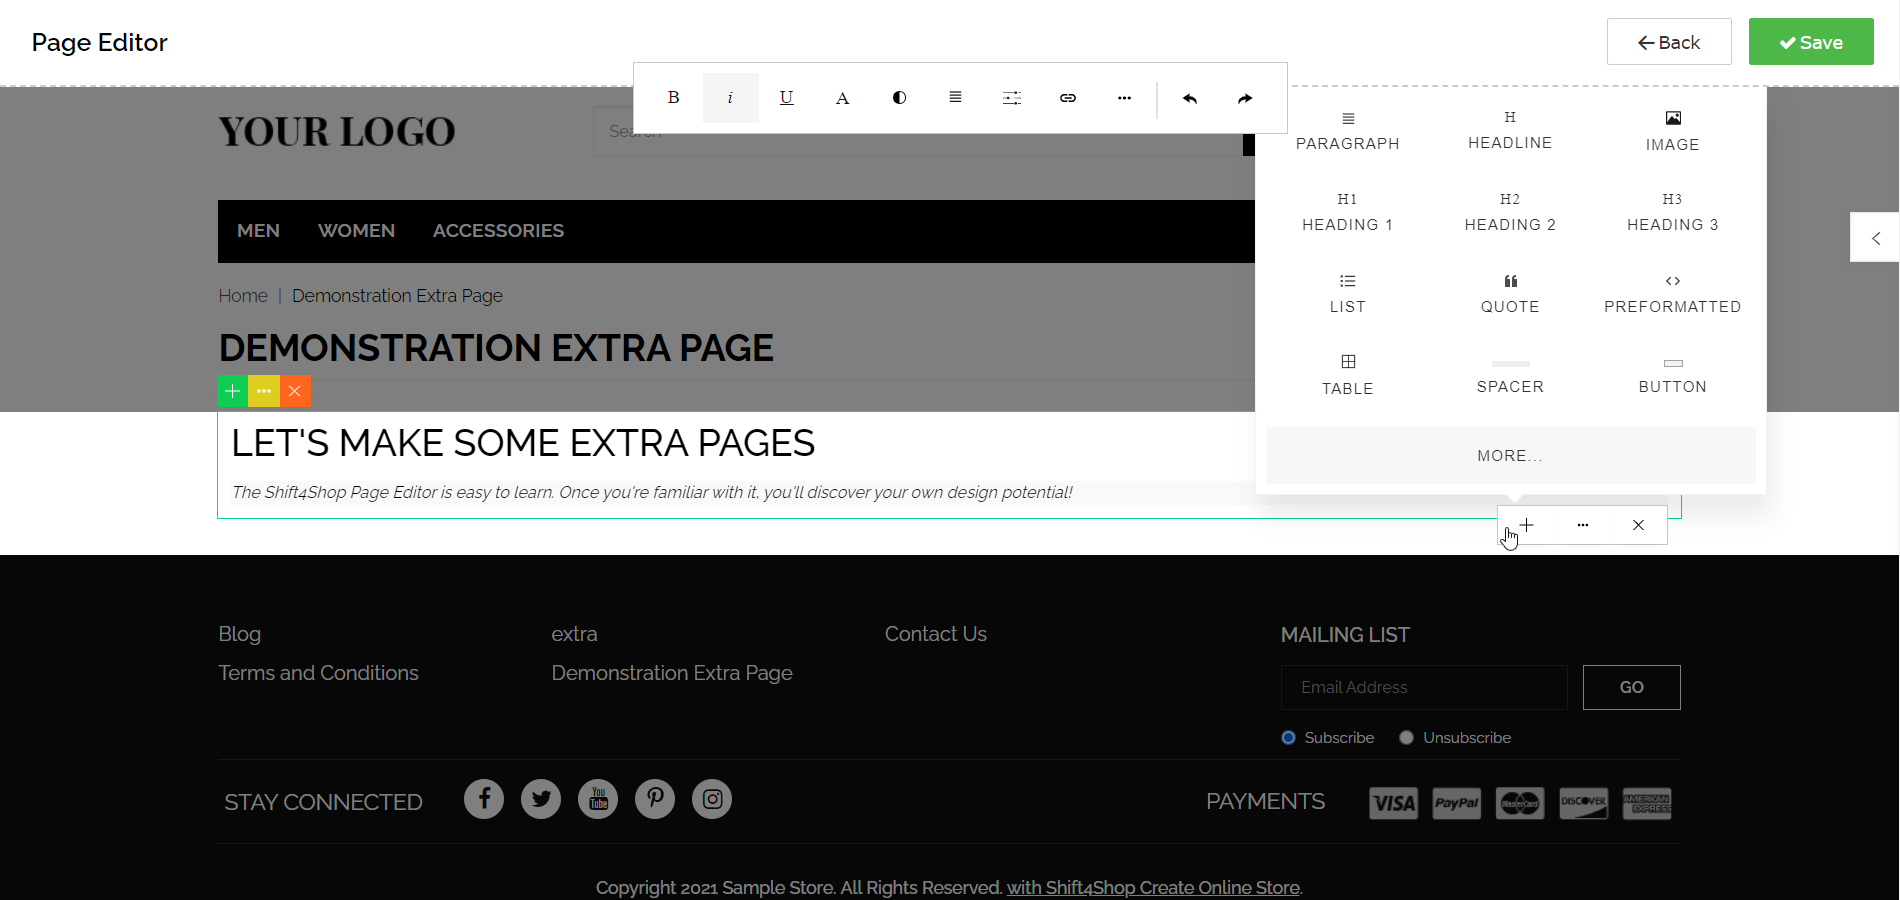
The content types visible as icons in the above menu will all be placed inside this same block, but if you click More… you can also add another block below the current one.
Below, I clicked Paragraph and a new paragraph of placeholder text is added below the existing elements within this block.
I don't want to keep this, though, so I delete it. Instead, let's look at the settings for the subheadline element. Similar to the block controls, these allow you to move or duplicate this element within its block. For example, if I clicked Move Up, it would move this small subheadline above the "Let's Make Some Extra Pages" headline.
There is also a Settings button, which we'll look at next.
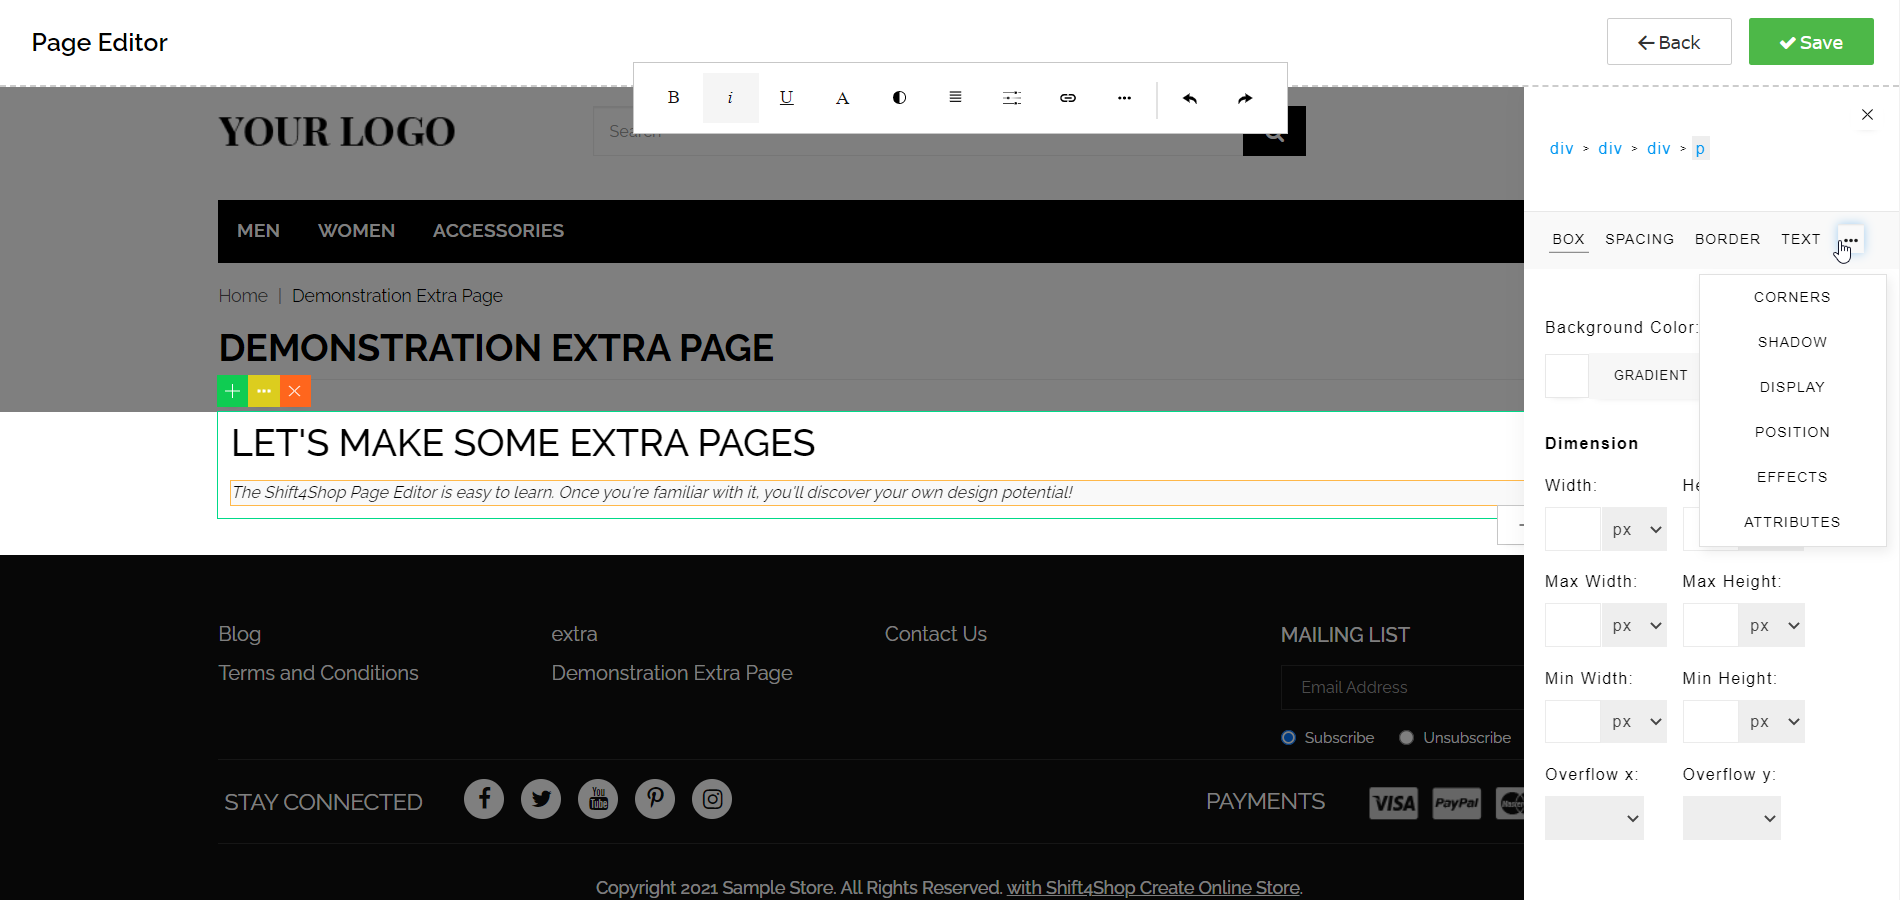
If you click the element's Settings button as seen below, it will open a side panel with formatting options you can apply to the element. More settings are also available in a dropdown menu if you click the "…" button within the Settings box. The element you're editing will also be highlighted with an outline to help you keep track of what you are changing.
We'll take another look at these later. The important thing right now is to understand that each block on your page can have multiple elements within it, and you can arrange and apply formatting to each of them separately to get the look you want for your page.
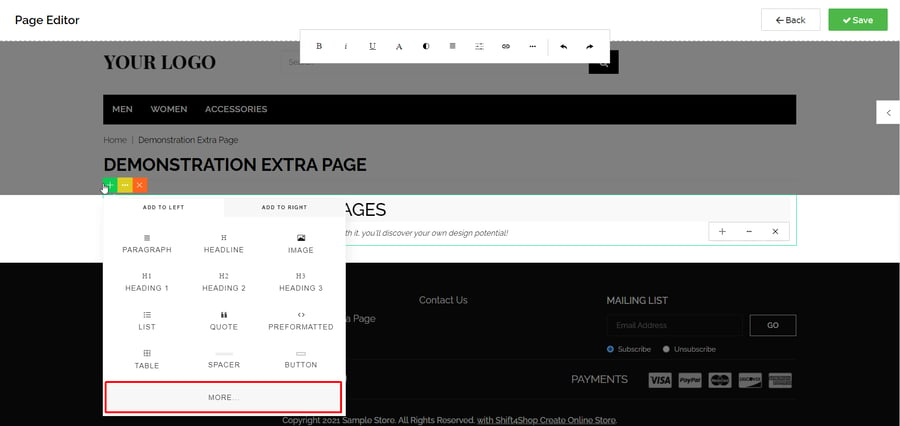
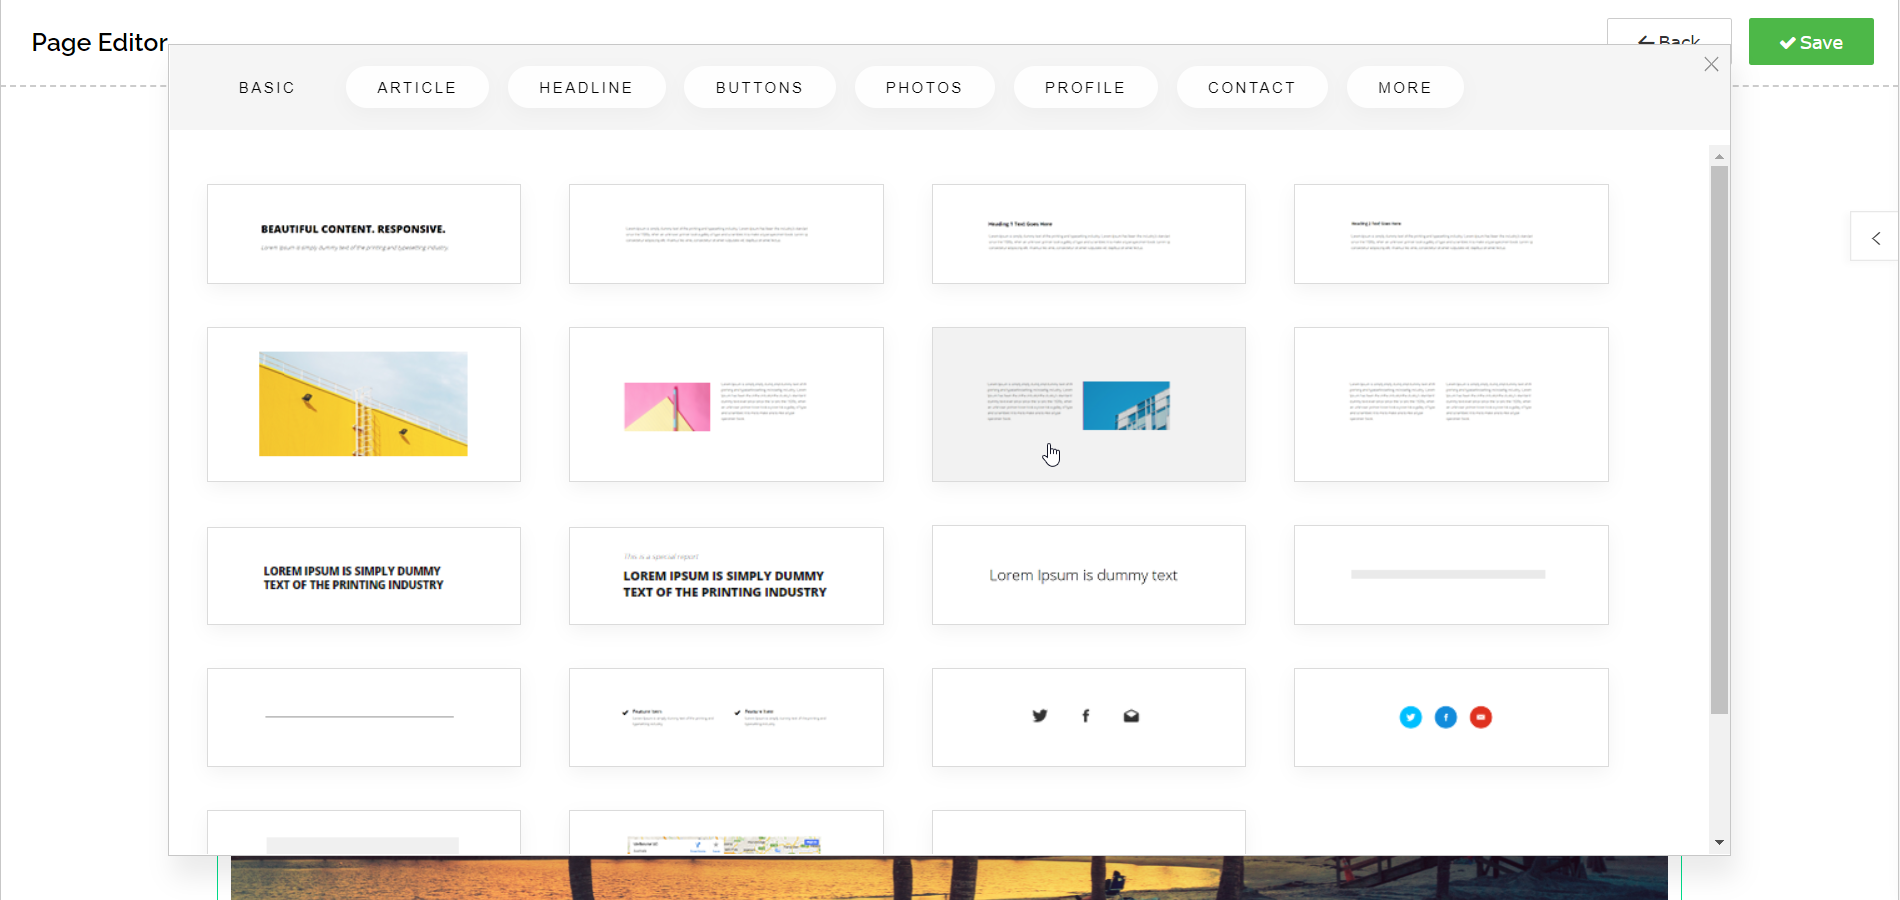
Now, I want to add a new block with an image below the existing block. I click the green plus sign button to add another block, but instead of choosing to add it to the left or right, I click More… as seen below.
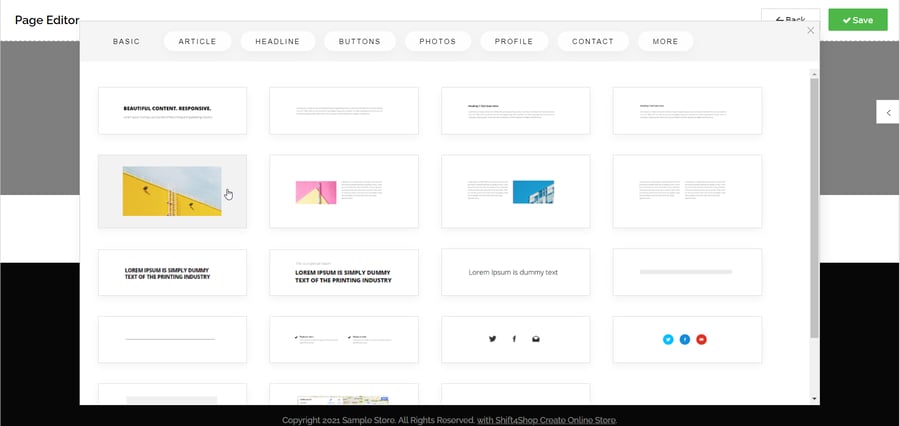
This brings up a bigger version of the snippets menu, just like the sidebar, only easier to navigate. Below, I'm choosing the snippet populated by a large stock image.
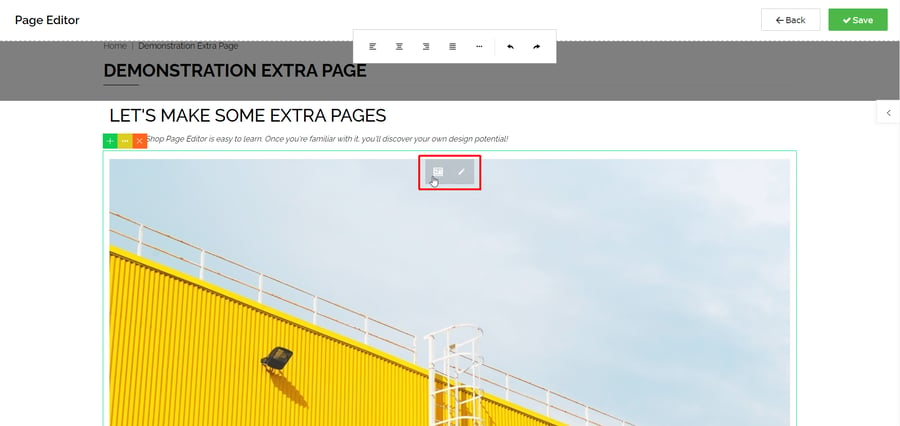
Clicking this snippet will add a new block with the image inside. Of course, this just a stock image, so I want to replace it with one of my own. Click the image to bring up image controls at the top, which consist of a Link button and an Edit button. Click the Link button as shown below.
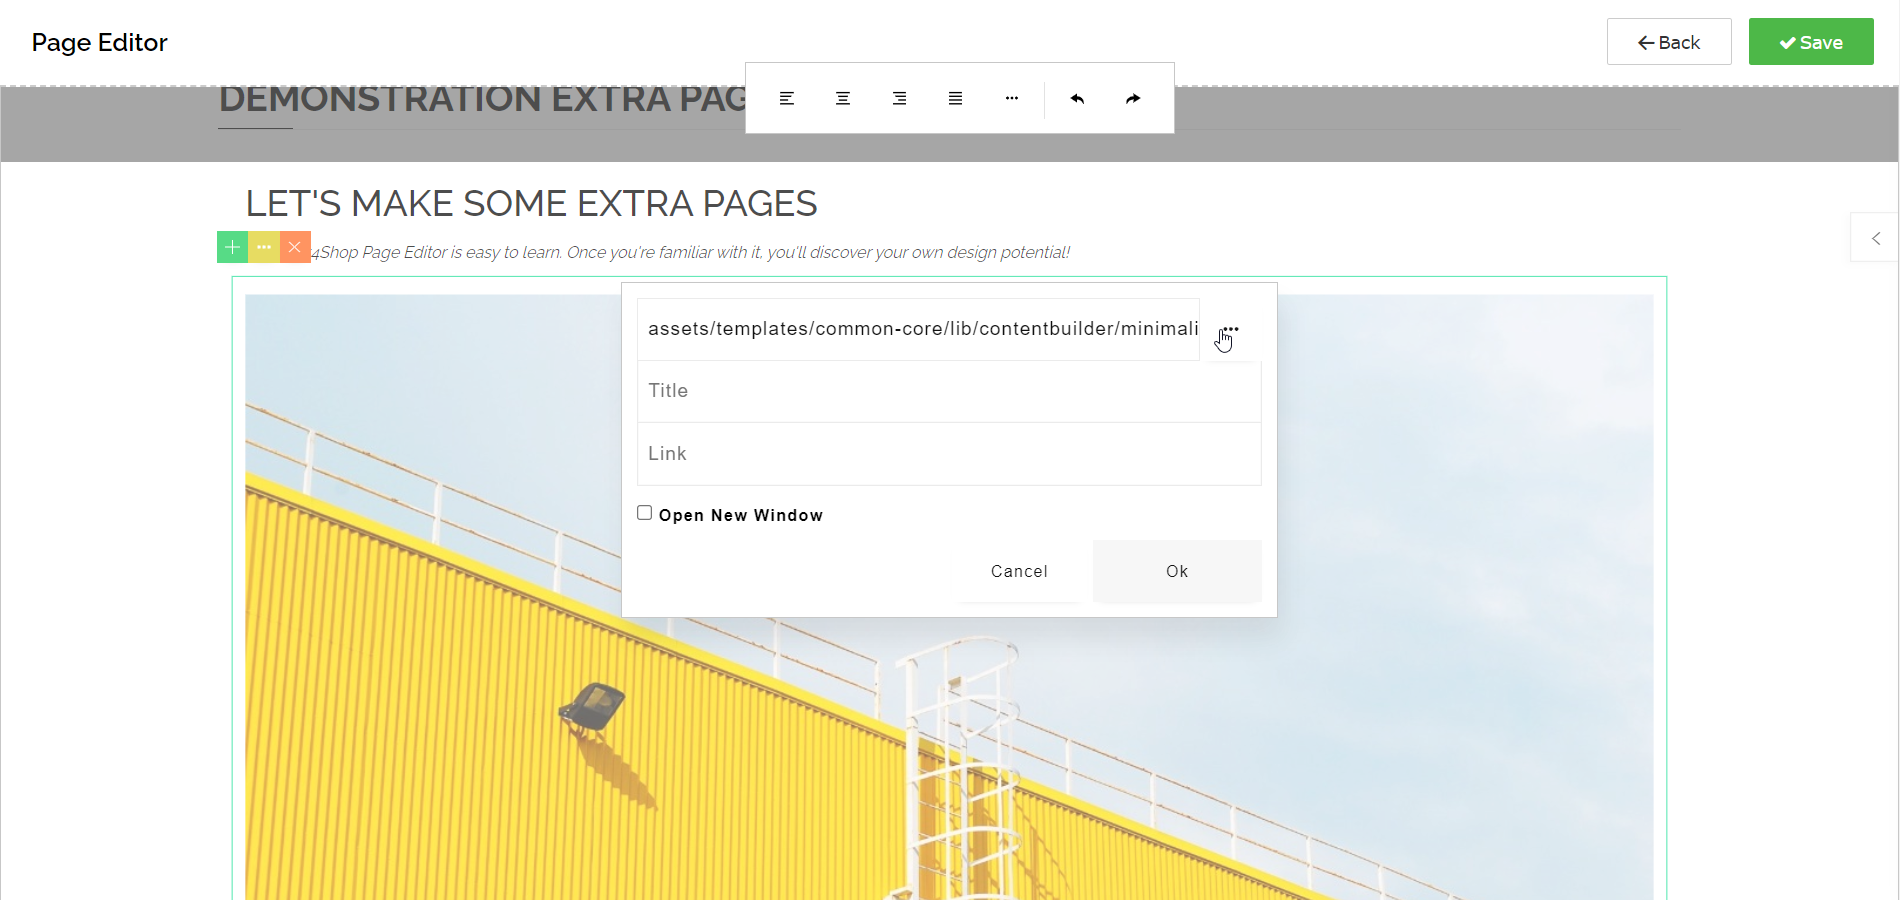
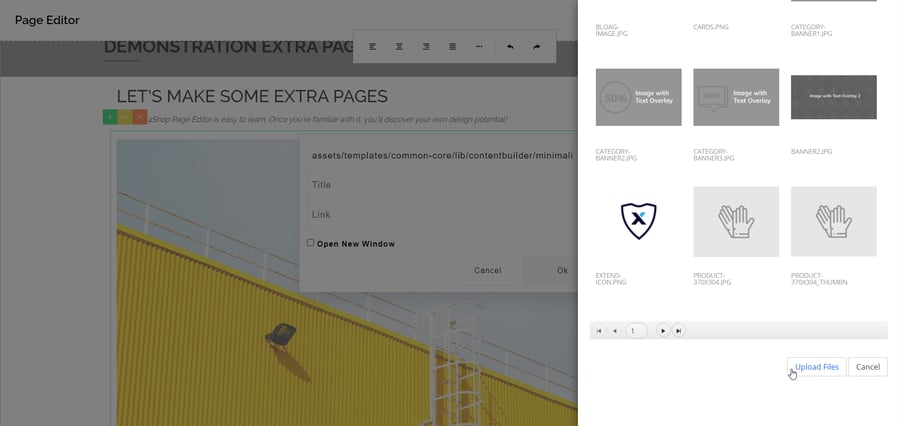
A small image settings panel will appear with fields you can use to add a link to the image and select whether this link should open in a new window. But what interests us now is the "..." button in its upper right corner, which will allow us to replace the image.
Clicking this button will open the File Manager, where you can choose from one of the images you've uploaded to your Shift4Shop site.
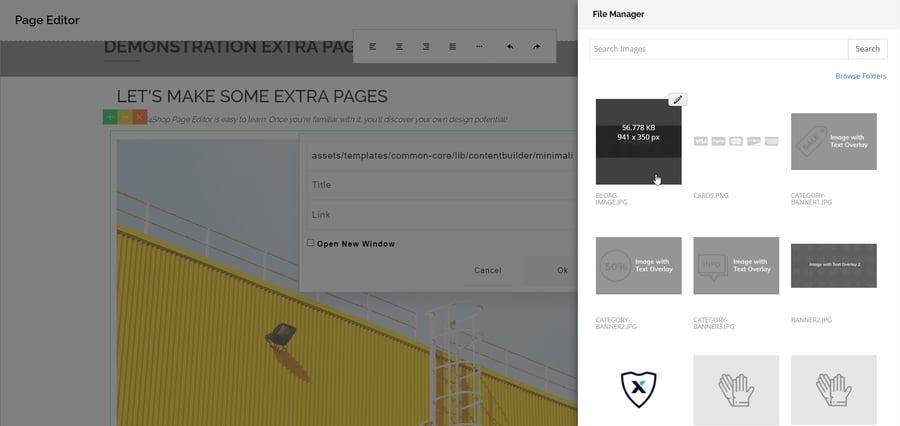
Scrolling down in this window will let you browse additional pages of images in your File Manager (depending on how many you've uploaded). You can also upload an image through this window, which is what I am going to do.
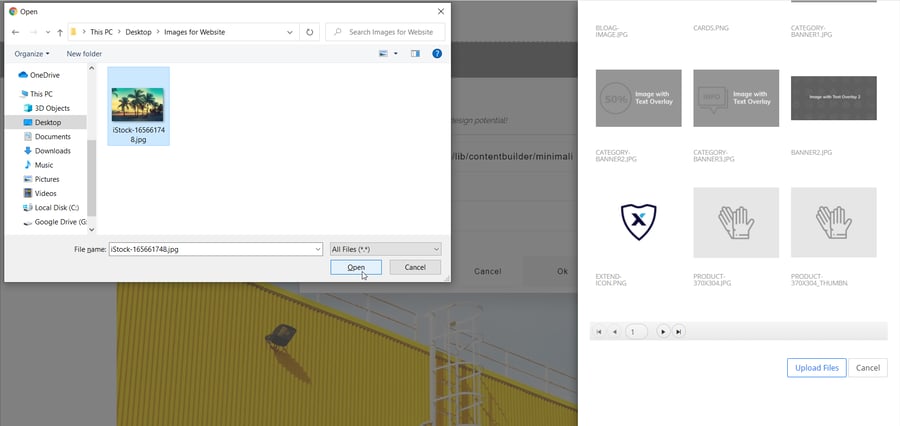
Clicking the Upload Files button will open the typical window on your computer for browsing. Locate the image you want to add, select it in the window, and click Open.
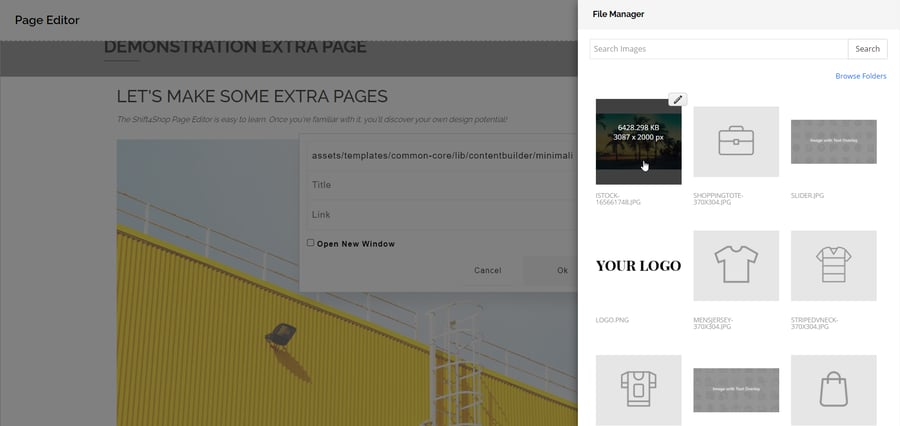
The image will then be uploaded to your File Manager. Once it's ready, click it to add it to the block, and then click Ok on the image settings panel.
The image has now been added to the page. You can click it to access the same settings as before, such as to add a link. You can also edit the image by clicking the button next to the settings button, with a small pencil icon. This will allow you to crop the image, either freehand or by using templates of different aspect ratios.
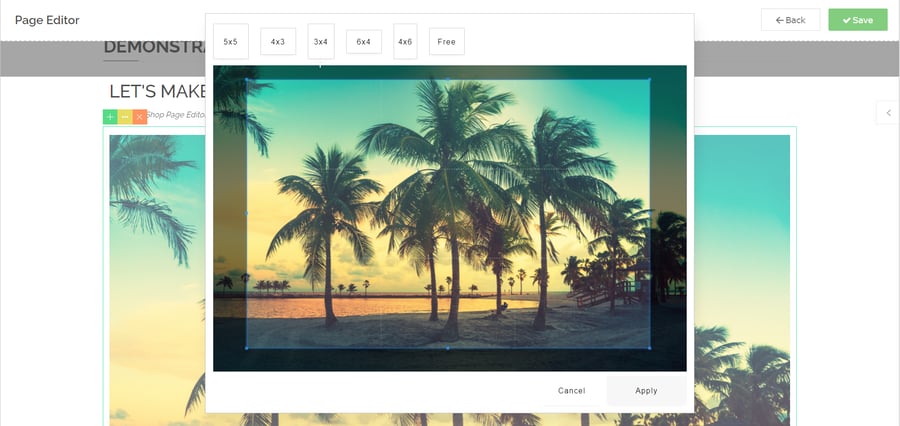
This tool is useful for quick changes, but you may prefer to edit your image in a graphics program before you upload it, since you'll have much more power with a dedicated image editing program.
You can keep adding content blocks and elements until you feel like your page is complete. Let's try adding a few more.
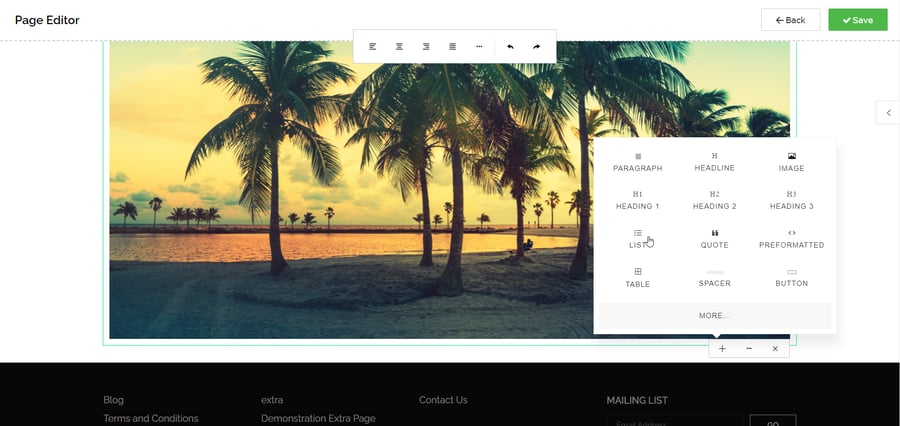
Another example of content you can add is a list. To add a list element to the current block below the image, click the image, then the plus sign on the small menu to add a new block, and then the List content type.
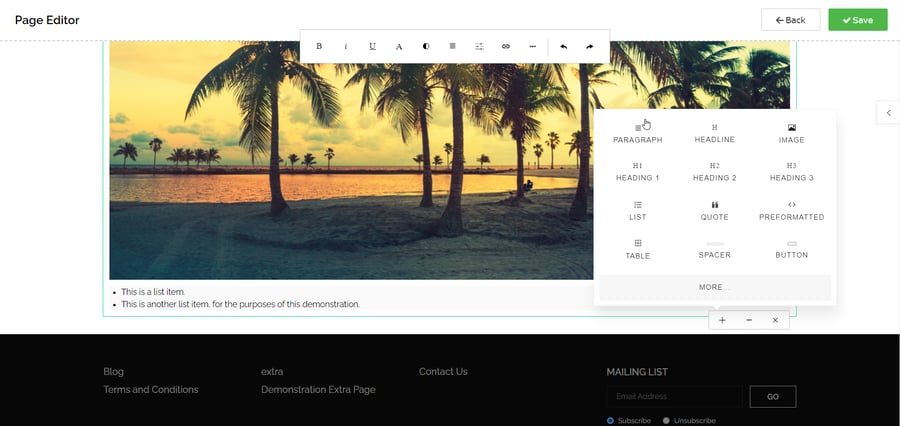
This will add a couple of list items populated with dummy text. You can freely change this text, and if you want to add more items to the list, you can do so the same way you would in a word processor — just move your typing cursor to the end of a list item and hit the Enter key to start a new line.

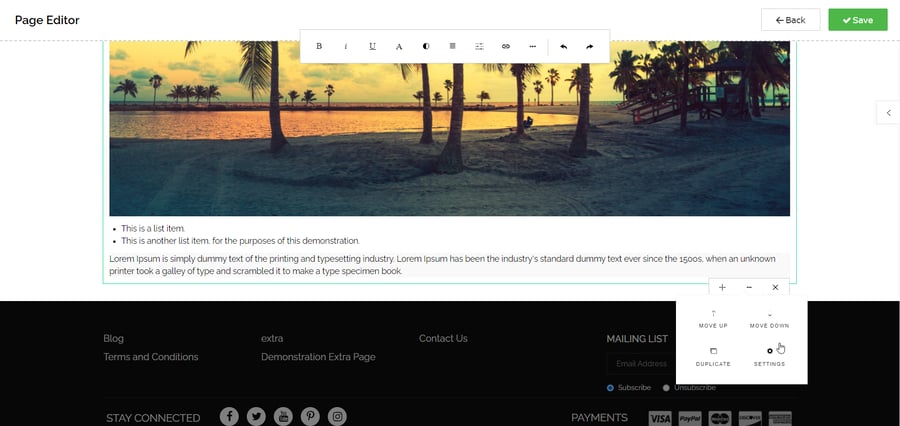
Now, let's add a paragraph below the list. Click your image. Just like you did last time you added a content area, click the plus sign to bring up the menu. This time, choose Paragraph.
Your new paragraph will appear, populated with dummy text. But maybe it needs to be spiced up a little by being made more colorful. Now is the time to explore the element style settings by clicking "..." in the small menu, and then clicking the Settings button.
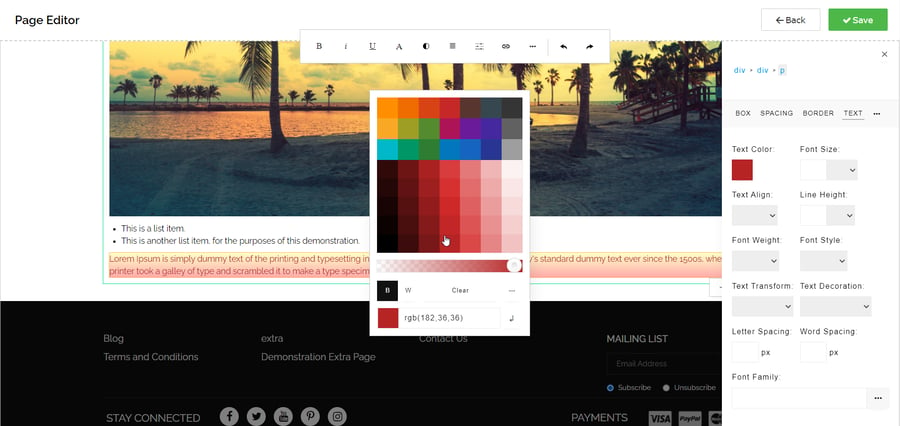
A panel will slide out, where you can change color, background color, dimensions, and more. The settings are divided in menus along the top of the panel. In addition to the Box, Spacing, Border, and Text style settings, you can find more by clicking the "..." menu item to their right. Most of these settings are pretty self-explanatory, and experimenting is easy because your changes will appear in real time.
If you decide to change a color, a color picker will appear. Choosing one of the colors from the top section will fill the bottom section of the picker with colors related to the one you clicked in the top section, like varying shades of red, such as in the next image. You can also change the transparency with a slider, clear your changes to bring the element back to its default color, or quickly switch to black or white using the clearly marked B and W buttons. Clicking "..." will bring up a much more detailed color picker as well.
In the text field, you can directly edit the RGB settings, or enter a hexadecimal number (which will be converted to RGB — hexadecimal numbers need to be preceded by a #, like #123456). If you edit the numbers in this field, click the arrow button next to it to apply the change.
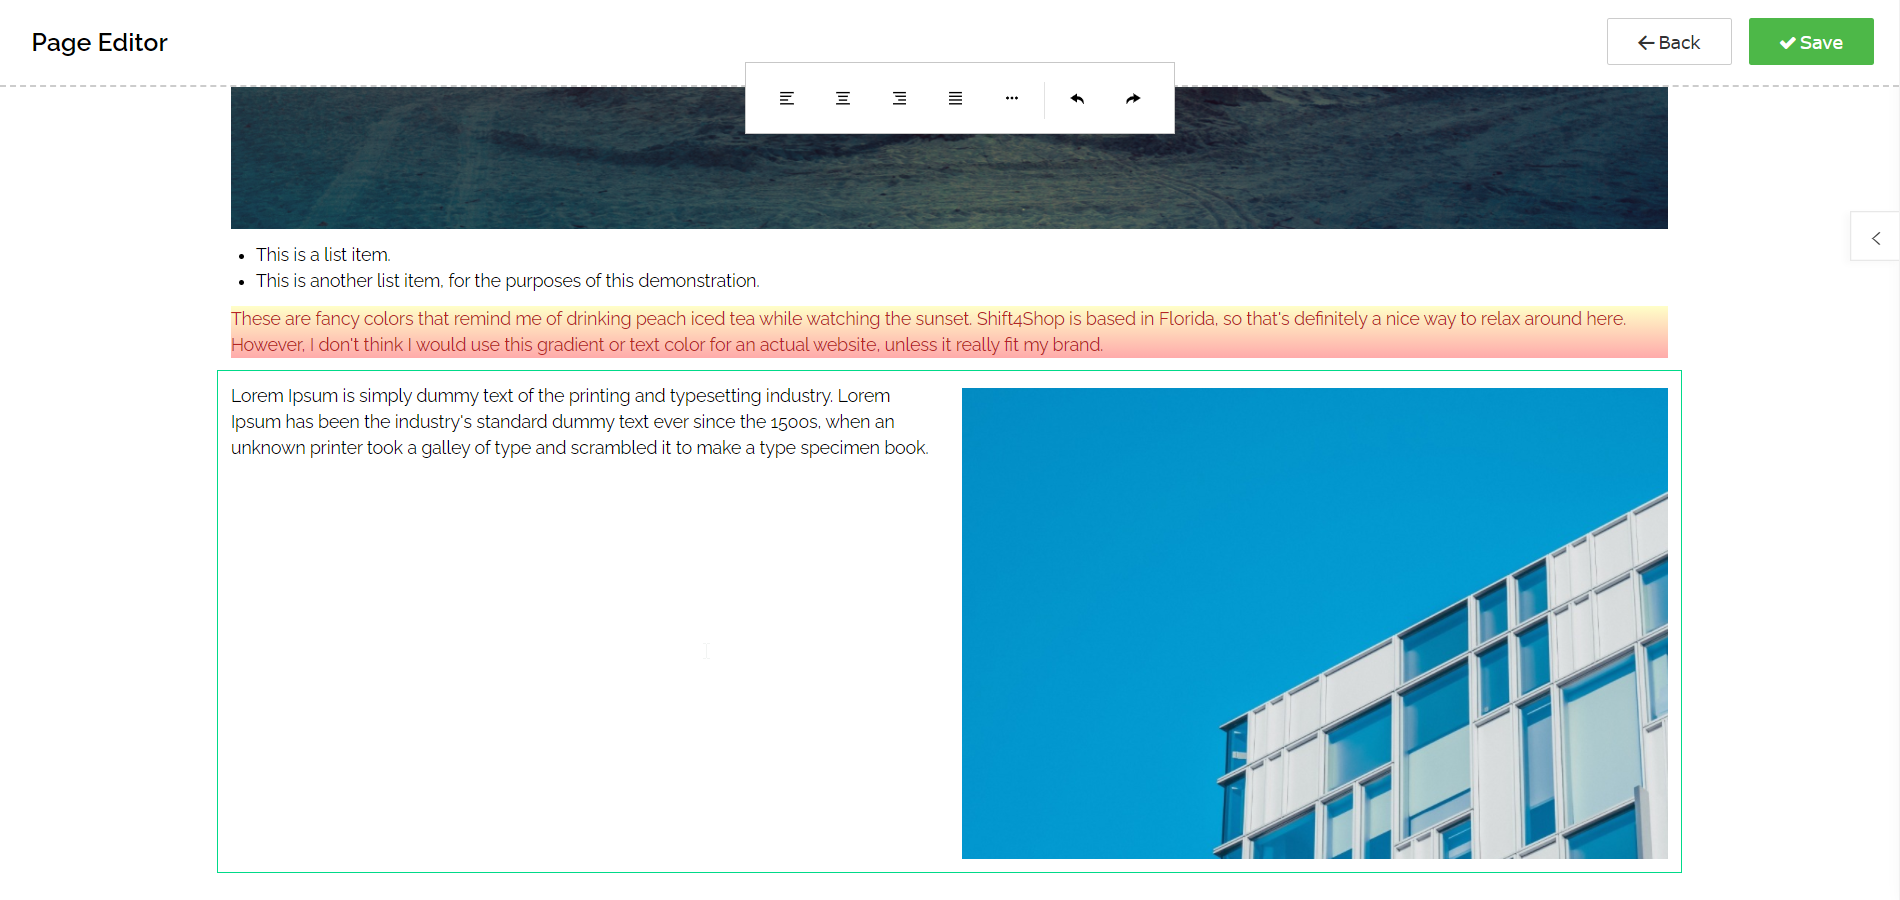
You can also use gradients instead of flat colors. Below, I have added a gradient and changed the text itself to a dark red.
If you copy an element by clicking the Duplicate button in its "..." menu, the copy of the element will include all the content from the original as well as any settings you've applied (like new colors).
Now, to round out this demonstration, let's add more content at the bottom of the page. I want to add two side-by-side blocks, one with text, and one with an image. I access the snippet selection from the menu of our current block, and choose the one seen below.
The new snippet is added below. It's actually two blocks side by side, but both start out highlighted to make it easy to see what you've just added.
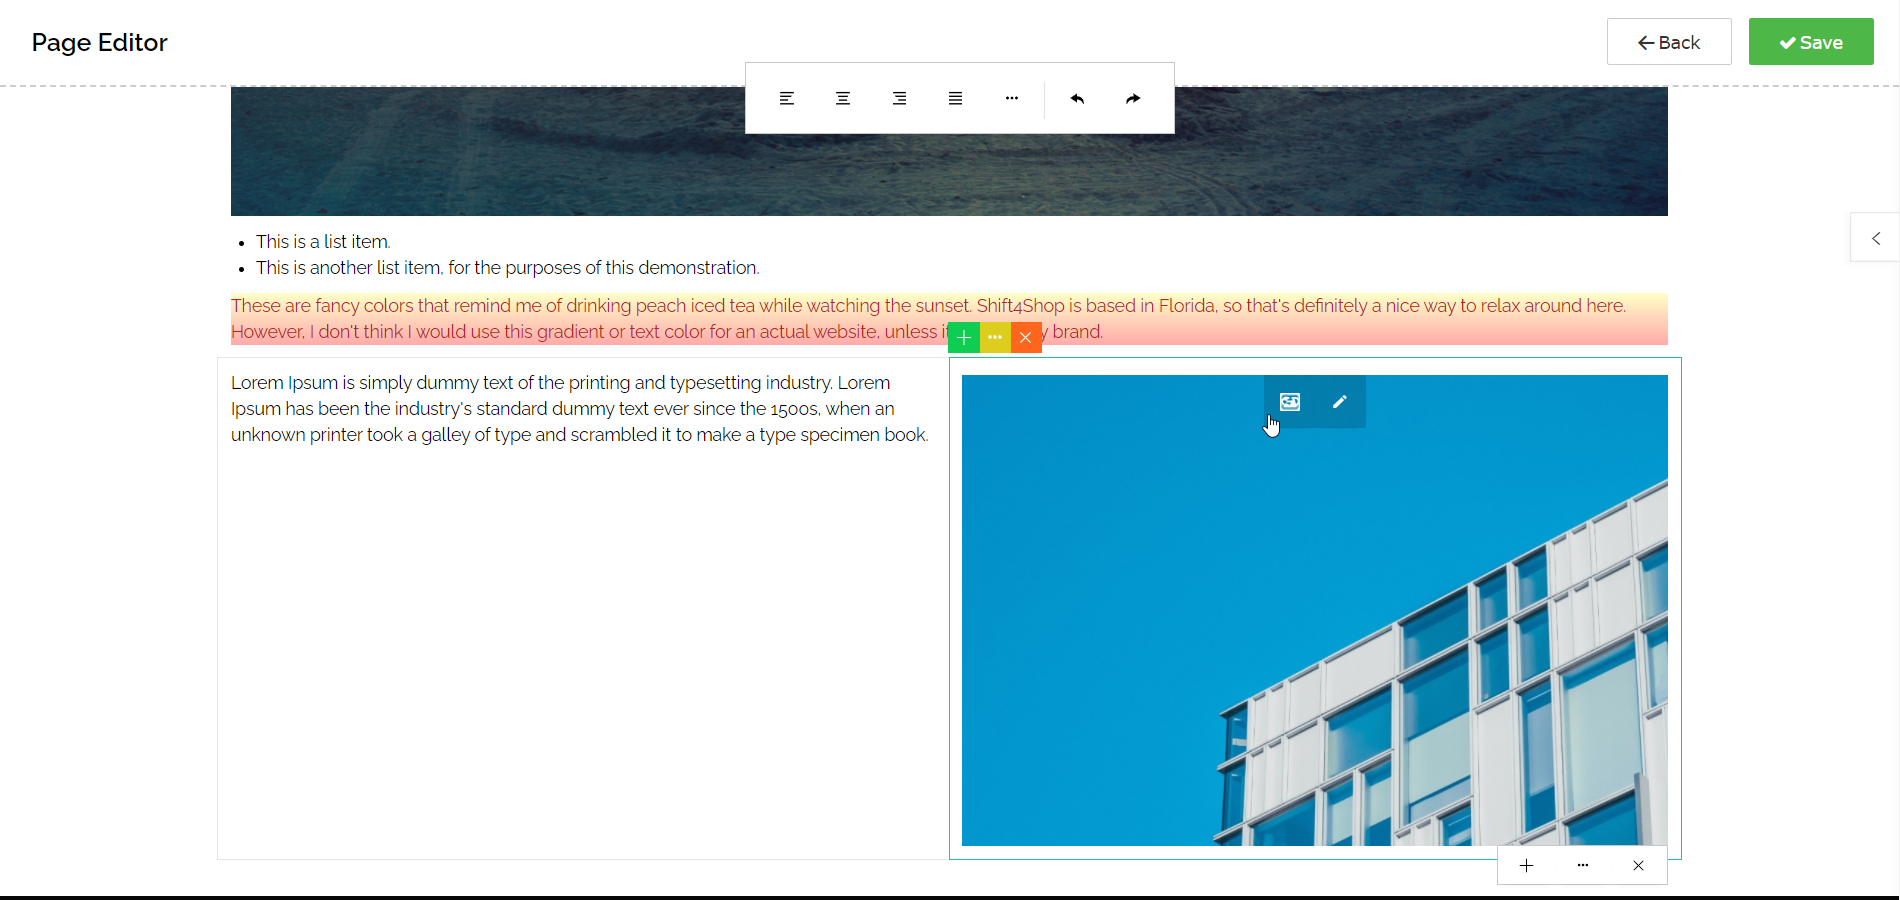
Clicking on the text or the image will select that particular block for editing. We can then follow the same process to replace the text and image with our own.
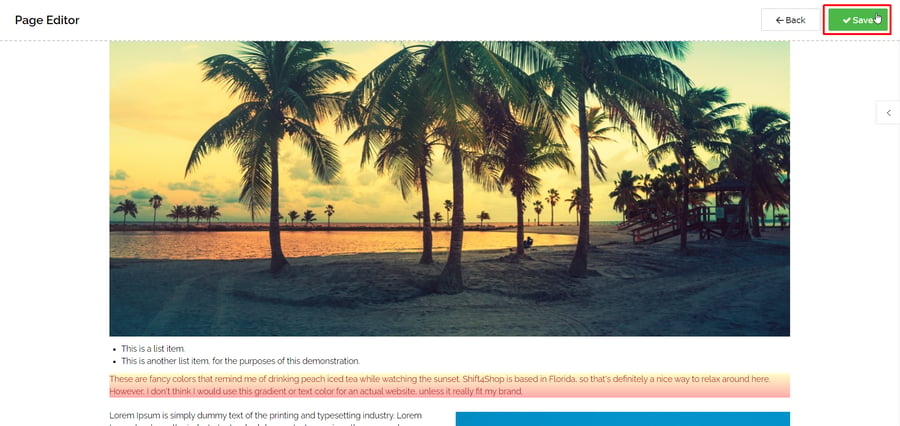
Take some time to get used to the Page Editor and you'll soon be able to create amazing pages within a few minutes. All the options and buttons are labeled (hover the mouse over them), so it's quick to learn. Make sure you remember to Save your work with the button in the upper right corner when you're done!
You can find some more specific details in our Knowledgebase article How do I use the Page Editor? which goes more in-depth about every button.
The Page Editor is Not Only for Extra Pages
You read that right! While we used an Extra Page as an example, all types of content pages in Shift4Shop can be built with the Page Editor. You can use the same method on all the following pages:
- Your homepage
- Pages in your Top Menu Links
- Extra Pages (as we covered)
- Your blog articles
We may also expand the Page Editor to work on more pages, so you'll be able to build even more of your website this way. Stay tuned — we'll announce when this happens!
Ready to Build an Awesome Website?
We hope you enjoy working with the Page Editor and that you find ways to unleash your creativity. Let's go over the basics one last time:
- Your website needs content to build search ranking and customer trust.
- You can create several types of content pages in Shift4Shop.
- These include your home page, blog, and Extra Pages.
- You can create unlimited Extra Pages and choose to make them subpages or not.
- You can decide which Extra Pages are linked in your site's footer.
- You can build all of the above types of content pages with the Page Editor.
- The Page Editor lets you create and arrange boxes or blocks to fill with content.
- All the formatting tools are at your fingertips.
- You can build a great-looking page in a few minutes.
Our goal at Shift4Shop is always to bring you the best tools for building your online store and growing your business. Our content-focused features are a crucial part of that mission. We hope the Page Editor can help you unlock your passion for design!


Leave a reply or comment below