


When you think of starting a new online business or making the transition to eCommerce, costs and fees may float around in your head. How much will you need to spend on building and hosting your online store? What extra fees will you need to account for?
At Shift4Shop, we want to ease those worries by providing you with a free eCommerce solution – no strings attached. We’ve worked to make eCommerce affordable so that any-sized business can take advantage of our platform.
If you’re new to eCommerce, the cost may not be the only thing that intimidates you. You may have never built a website before, or have any experience with online selling. To accommodate all users, we’ve also made it simple for someone of any skill level to sign up and get started.
In this blog, we’ll go through each step that you should take to build the perfect online shop and start selling. Let’s get started.
What is Shift4Shop?
Shift4Shop is an all-in-one eCommerce solution that comes with the best features and tools for online selling. When you sign up for Shift4Shop, you’ll gain access to a brand-new online store that you can use to sell products on the internet. With Shift4Shop, you can design a custom site, fulfill orders, process payments, market your business, and much more.
Since 1997, Shift4Shop has brought premier eCommerce to thousands of stores. The platform has constantly updated to provide the newest industry-standard functionality to keep merchants ahead of the game. Now powered by Shift4 Payments, Shift4Shop is able to offer software and service completely free to US merchants. Combine payment processing with premier SEO tools and a comprehensive list of built-in features, and you’ve got Shift4Shop.
How to Build a Free Online Store with Shift4Shop
Are you ready to get started? Building an online store with Shift4Shop is easy and free. Let’s go step-by-step through the most important things you need to do to get your business up and running.
Step 1: Sign up for a Shift4Shop Account
The first step to building your free online store with Shift4Shop is, naturally, signing up for a new account. Be sure to choose our free end-to-end eCommerce plan, which offers all our features without any fees or hidden costs. The only requirement to use the free plan is that your store uses Shift4 Payments to process payments on your store.
The first thing you need to do when signing up is enter your shop name and industry. Make sure that your shop name is unique, and choose your industry from the drop-down menu.
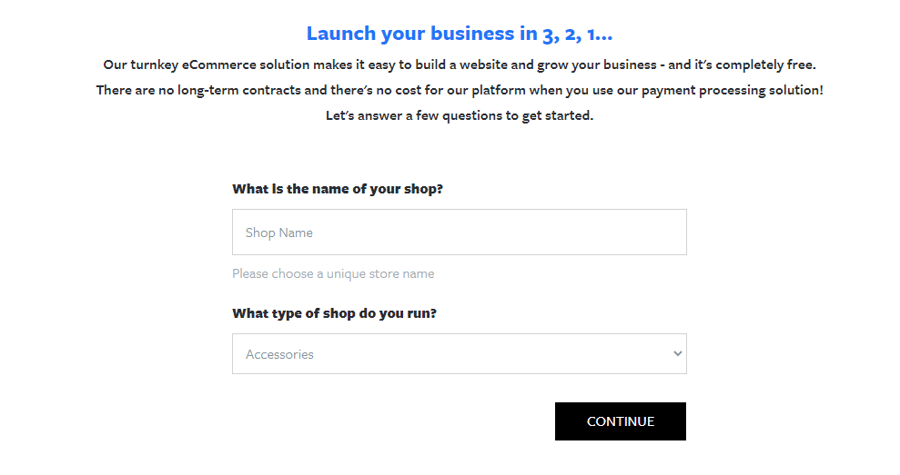
To sign up for our free plan, you must be a United States merchant. At this time, the free plan does not support international customers. Shift4 Payments also cannot process high-risk transactions.
Step 2: Choose a Theme
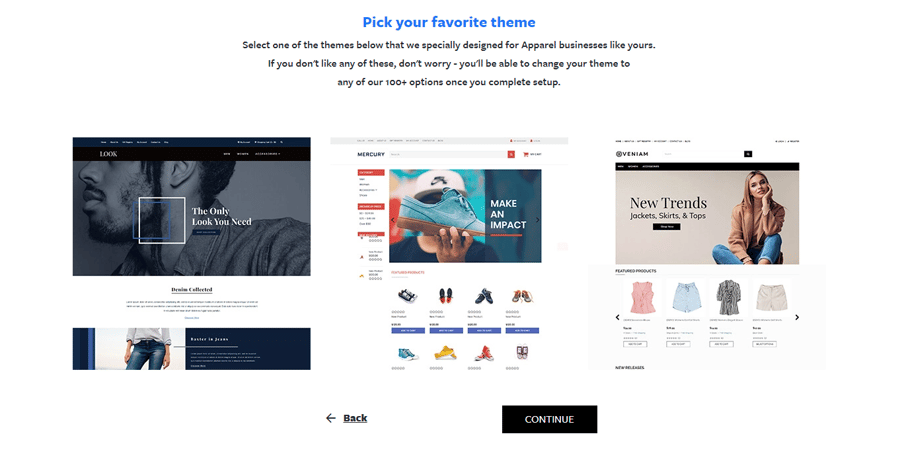
Once you’ve started the signup process, you’ll be prompted to choose one of three themes that are the best fit for your business’s industry. Don’t worry if you don’t particularly enjoy any of the themes offered to you at this point – you can always change it later.
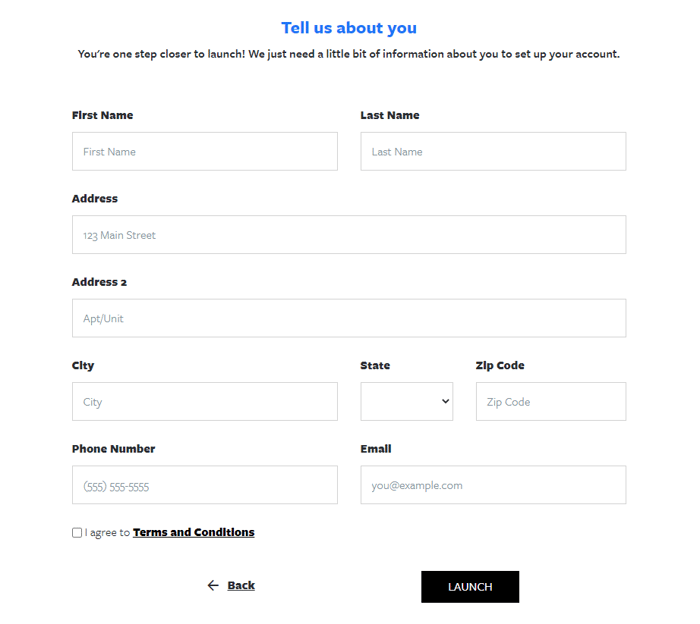
To finish the sign up process after choosing your theme, you’ll need to enter your contact information. Then, click Launch to be taken to your Online Store Manager.
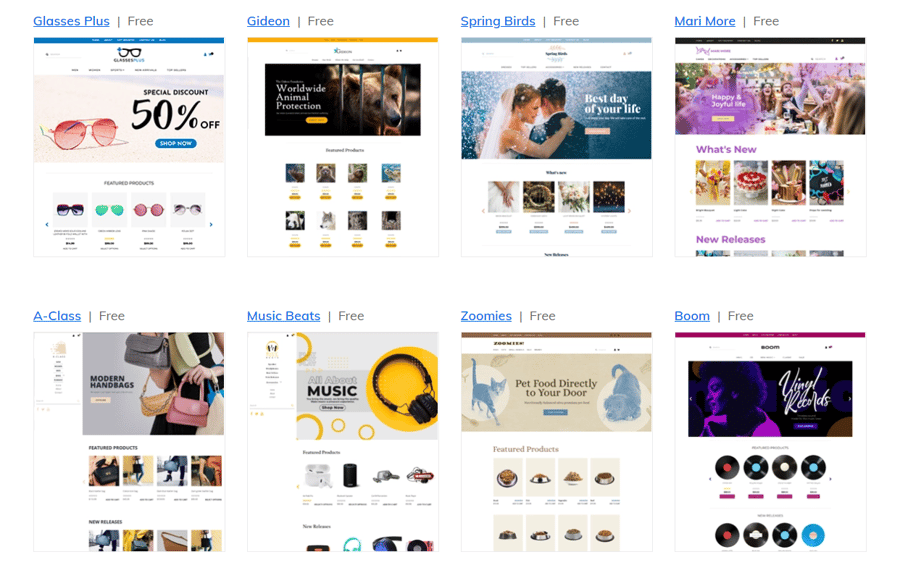
With your account created, you can now make any changes you’d like to your shop, including choosing a new theme. Shift4Shop offers over 100 free themes to choose from, each tailored to a specific industry and/or design style. From monochrome minimalism to extra elegance, and restaurants to tech stores, we’ve got a theme that will fit your brand’s aesthetic.
Built on our Core Templating Engine, all our themes are mobile responsive and customizable. We'll get to that later on in this blog.
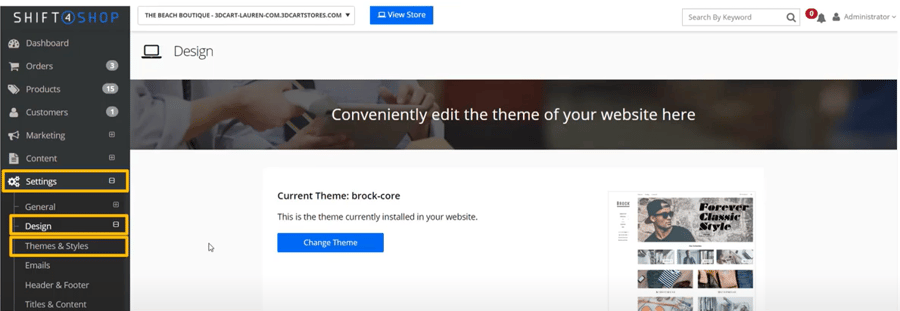
To change your theme, navigate to Settings in your Online Store Manager. From there, you’ll select Design and click the “Change Theme” button. You can also browse our theme store at themes.shift4shop.com to see our full selection with interactive previews.
Step 3: Add Products and Categories
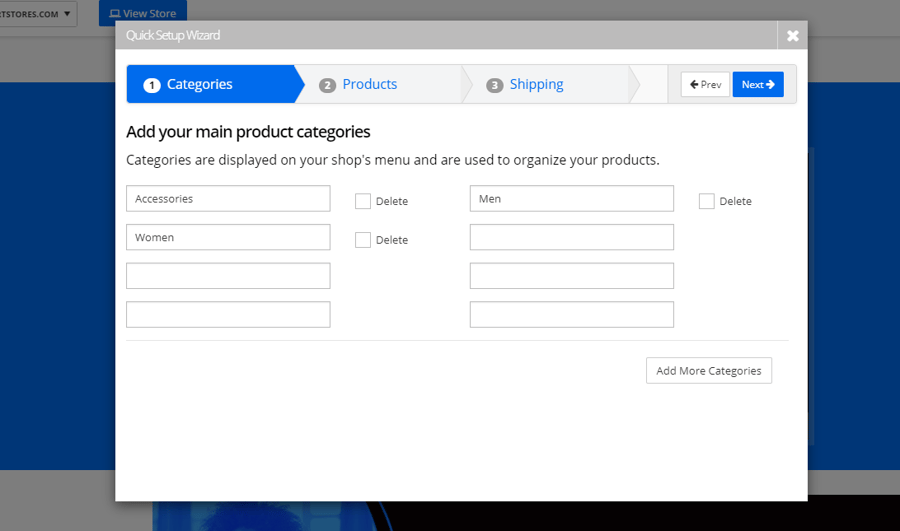
Now that you’ve signed up, you’re able to use the QuickSetup Wizard to get right into building your online store. Here, you can add your main product categories and first product to get started.
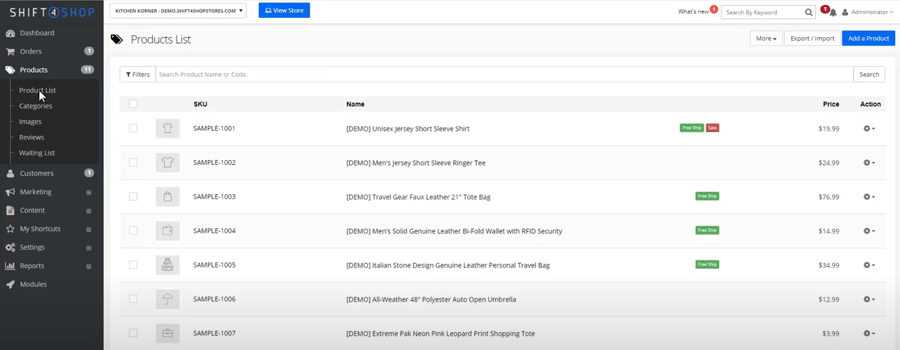
Later on, you can add more details to your product and create more product listings. This can be done by navigating to Products in your Online Store Manager. In the Product List section, you can add a product manually by clicking the “Add a Product” button. You can also import multiple products at once via CSV file by clicking the “Export/Import” button.
To edit your first product and add more details to it, click on the product in your Product List. Here, you can add a price, stock level, description, photos, product options, and more.
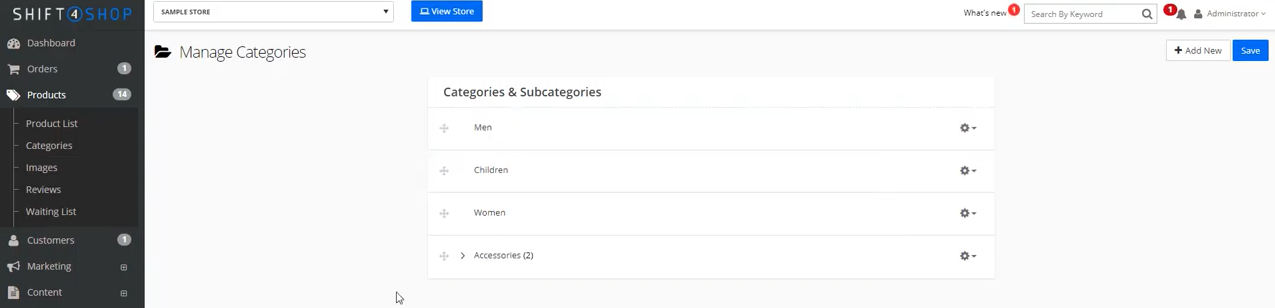
You can also add more categories and edit existing ones in the Products section of your Online Store Manager. Simply click on Categories to see all the categories and subcategories that you already have. Clicking the “Add New” button will create a new category – here, you can give it a name and decide where that category should go if it is a subcategory.
To edit an existing category, click on the gear icon next to the category you want to edit and select “Details”. From here, you can change the category’s name, SEO tags, category page settings, access permissions, and page content for the header and footer.
Step 4: Set Up Shipping Details
Also within the QuickSetup Wizard, you’re prompted to set up a few basic delivery options. Choose what best fits your business; you can also change this later.
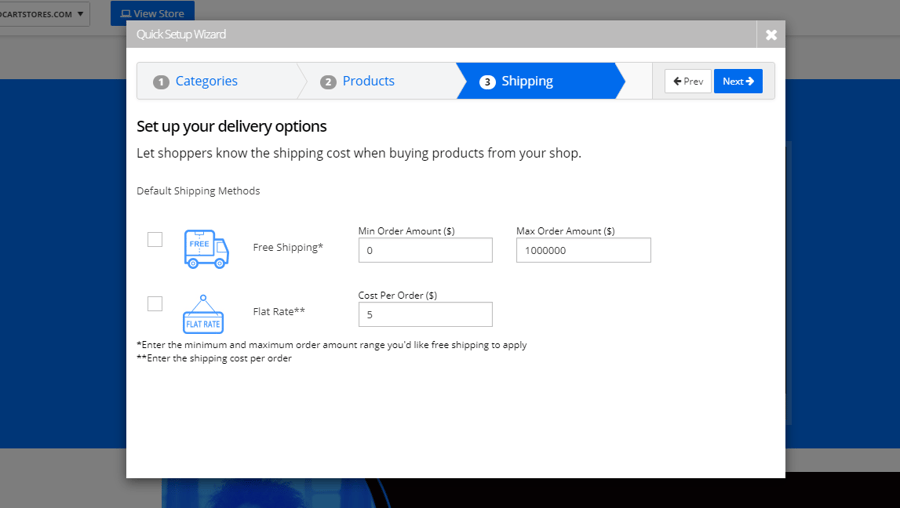
Within your Online Store Manager, you can add more advanced shipping options with real-time rates as well.
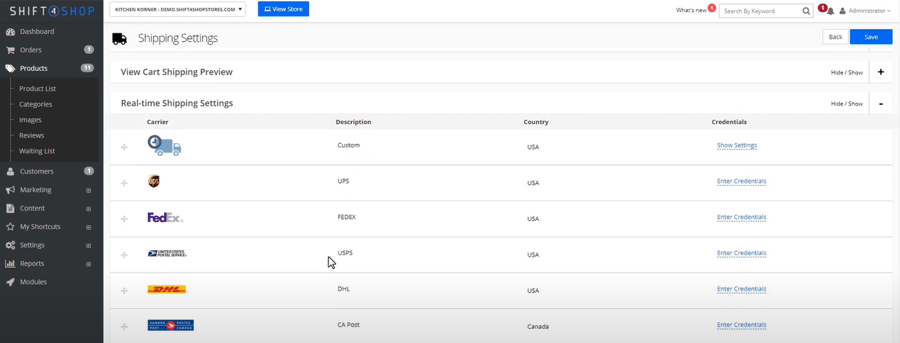
To add real-time shipping rates to your online store, you’ll need to connect to your preferred shipping carrier. Navigate to Settings, then to Shipping, and click on the “Edit Settings” button under Shipping Settings. Under Real-time Shipping Settings, you can connect to your chosen carrier. We directly integrate with popular carriers, such as USPS, FedEx, UPS, and more. Add your credentials to connect your account, or register a new one if you don’t already have one.
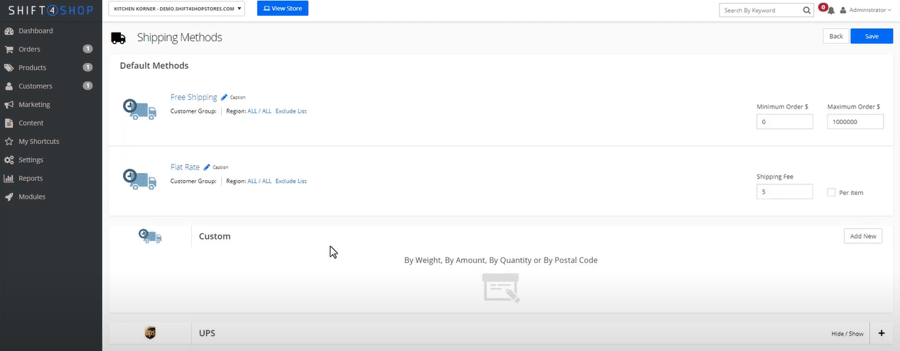
Next, you’ll want to add your shipping method. This will be back on the Shipping page – click on “Select Methods” underneath Shipping Methods. Here, you can add free shipping, flat rate shipping, and custom shipping to your online store. You can also edit more details concerning your real-time shipping rate carriers.
To sell products on your online store, you’ll need a way to take payments. Customers want their checkout process to be convenient and secure, which means you’ll need to have a quality payment gateway on your side.
All free Shift4Shop online stores are automatically integrated with Shift4 for payment processing. Shift4’s gateway is fully PCI compliant and utilizes advanced tokenization to secure your customer’s data. Your customers will also be able to use both credit cards and digital wallets like Apple Pay and Google Pay. Considering the fact that eWallets will be the most commonly used eCommerce payment method by 2022, this flexibility is vital.
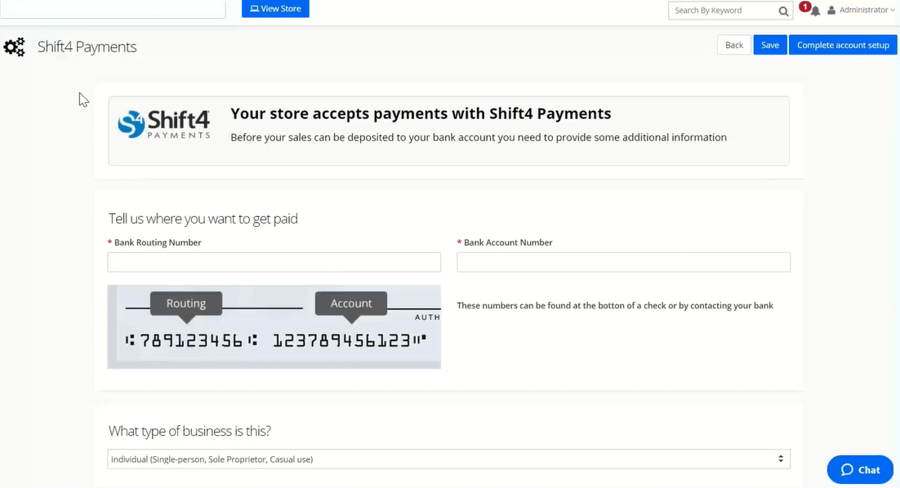
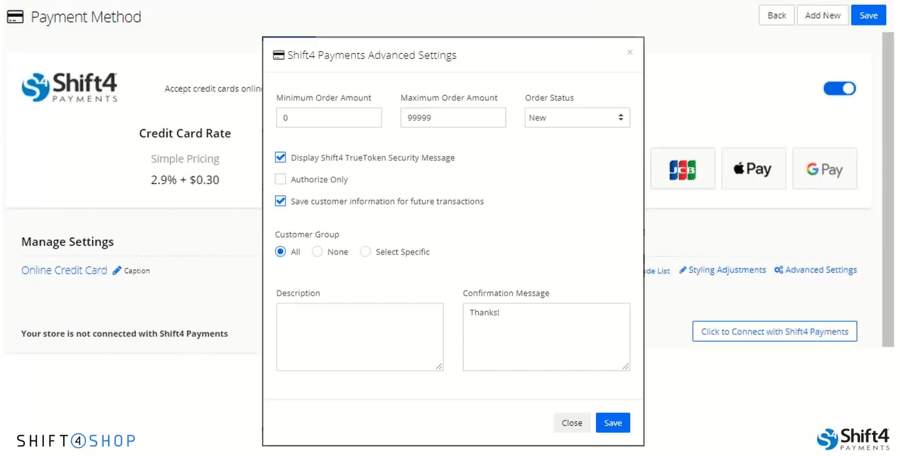
To get Shift4 Payments set up, navigate to Settings in your Online Store Manager. Go to the Payments page, and then click on the “Select Payment Methods” button. Select “Complete Payments Account Setup” to be taken to the Shift4 Payments form page. From here, you’ll need to enter your bank information and extra information about your business. Once you’re done, select “Complete account setup”.
You can also customize payments by selecting “Advanced Settings” in the Manage Settings section of the Payment Method page. Define minimum and maximum order amounts, customize your confirmation message, and more. When you’re done, select the “Click to Connect with Shift4 Payments” button.
Step 6: Register a Domain Name
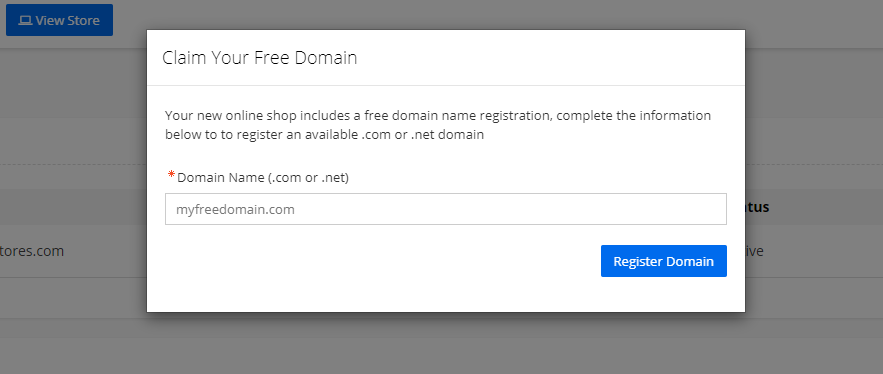
Your free Shift4Shop online store doesn’t just come with our software for free. We can also register your own custom domain name for free for the first year. If you already have a domain name, there’s no need to worry, as you can easily point it to your new Shift4Shop site as well.
You can go directly to your Domain Settings by clicking the “Connect Domain” button underneath “Set Up Your Domain Name” on your Online Store Manager’s home page.
.jpg?width=900&name=admin-welcome-page_V1%20(2).jpg)
Alternatively, you can navigate to Settings in your Online Store Manager. From there, select General, and then go to Store Settings.
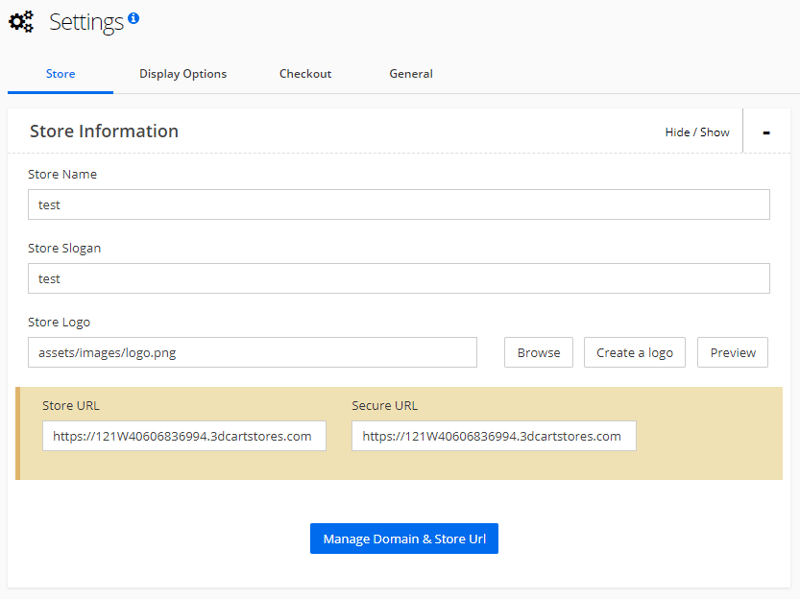
Click on the “Manage Domain and Store URL” button to be taken to the Domain Settings page. Here, you can either claim your new free domain or set up your existing domain’s DNS settings.
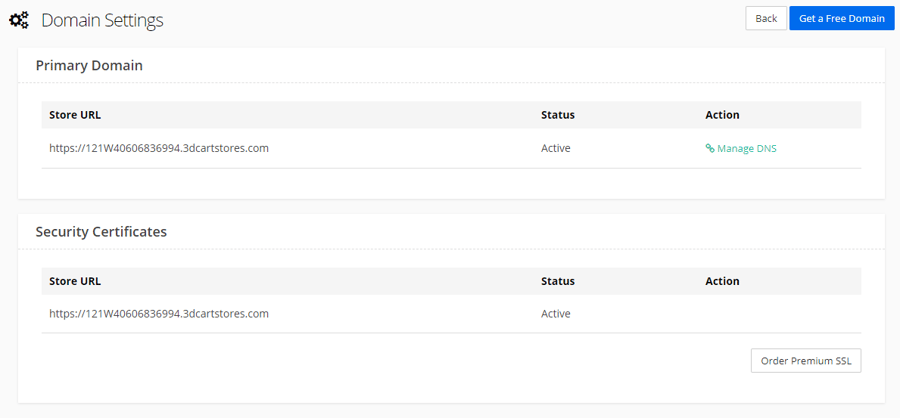
Click on the “Buy New Domain” button and enter your desired domain name. Be sure to check that your domain name is available and not already taken by another website.
Step 7: Customize Your Store
According to research from Blue Corona, 38% of online users will stop engaging with a site if they find its layout or content unattractive. With this in mind, it’s important that you have full control over how your site is designed. With Shift4Shop, you have access to intuitive and detailed site customization tools that can help your site stand out from the rest.
But first, let’s get your logo uploaded. You can do this by navigating to Settings, then General, and finally to Store Settings in your Online Store Manager. In this section, you can add other business details too, like your shop’s name and slogan.
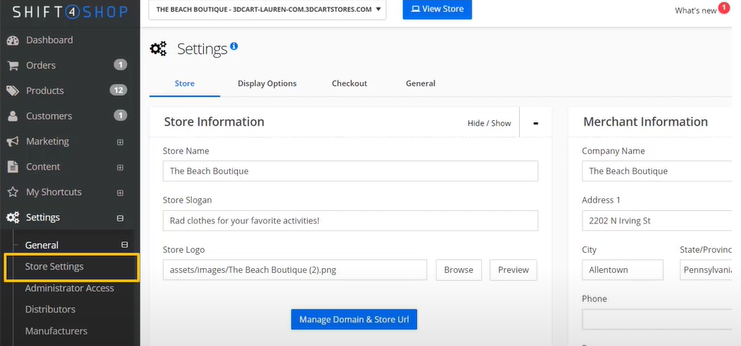
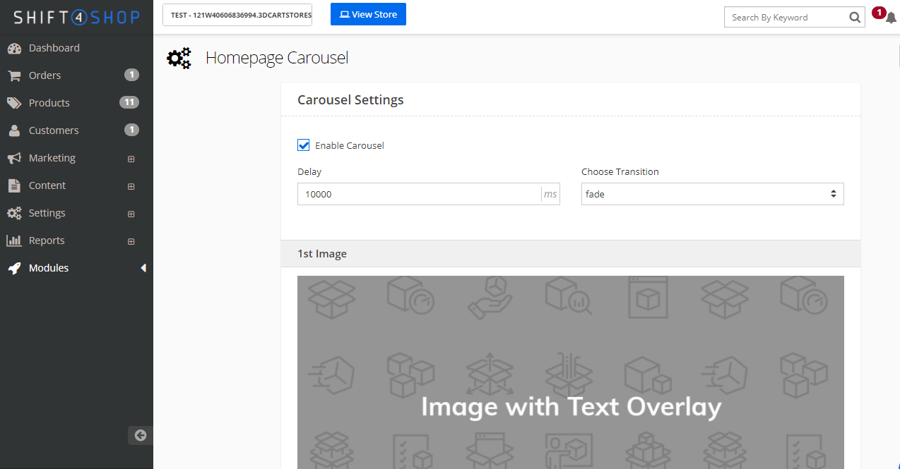
Most themes will also support a carousel slider on the home page. You can use this feature to promote sales or new products to visitors as soon as they land on your site. To add the homepage carousel, navigate to Modules in your Online Store Manager. In the search bar on the Modules page, type in “Homepage Carousel” to locate that module. Check the blue check box to enable to the module, and then click the “Settings” button to add your carousel images.
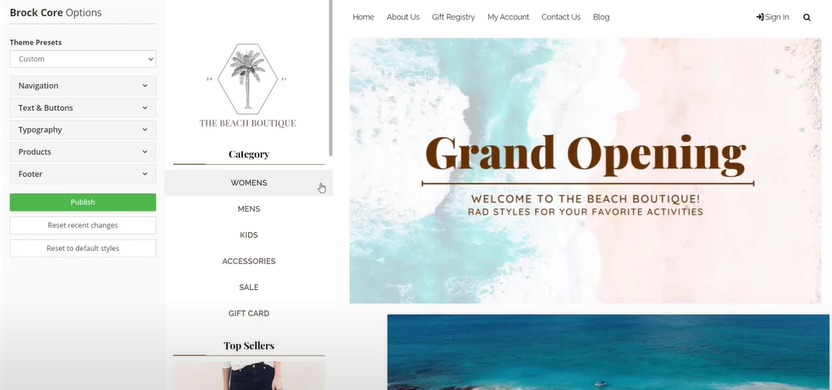
Next, you can start editing your theme to match your brand. Navigate to Settings in your Online Store Manager, and then go to Design. In Themes and Styles, you’ll see the theme you currently have selected. Clicking on the “Edit theme” button will take you to the Theme Editor, where you can change theme colors and fonts.
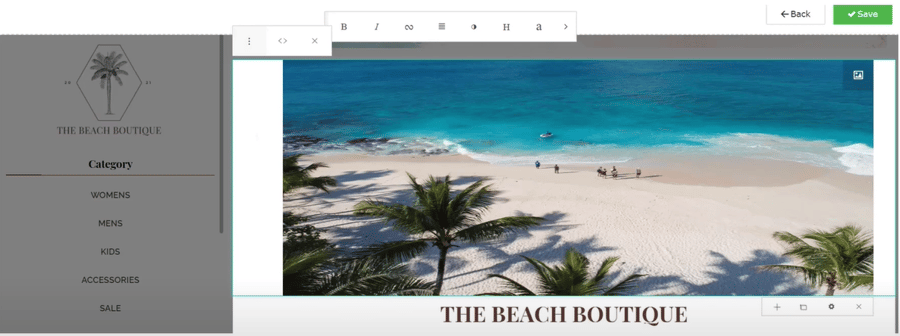
You can further edit and customize your store by using the Home Page Editor. To use this editor, navigate to Settings, then Design in your Online Store Manager. From here, click the “Edit” button underneath the Home Page section to be taken to the Home Page Editor. Clicking the “Launch Page Editor” button will bring you to a preview of your store’s home page. Here, you can edit any section of the page that isn’t grayed out. Add formatted text, images, multimedia blocks, and much more to make your site your own.
Time to Launch!
Of course, there are many more things that can be done in Shift4Shop beyond this list. With your online store built, you can start marketing and optimizing for SEO to help your site reach more customers. You can also create promotions to encourage customers to buy when they visit. The possibilities are nearly endless, so start exploring!
If you’re ever stuck or need help with your online store, you can always contact our technical support team 24/7/365 via phone, email, or live chat. We also provide business owners with an extensive Knowledgebase that has an article on every aspect of Shift4Shop.
Good luck with your new online shop!


Leave a reply or comment below