


Navigation is the crux of your online store’s user experience, with its quality either making or breaking a sale. Obviously, you want to make sure that it’s as easy as possible for customers to navigate your site to find the exact products they’re looking to buy. In order to get the job done right, a good menu will include categories and sub-categories that are organized properly and in a way that’s pleasing to the eye. If your store has a decent amount of categories, sub-categories and product types in general, a drop-down menu is probably your first go-to for organizing it all into a condensed manner.
But, regular drop-down menus aren’t perfect. Typically, they take the form of long lists of categories that often force users to scroll down to see all of the options within it. They tend to look unattractive, and take away from the overall feel of your site that you’ve taken so long to perfect and craft. At Shift4Shop, we understand how important navigation is for online store owners, so we’re happy to announce that we’ve developed an application to help you create an advanced navigation menu for your website: The Mega Menu Builder.
Shift4Shop's Mega Menu Builder Application

Mega Menus are an attractive and functional solution to the website navigation problem. Acting like an improved drop-down menu, Mega Menus are expanded and contain a much wider array of navigational capabilities and possibilities. Rather than a long list of text-based categories, a Mega Menu is a dynamic and visual road-map of everything on your site, laid out for customers to easily navigate. By organizing categories and sub-categories in a visual flow that customers will naturally navigate effortlessly, and implementing graphical elements that make searching easier, you’ll effectively eliminate any frustrated scrolling or confusion by enabling this onto your site.
Since the Mega Menu is able to show all of your categories and sub-categories simultaneously, everything is visible at once without forcing your customer to scroll through long lists. Extended navigation panels will appear as fly-outs from main categories, being revealed as your customer’s mouse clicks or hovers over them. This makes the navigation on your site seamless, allowing your high-intent customers to find what they’re looking for easily which, in turn, makes them more likely to follow through with a purchase.
With Shift4Shop's new Mega Menu Builder, adding a Mega Menu to your online store is just as effortless as it will be for your customers to navigate your site once enabled. It’s as easy as clicking a few buttons, and voila: your fully-customized Mega Menu is live on your site. Don’t worry, there’s no advanced coding necessary; the Mega Menu Builder is designed to make the process simple and self-explanatory for anyone, no matter your coding skill-level.
Types of Mega Menus
Using the new Mega Menu Builder, you have 3 options of navigation menus to choose from: the tree menu, column menu and tabbed menu.
Tree Menu

With the tree menu, you’re able to include custom menu category trees that open fly-outs to reveal further nested menu options when a customer hovers over each menu option. A tree menu will allow you to nest up to 3 levels of menu branches for your choice of sub-categories, products, etc.
Column Menu
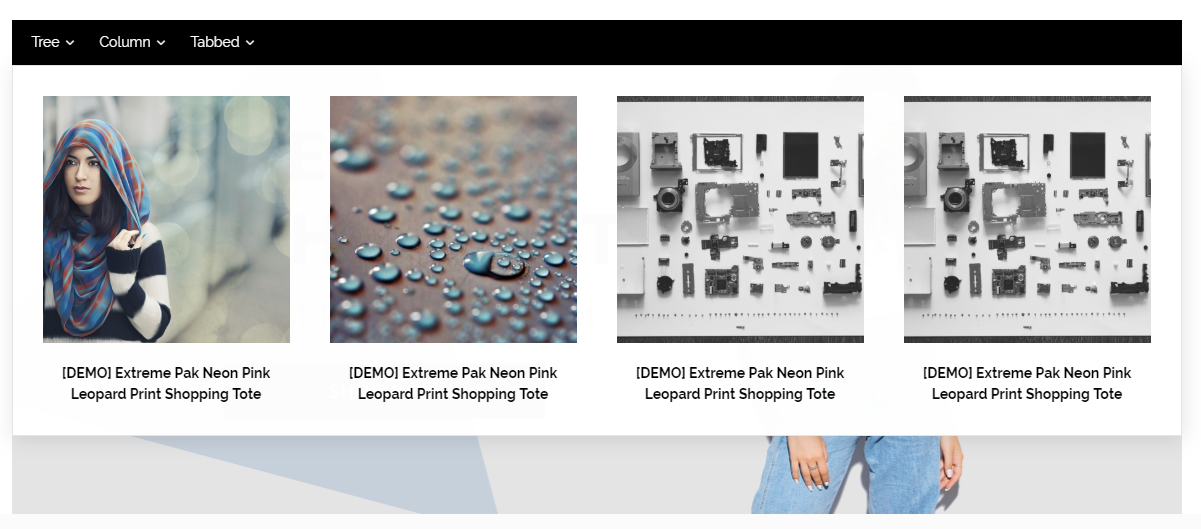
By enabling the column menu, you’re able to include large clickable photos that can be used to indicate categories, products, best sellers or whatever you’d like to be included in your navigation. Each image has a header at the bottom, indicating in text what the menu option is; you can also opt to leave this header section empty if you so choose.
Tabbed Menu
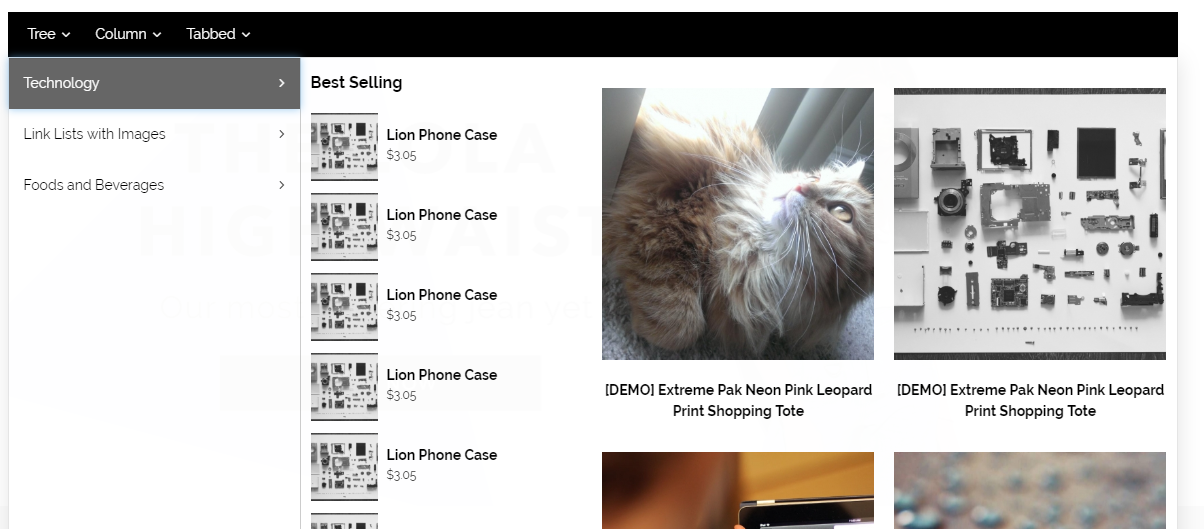
The tabbed menu is definitely the show-stopper of the bunch, combining the tree menu and the column menu into one truly mega menu. To the left, you can enable general category tree menus that will act as the trunk of this menu’s branches. When clicked, these menu options will reveal a fly-out column menu to the right, where you have the option to include both a column of smaller images to indicate products, sub-categories or whatever you may need, as well as a larger column menu with full-sized images to perform the same function.
How to Use the Mega Menu Builder
In four easy steps, you can build a Mega Menu and have it up and running on your site. Here’s how to get started:
Step 1: Purchase and Enable the Module
After purchasing the app in the Shift4Shop app store, you can enable the Mega Menu Builder module in your Shift4Shop store admin page. This step is important, because it’s necessary so that the Mega Menu code can be injected into your site’s frame.HTML file.
Note: The Mega Menu Builder plugin will only work on core themes, so make sure that your online store is running on a theme that is core.
Step 2: Edit the Mega Menu Builder Module
Once the module is enabled, you can locate it by searching “Mega Menu,” and then click the settings button.
From here, you can choose the Mega Menu theme (light or dark), the navigation background color’s HEX code, the navigation’s text color via HEX code, and the Mega Menu navigation bar’s width. Regarding width, you can choose whether or not you want the navigation bar to span the entire width of the screen, or if you want it to only stay inside of the header container. This option is especially useful if you have a full width header.
Note: The font of your Mega Menu will automatically be set to match your current theme’s font, so you don’t have to set your navigation bar’s font separately.
Step 3: Add the Mega Menu Builder Code to Your Site’s Frame File
At this point, you’ll need to have the Mega Menu’s code added to your site’s code. Don’t worry, there isn’t any coding required of you here. All you’ll have to do is navigate to the “How to use the mega menu?” section of the module, copy the code and paste it into your current theme’s frame.HTML file. There’s a button in this section that you can click to directly edit your frame.HTML file, so pasting this code in is quick and easy for you.
Step 4: Launch the Mega Menu Builder
Once you’re finished customizing the aesthetics of your menu, you can now launch the menu builder by clicking the “Launch menu builder” button at the top right of the page. You’ll be taken to the builder, which will reflect the color and width settings that you selected previously as a preview version of your menu. From here, you can easily edit your menu by hovering over menu items and clicking the edit option. You can add menu options by clicking the “add+” button.
As you edit your menu, the builder is designed to reflect exactly what your menu will look like on your live site’s front-end once the new menu is enabled. This way, you won’t have to be stuck guessing what the final product of your customizations will end up looking like in the end.
Navigation doesn’t have to be unattractive to be effective, and Mega Menus are proof of that. With a new customized Mega Menu enabled on your online store, you’ll see a boost in sales and an improved user experience in no time. This new application will launch with our latest Shift4Shop version update, and will be available on our app store for every merchant. To be able to enable the Mega Menu Builder application onto your website, you can either pay $14.99 monthly or pay a one-time fee of $249. Check out the Shift4Shop app store for more information.


Leave a reply or comment below