


Consider the following: a product on your site has become unavailable. This product may simply be out of stock, or it may never be sold again. However, that product’s page has historically brought your website valuable traffic and conversions. How can you maintain that value, even without selling that product anymore?
In this article, we’re going to go through the 5 best ways to discontinue a product on your online store without losing SEO or conversion value.
Why Would a Product be Discontinued?
There are several reasons why you may not be selling a certain product on your online store anymore. The reason is important, because this will dictate how you handle its product page on your website. A product may be discontinued for the following reasons:
Permanently Discontinued
If a product is permanently discontinued, this means that it will never be sold on your online store ever again. This could be due to a lack of stock on your part, which you will not renew, or because it’s no longer being made by its manufacturer.
Temporarily Unavailable
A product that is only unavailable temporarily is one that will come back to your online store in the future. This product could be simply out of stock and will come back in stock once you’ve made more of this product or received more of it from your supplier. Alternatively, a product that’s temporarily unavailable may not have even been made yet – in this case, products could be up for pre-order.
Out of Date Products
When a product is out of date, this typically means that it’s not the current model. You’re selling a new version or model of this product now, which might have better features or fixed issues. However, many customers may still be using the out of date version – this makes the product page still valuable.
Top 5 Best Practices for Discontinued Product Pages
Discontinuing a product on your online store isn’t as simple as hiding it from categories and removing its page. If the product page is valuable in any way, whether it’s because of information that customers need, it converted well for your site overall, or it ranked high on SERPs, you need to maintain that page.
But, how can maintain a product page’s value if you don’t sell the product anymore?
Let’s dive into the 5 best practices for discontinuing a product without sacrificing value.
Repurpose Product Pages
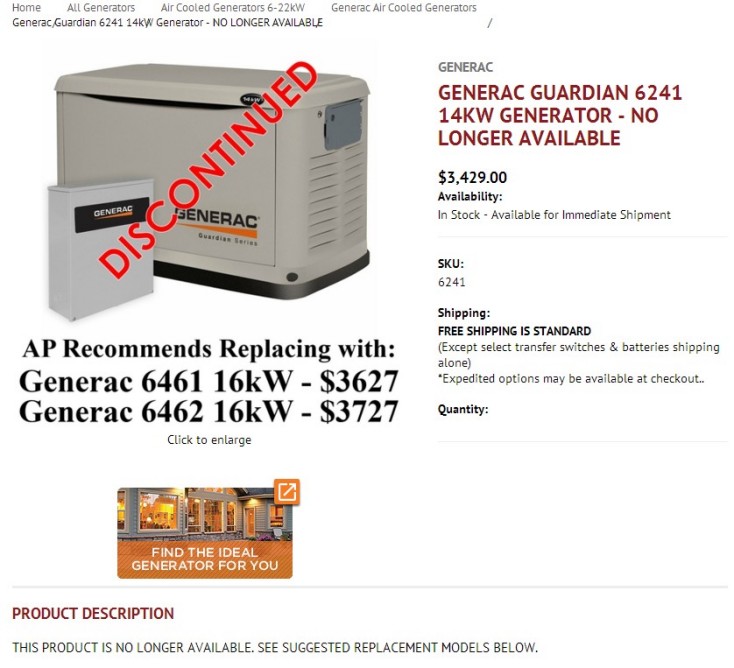
Source: Vertical Leap
There are many reasons why you wouldn’t want to completely remove a product page from your site. This could be because the product is temporarily out of stock, or because its page is valuable for reasons we’ve already listed. In these cases, it’s best to keep the page up and repurpose it to reflect its newly unavailable status.
To do this, you can add additional information to the page stating that it’s out of stock but may come back in the future (if it will). If it’s an out of date or permanently discontinued, you can add information stating as such; for example, add “DISCONTINUED” to the product’s so there’s no confusion. You want to avoid using phrasing like this in the actual text on your page, because Google may interpret this as a soft 404 according to Google Webmaster John Mueller.
Soft 404 errors occur when Google interprets a page as being unavailable, so avoid phrasing that suggests this – it may ruin your ranking.
After you’ve indicated that the product is no longer available, link to the new version of the product or recommended related products in the description.
It’s also important that you grey out or remove the add to cart button so that there’s no way for customers to accidentally purchase a discontinued product. If the product is coming back in stock, you can add a “put me on the wait list” button instead so that interested customers can be notified when it’s back.
Create Custom 404 Pages
Source: Neil Patel
If you have a large product catalog with hundreds or thousands of pages, then it may not be feasible to maintain every discontinued product page – especially if they’re permanently unavailable. In this case, you may need to take the page down and have customers be directed to a 404. However, a 404 is never a pleasing experience for the customer, and if the page was a valuable traffic source and converter, a 404 isn’t the best option.
However, if you must set up a 404, rather than redirect customers to a generic 404 page, consider creating a custom 404 page that acts as a landing page to direct those customers elsewhere.
Like a repurposed product page, a custom 404 page can include recommended products and a prominent call to action button. However, keep in mind that there’s several reasons NOT to use a 404 page. These include:
- You have many discontinued products on your store.
- You are a small business with less than 100 pages on your website.
- You already have 404 pages for other reasons.
According to Matt Cuts, a Google Webmaster, a small eCommerce store with less than 100 pages should not use a 404 page; a redirect is better here. However, he also states that a 404 is recommended if you have hundreds or thousands of pages; this is due to the potential frustration of having many out of stock products on your site.
Additionally, having a large amount of 404 pages relative to your live pages can end up wasting your site’s crawl budget, which is Google’s way of only indexing important pages. So, it’s best to only set up a 404 if it’s necessary in your specific situation; redirecting the page instead may be a better option if the page has valuable traffic or backlinks.
Set Up 301 Redirects
A 301 redirect can point the URL of the original product to another URL of your choice. In setting up a redirect, you can effectively retain the benefits provided from the original page without taking customers to that discontinued product page. This is best for outdated products and valuable discontinued product pages.
You generally have two options for redirect targets: a similar product or a category page.
If you redirect the discontinued product page to a live product that’s comparable, this may be a bit risky. Do not redirect to a product that has any chance of being discontinued in the future; once you redirect that page to another page, you’ll have created a redirect chain (which is bad for SEO). To avoid this potential Google penalty, redirect to a product that is sure to be a permanent fixture of your online store.
To avoid the risk of the first option, you can also redirect to the category page of the discontinued product. This way, customers can see other products that are in the same category, meaning they are likely to be comparable alternatives. Category pages are much more permanent than product pages, so this is the safest option.
Unfortunately, setting up a 301 redirect away from the original product page is tricky when it comes to customer experience. The customer may become confused or frustrated because they can’t see the original product that they ordered. To avoid confusion, it may be a good idea to add a message that informs the customer that the product they clicked on is no longer available and that they’re being redirected to a comparable page.
Keep Your Sales Records Straight
When discontinuing a product, you don’t just need to do work on the front end of your site; the back end also needs to reflect that change. Just because you’re removing a product from sale on your store doesn’t mean that it’s been deleted from your entire sales history and records. Those records are valuable, so you will need to ensure that information is maintained.
In the future, if the product is brought back or if you’re introducing a similar product, you’ll want to know how many of the previous products were sold, what your profit margin was, and which customers bought that original version.
If you choose to keep the product page up and repurpose it, you’ll also need to monitor traffic and conversions from that page – even though you’re not actually selling anything on that page anymore. It’s important that you keep as many pages on your site valuable to maximize your ability to rank on SERPs.
Inform Your Customers
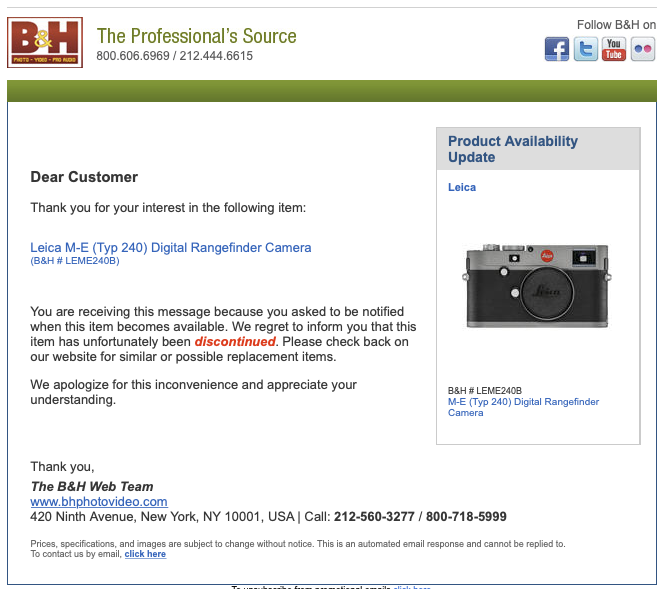
Source: Leica Rumors
A discontinued product isn’t just difficult for your store to handle. It’s also a disappointing experience when a customer comes to your site specifically for that product, only to find that it’s unavailable.
Discontinuing a product doesn’t erase the fact that customers may have purchased that product in the past. To keep those customers satisfied and loyal, you need to ensure that your records still reflect that they’ve purchased that product before in case they need support for it.
You’ll also want to maintain valuable information on that product page for customers who have previously purchased the product. Often, customers will come back to the product page to find instruction manuals or other vital information. Be sure to clearly mark that the product is discontinued so that both customers and your staff on the back end of your site don’t mistakenly consider that the item is still for sale.
It may be a good idea to inform customers who bought that product that you have a new, up to date version they might be interested in. This can actually be an effective email marketing strategy.
How to Set Up Discontinued Product Pages in Shift4Shop
If your online store is run on Shift4Shop, you may be wondering how you can set all of this up. There are several ways to handle discontinued products in Shift4Shop.
Utilizing Inventory Control & Product Settings
In your Online Store Manager, you can control what happens automatically when a product’s stock reaches zero. This utilizes your store’s inventory control features. If you’d like to do this on a store-wide basis, then take the following steps:
- Navigate to Settings > General > Store Settings in the Online Store Manager.
- Under the “General” tab, locate the “Inventory Control” options.
- Check the “Enable Inventory Control” checkbox and save.
- Below the checkbox, you can choose Hide Items, Show as “Out of Stock,” Allow Back Order, or Use Waiting List for products that have reached zero.
- Save your settings.

Rather than making changes globally, you can also do this on a per-product basis. Here’s how to set that up:
- Navigate to Products > Product List.
- Click on the product that you’d like to make changes to.
- On the product’s “Information” tab, find the “Inventory Options” section.
- Select your option under the “Inventory Control” drop down menu; choose from Default, Out of Stock, Back Order, and Use Waiting List.
- You can also set custom messages for items that are In Stock, Out of Stock, or on Back Order here.
- Save your settings.

Check out this knowledge base article for more information on inventory control.
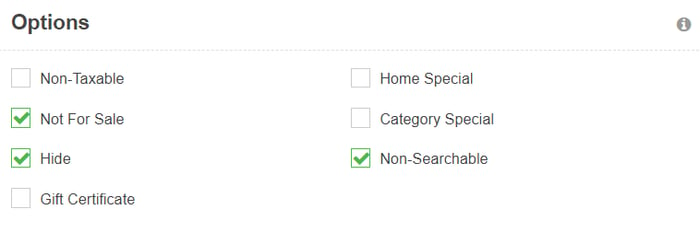
Hiding the Product
If you’d like to hide a discontinued product from your storefront, but still have the page live for customers who have the link, then you can hide the product. Here’s how to do that:
- Navigate to Products > Product List.
- Click on the product that you’d like to make changes to.
- On the product’s “Information” tab, find the “Inventory Options” section.
- From here, you can Hide the product and set it as Not for Sale and Not Searchable.
- Save your settings.
You can also remove all categories, manufacturers, or distributors from the product so that it doesn’t show up at all on your site in those areas.
- Navigate to the same “Information” tab for the product you’d like to edit.
- Under the “Product Information,” you can remove the Manufacturer and Distributor from the product.
- Under the “Categories” section, you can select the category that the product is in and click the “Remove” button.
- Save your settings.
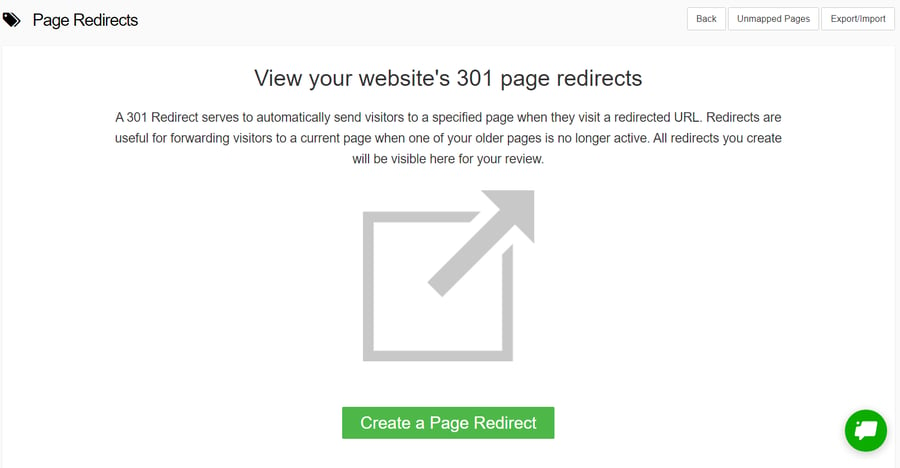
Setting up 301 Redirects
If you’d like to set up a 301 redirect in your Shift4Shop store, whether it’s to a category page or to a new product page, follow these steps:
- Navigate to Marketing > SEO Tools.
- Under the “General Settings” section, click the “Edit Page Redirects” button.
- Click on the “Create a Page Redirect” button.
- Type in the filename of the old product’s URL in the “URL” field. (The filename is everything after the domain name. For example, if the URL is example.com/old_product.html, then the filename is “old_product.html”)
- Type in the target filename of the new URL in the “Mapped URL” field.
- Click “Add” to create the redirect.
Check out this knowledge base article for more information on 301 redirects.
Wrapping Up
Discontinuing a product doesn’t sound like a positive action for any business. However, if done right, you may be able to turn that unfortunate situation into one with high conversions while maintaining the value of the original page. Be sure to take the right steps depending on your specific store’s size and the product’s status, in order to keep both your customers and search engines satisfied.


Leave a reply or comment below