


Shift4Shop’s Unsplash integration makes it easy to quickly add free stock photos to your eCommerce website. Let’s take a look at how it works, and some strategies for choosing the best stock images!
What Are Stock Images?
Stock images are images that have been made available for use in different places such as within blog articles, on websites, and elsewhere. They are commonly used when a publisher (whether of a blog, etc.) needs to illustrate a topic, but getting a photo of an exact, specific occurrence is either impossible or not necessary.
For example, a writer might want to post an article about common frustrations with online customer service. For the article’s image, they could choose a stock photo of a person showing anger or exasperation while looking at a computer. It wouldn’t be necessary for a new photo to be taken of a person who is actually going through a negative customer service experience — the generic stock image is just fine.
Stock image libraries save time and effort for content creators of all stripes. Another convenience stock images offer is licensing — normally, you might have to secure a release form from the person in the image to be allowed to use their likeness, but that’s already taken care of by the stock photo agency.
Stock images can include both photos and other graphics, such as drawings or 3D renders. Some stock image agencies offer multiple types of stock images, while others focus exclusively on stock photos.
Why Use Stock Images on an Online Store?
Stock images are just that — “stock” images. They are famous for showing people in a variety of situations, but you’re not likely to find a photo of someone using one of your products. So why use them?
1. Photos Help Establish a Mood
First off, not every image on your eCommerce website needs to show off a product you sell. Building a look and feel for your brand is just as important as selling products. You can use stock images that relate to your brand, voice, and target audience whether or not your products are on display.
The human brain is extremely visually oriented, and processes images much faster than text — 60,000 times faster, in fact! You’ve probably heard the phrase “a picture is worth a thousand words,” but that might actually be underestimating the power of images. They establish a setting and create a mood within seconds, and they can do it while the viewer is still deciding whether or not they want to take the time to read any text on the page.
This makes images the best way to quickly set a mood and visual identity for your brand. Photos are the best type of images to use (as opposed to drawings or 3D renders, etc.) because since they portray a real scene or subject, they have the biggest impact.
2. Photos Increase Conversions
Photos also help pique people’s interest. This relates to the mood, look, and feel you are trying to create — you want visitors to your site to get interested immediately. For example, if you’re selling products for outdoor activities like camping or hiking, photos of outdoor landscapes can help remind people why they’re shopping for those items in the first place: they can’t wait to get outside in places like the ones you’re showing them.
This is why the right photos increase conversions. Not only do they help establish the “feel” of your brand, they can also get customers excited about your products whether or not the products are actually shown.
Photos with people in them are even more effective, having been shown to improve conversion rates by increasing trust. Site visitors need to remember that actual humans are behind the website they’re looking at, and photos of people remind them of this. However, there are some potential issues you should be aware of that we’ll cover in the next section.
Tips for Using Stock Photos for eCommerce
Let’s go over some tips for using stock photos on your online store, and some examples of types of photos you can use.
First, as mentioned above, there are some caveats to keep in mind when adding stock photos of people to your website. Yes, photos of people increase trust (and therefore, conversions). However, stock photos of people don’t produce the best results, if they look like stock photos.
Many stock photos look unnatural, with careful staging, minimal clutter, and almost clinically white backgrounds. Other unnatural-looking elements include exaggerated gestures or facial expressions, and camera angles focusing on content rather than composition — meaning the photo is taken from an angle that “shows everything happening” rather than from the angle that makes it pleasing to look at.
If you want to use stock photos of people, look for photos that look natural, or look like candid shots. If the photo looks like it could have been taken by a friend of the person or a member of the group, and nothing jumps out as looking unnatural to you, it’s probably fine.
And what should the people be doing in these images? You’re extremely unlikely to find stock photos of people using your exact products, but you can likely find images of people in the types of situations where your products would be used, or come in handy. Try looking for pictures of people having the problem your products are meant to solve. Just stay away from anything that looks unnaturally staged, and you have a lot of room for creativity in this area.
As for photos that don’t include people, we’ve already touched on using landscapes to evoke a mood, with the example of outdoor photos being especially good for stores selling hiking, camping, or related equipment. This principle can work for multiple industries: you want the customer to think about where they are going or what they’re going to do, and how your products or services can get them there.
Both general and specific images can work for this, with or without people, as long as the focus is on the setting and not the products. A skateboard retailer could use photos of skate parks, a motorcycle supplier could use photos of the open road, and more. With these types of photos, it’s more important to evoke a feeling or a desire than to show the product. The presence of these images already goes a long way toward implying that your brand can help give the viewer the experience they want.
One more tip for effectively using stock photos is to know when not to use them. They’ll work best when paired with original photos from your business, including product photos, lifestyle photos, and more. These will help people form the connection between your brand and the other imagery you’ve added to your site via stock photos. Our Guide to Product Photography can help you get started with taking your own photos, even if you have a low budget.
Now that you have a better understanding of using stock photos for eCommerce, let’s get into the Unsplash integration with Shift4Shop!
How to Use the Shift4Shop Unsplash Integration
The Shift4Shop integration with Unsplash makes it easy to grab images directly from Unsplash from within your Shift4Shop dashboard, and add them to your website with a few clicks. You can add them to your Homepage Carousel or send them to your File Manager (all images you add to the carousel go into your File Manager as well).
Unsplash’s license gives you full permission to use images from their site, including for commercial purposes. You can also edit the photos as needed, although you’ll need to download them or import them into your favorite image editing program or website.
Let’s go through the process step by step so you can see how to add images from Unsplash and a few things to watch out for when selecting the best images.
Adding Unsplash Images to Your Homepage Carousel
First, we’ll demonstrate adding images to the Homepage Carousel that appears on the front page of your website.
You access the Unsplash images from inside the Homepage Carousel’s settings. First, log into your Shift4Shop Online Store Manager. Once you are logged in, follow these steps to find the Homepage Carousel’s settings:
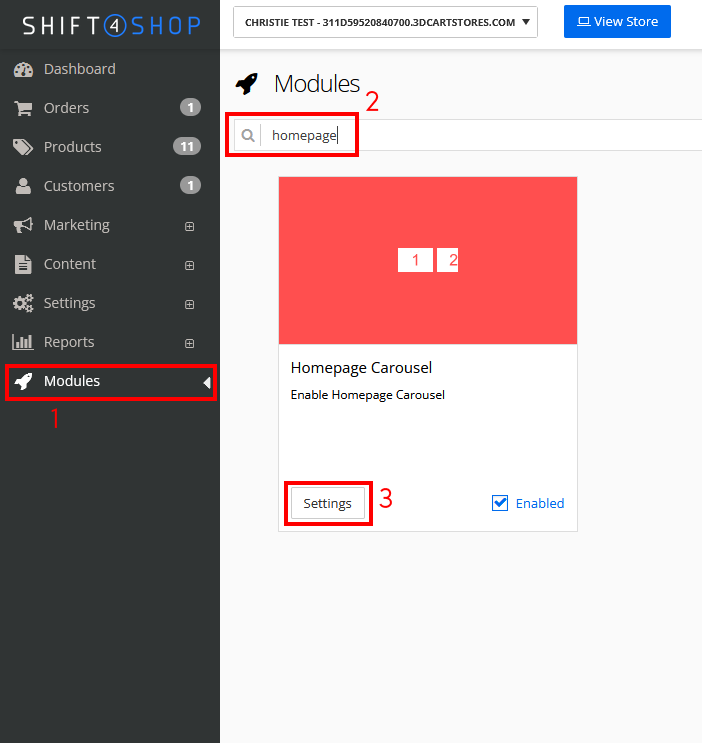
- Click Modules in the left-hand navigation menu.
- To quickly find the Homepage Carousel, enter its name into the search bar. As seen below, it will probably pop up as soon as you type “homepage.”
- Click on the Settings button on the module.
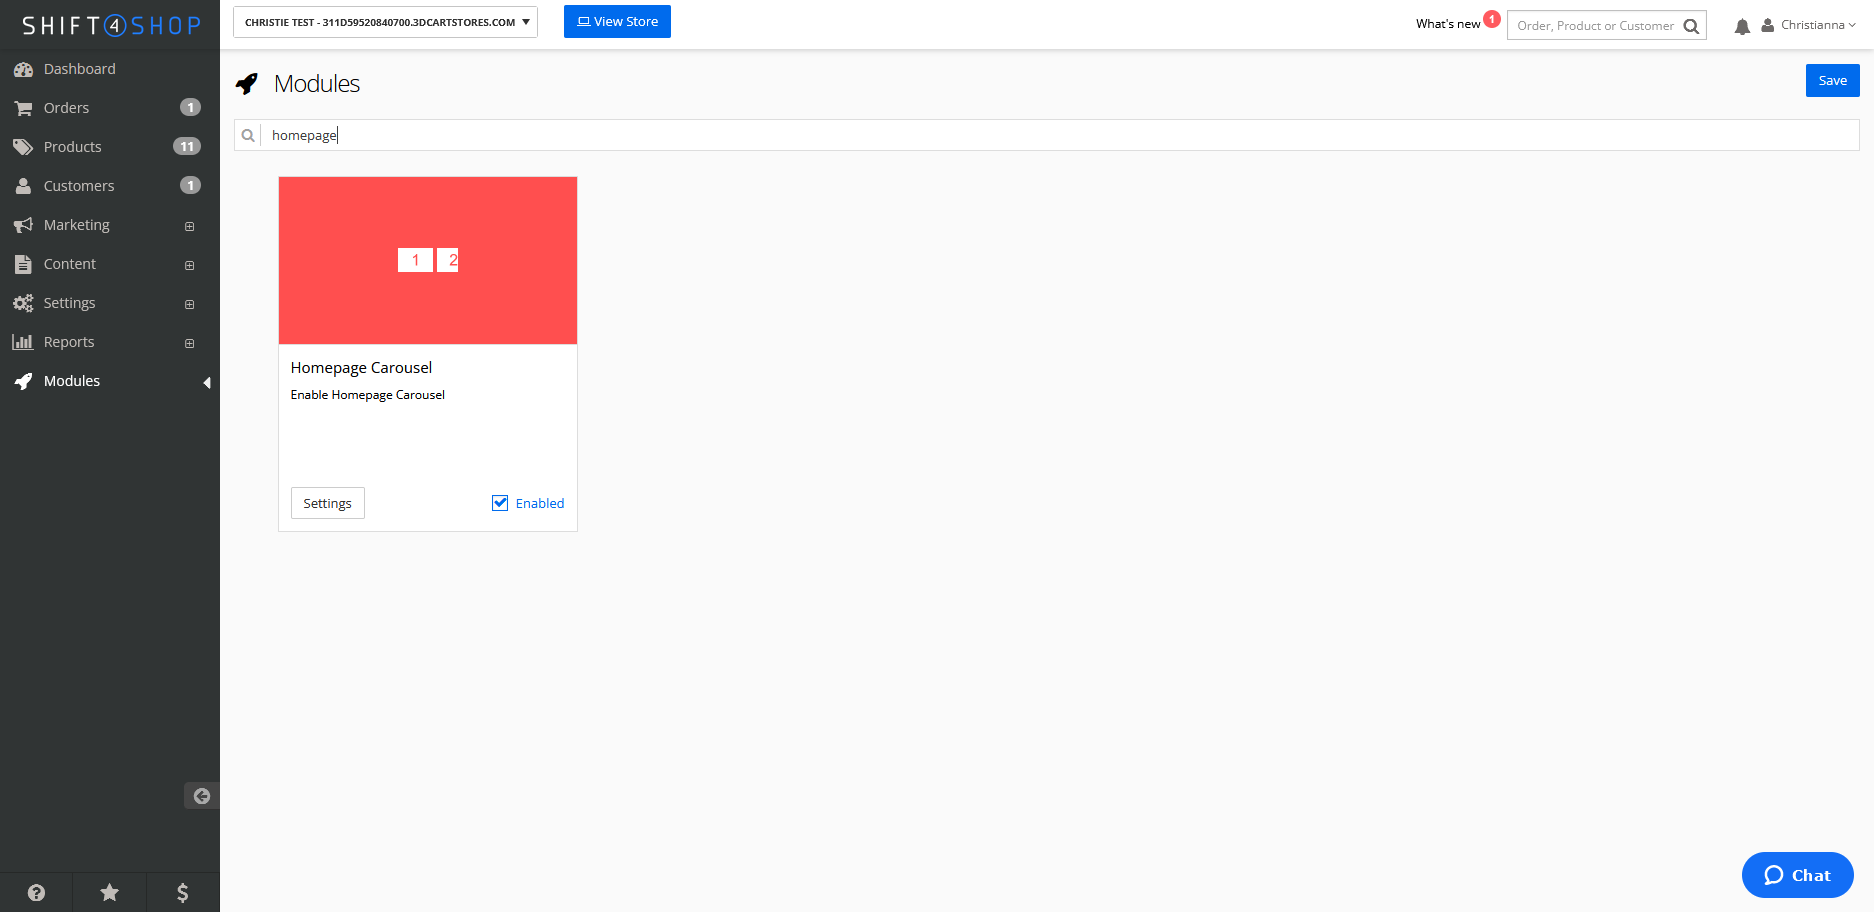
Here’s a closer look:
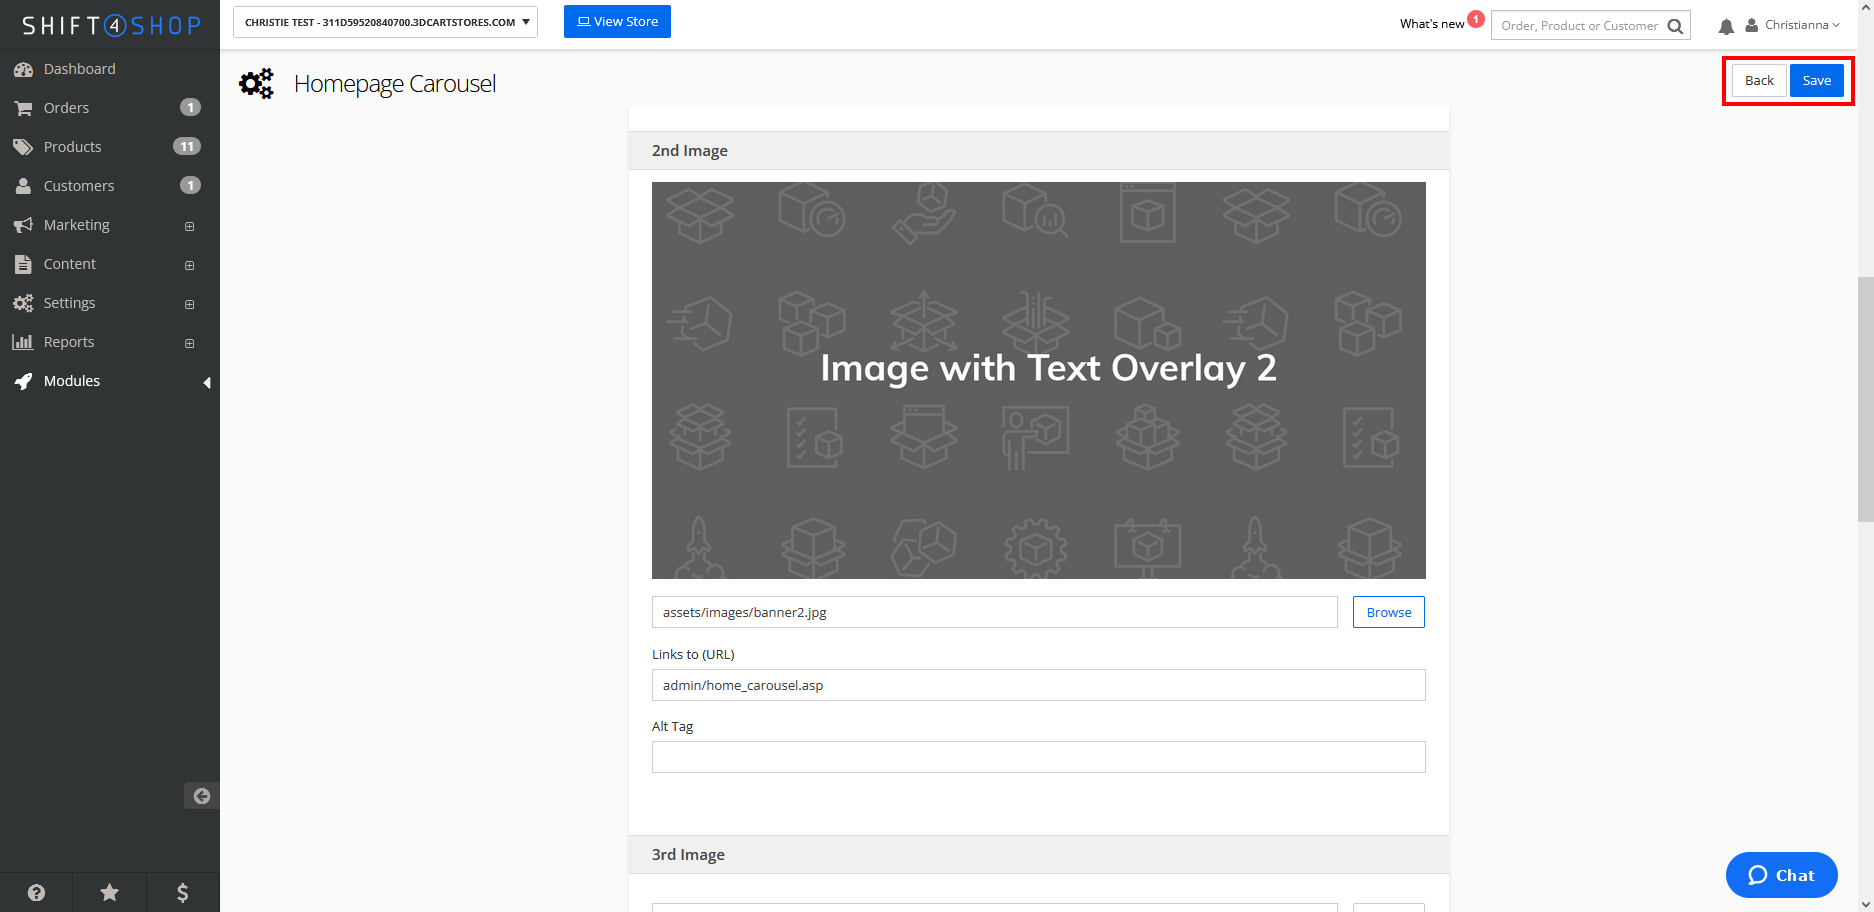
When you click the Settings button, you’ll be brought to the Homepage Carousel Settings in which you can enable or disable the carousel, choose the time delay before the carousel moves to the next image and what type of transition it uses, and add images to it.
Let’s start by adding the first photo to the carousel. Below each image (if one is present, such as the default example images shown below), you’ll see its file path, which is the location of the image inside your File Manager. To the right of that is a Browse button, highlighted below.
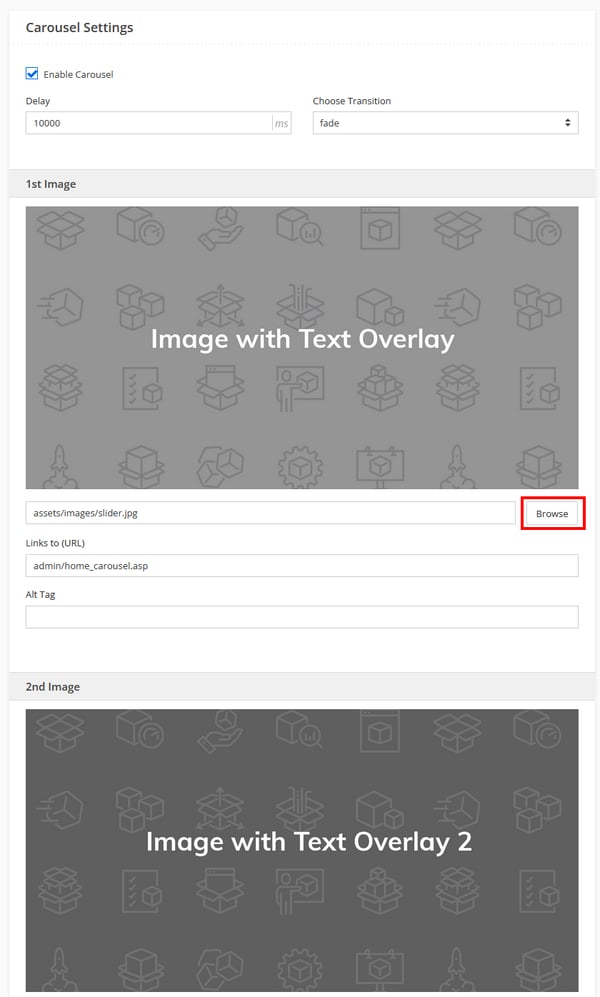
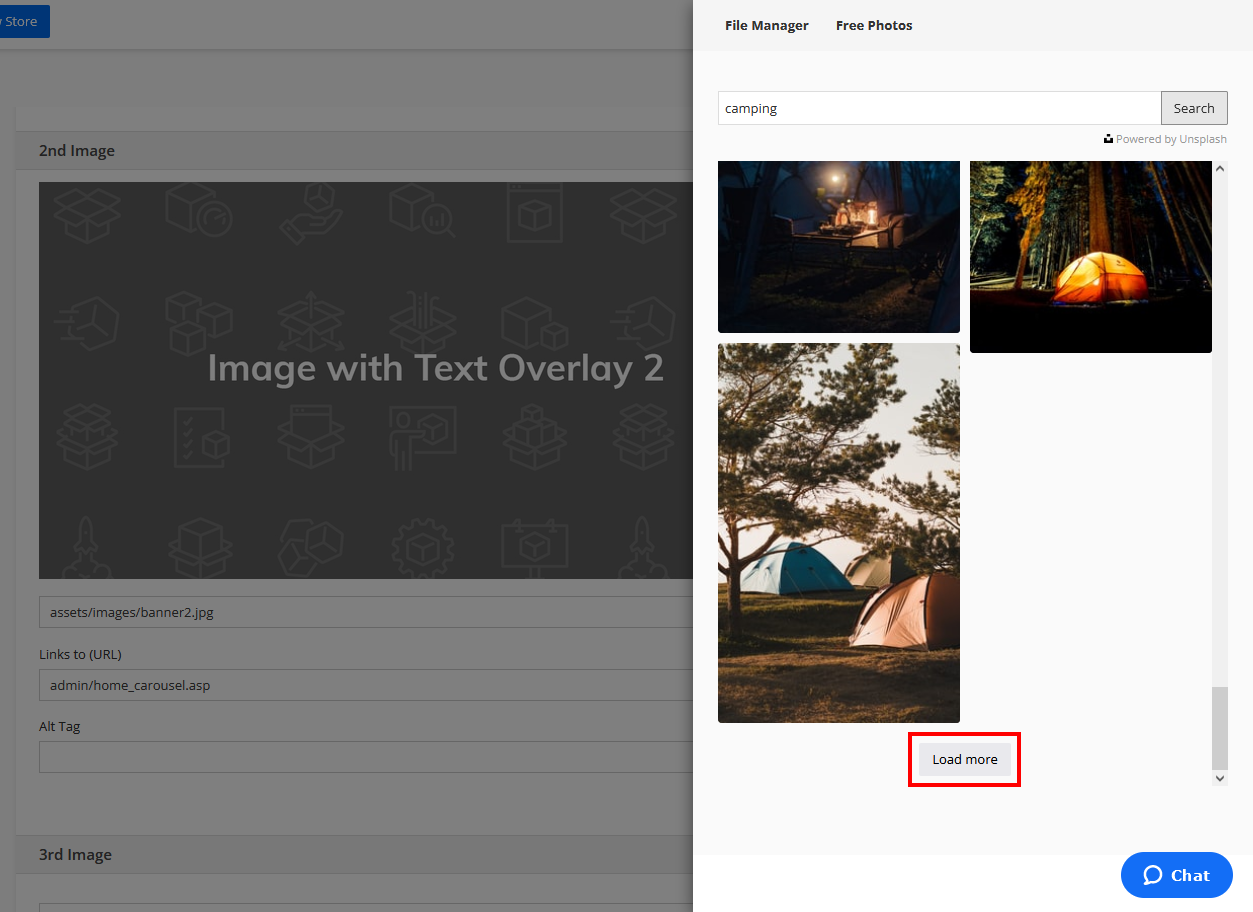
Click the Browse button and a sidebar will appear. It will open up to the images in your File Manager. Click the Free Photos link at the top to be brought to Unsplash instead.
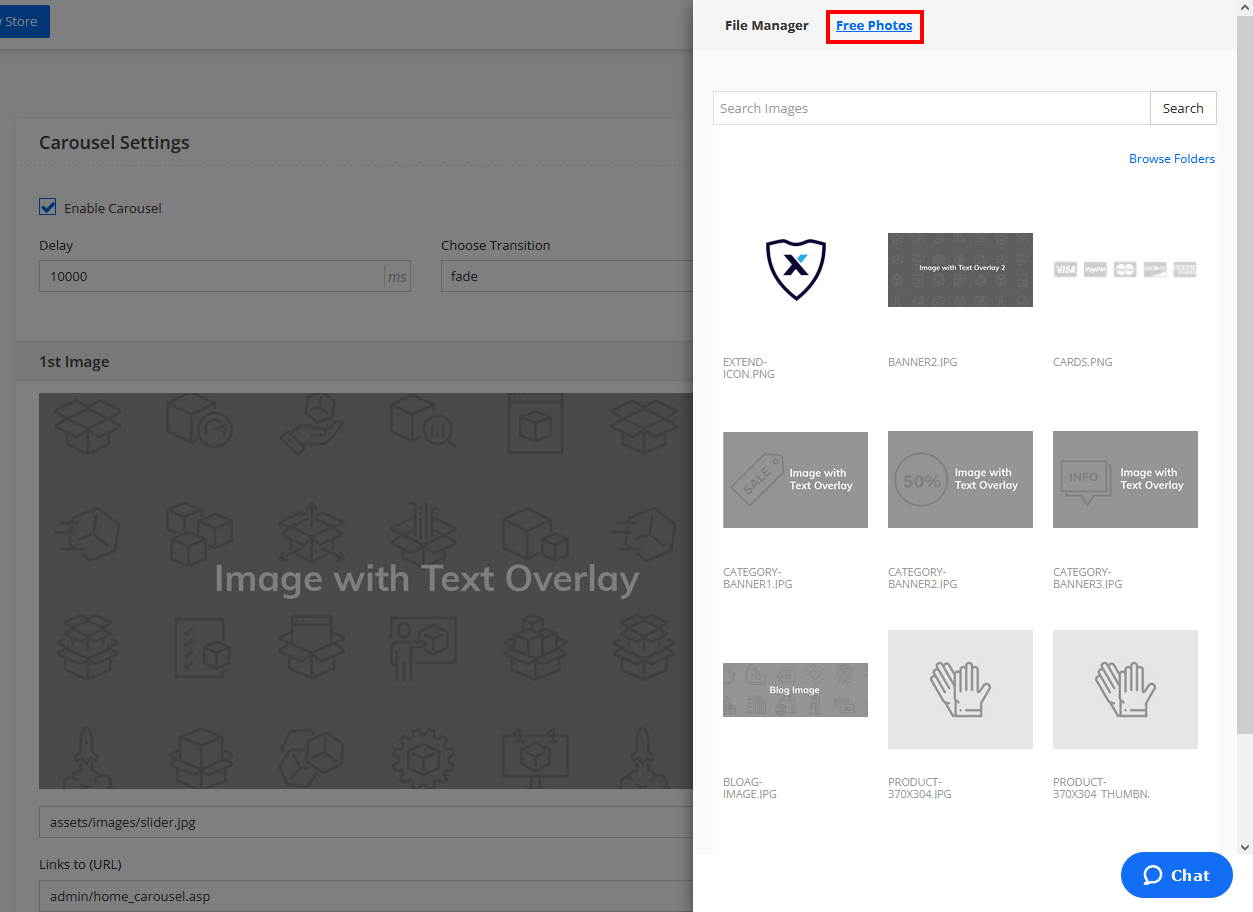
You can now browse free images from Unsplash from within this sidebar.
When Unsplash opens, it will display random images that have been recently added to their website.

However, you’re going to want to find images that relate to your business in some way. For the purposes of this demonstration, I’m going to use images of the outdoors, as if I am building an online store to sell camping equipment like in the examples earlier.
Use the Search bar at the top of the image sidebar to narrow down the images that are displayed. Following the outdoorsy theme I’m looking for, I’m going to try searching for “forest.”
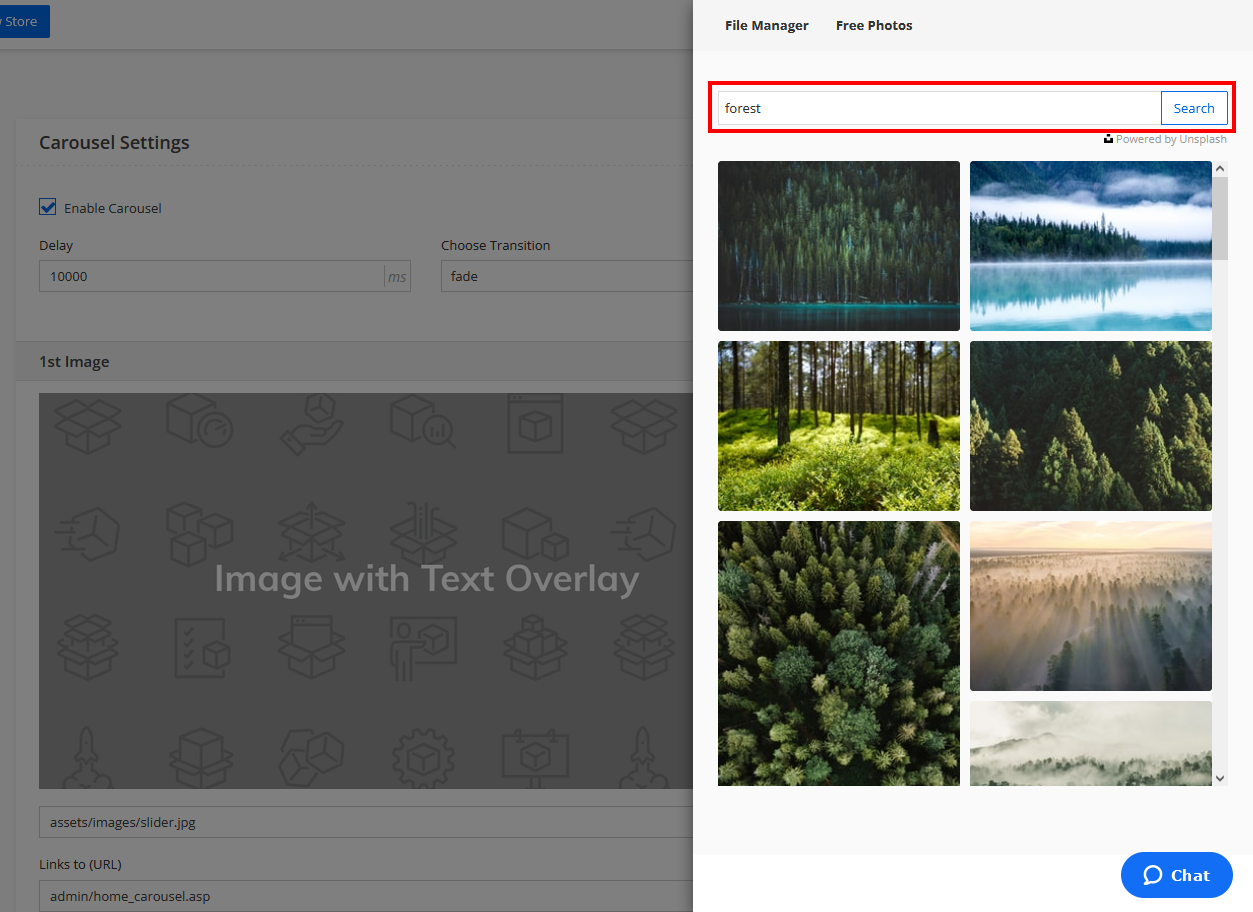
Normally, the search goes through instantly, although it may take a few seconds if your internet connection is slower. As you can see above, the results have been narrowed down to photos of forests.
Scrolling down will reveal more results, or I could also refine my search terms to further refine the displayed images — for example, “northern forest” or “pine forest.” However, these are good enough for a demonstration!
Simply click one of the images to immediately add it to the Homepage Carousel.
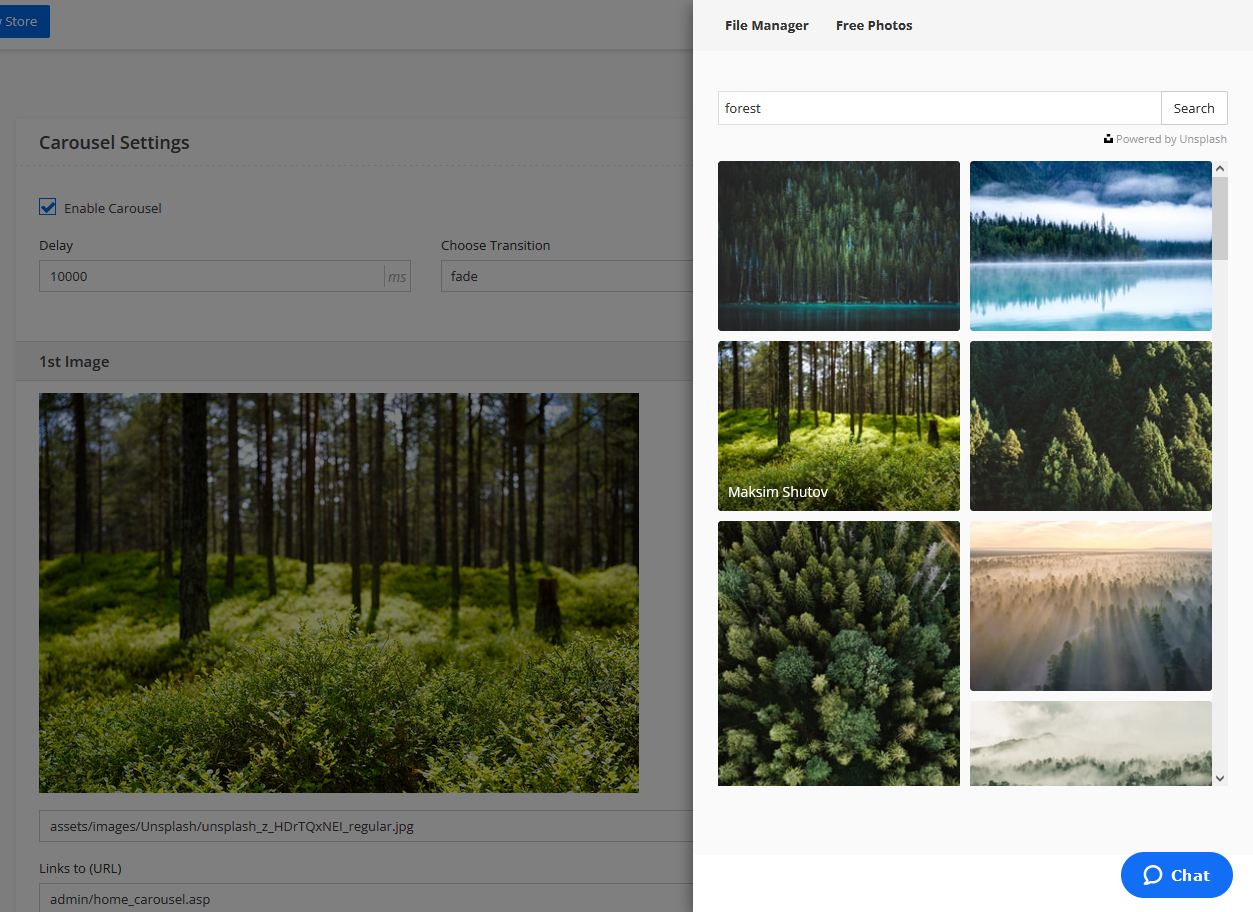
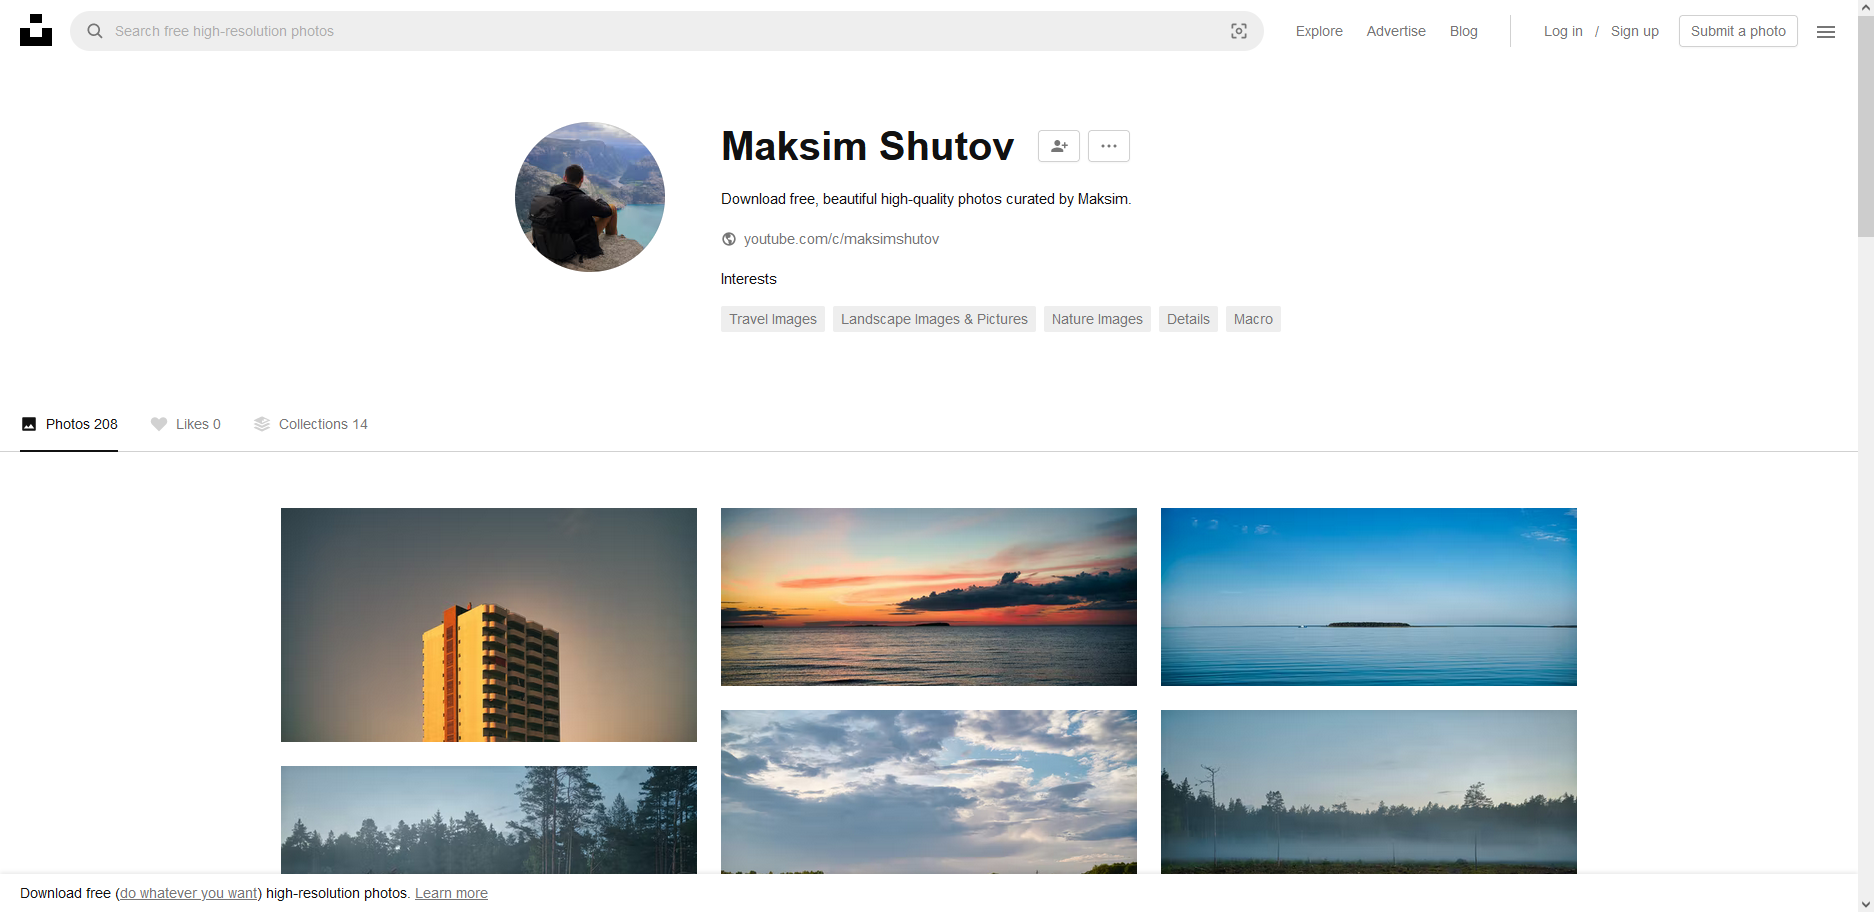
When you hover your mouse over an image, the photographer’s name appears. While clicking on the image itself selects it for your carousel, clicking the name opens a new tab in your browser with more images from the same photographer.
Back in our Homepage Carousel, once you add an image, you can click anywhere outside of the Browse sidebar to close it and return to the Homepage Carousel settings.
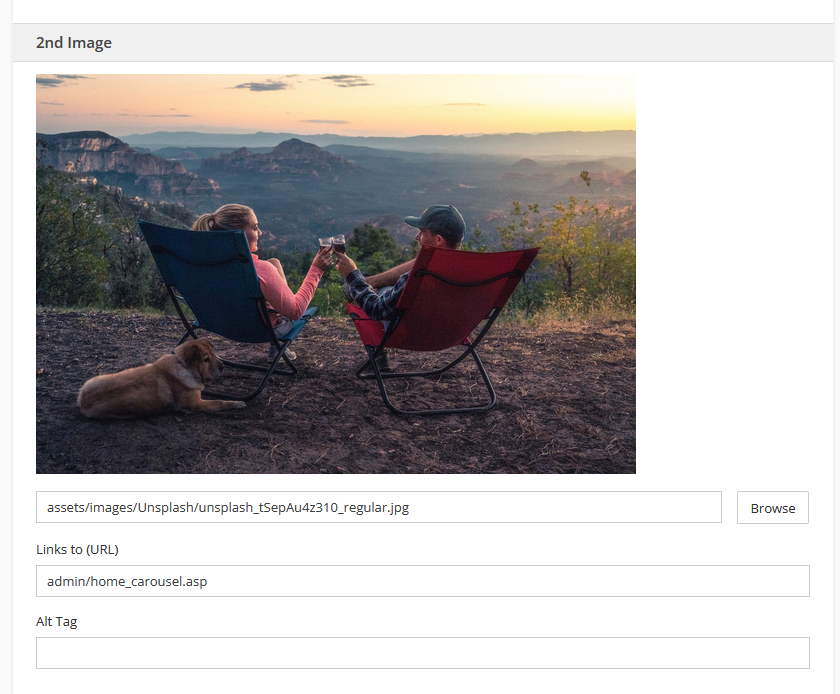
Now, let’s take a quick look at the first image as it is inside the carousel settings:
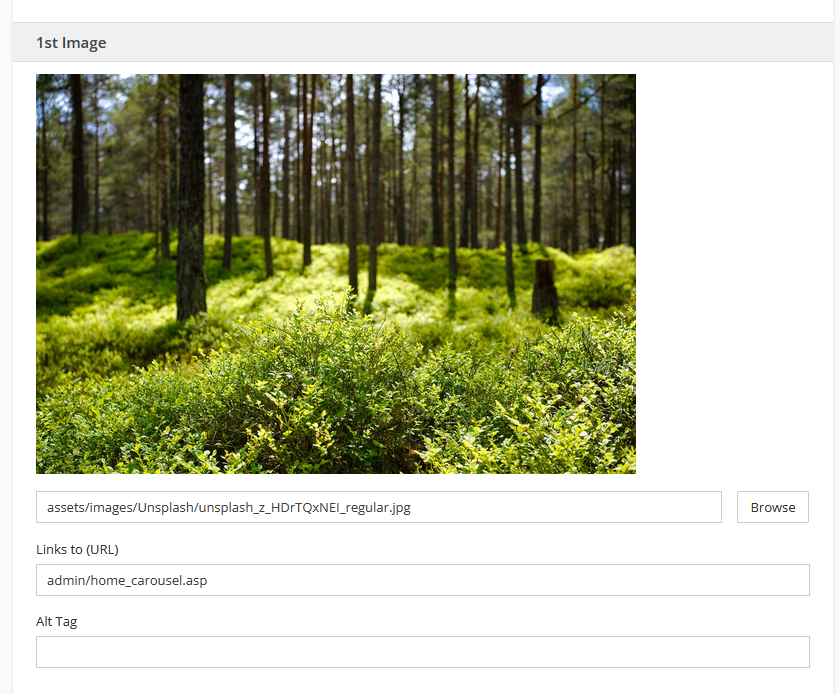
The first thing you’ll notice is that the photo I selected does not fill the entire available space for a carousel image. Depending on the Shift4Shop Theme you’re using for your online store, this may look fine on the front page, but on some themes you might see empty space next to it. There are a couple of ways to fix this — you could either look for a different image, or download and edit this image yourself to get the right aspect ratio.
If you want to download and edit images added through this method, you can find them in a folder called “Unsplash” within the File Manager. The integration downloads both a small and large version of the image and automatically places the large version into the Homepage Carousel’s file path.
However, for now, I’m going to leave this image as-is and go back to looking for additional images to add to the carousel. Even though I’d eventually edit this photo to make it fit better, first I want to find more photos that look good together on the carousel and there’s no reason to spend time editing a photo until you are sure you want to use it.
Scroll down to the next carousel image. Clicking its Browse button will allow us to repeat the process for the first image, but don’t forget to Save by clicking the blue button in the upper right corner as shown below.
For the second image, I’ve searched for “camping” this time around, and scrolled down through the search results. The Load more button will bring up more photos.
Evaluating this photo, you can see that it’s also not the full size of the carousel, but is the same size as the previous photo and so would need to be edited in the exact same way. By adding them both to the carousel, I can see whether I like using these images together before putting any time into editing them.
A Quick Note About Editing Photos
The Shift4Shop Unsplash integration is built to allow you to place photos directly from Unsplash into your Homepage Carousel (and File Manager, as we’ll cover momentarily). You may discover photos that work perfectly in your carousel without needing to do anything more than simply adding them from Unsplash — especially if you’re choosing one to create a mood rather than to use for a sales banner.
But in many cases, you’ll probably want to edit the images. Editing can include cropping and resizing as mentioned above for images that aren’t quite the right size, as well as other changes like adding text. Adding photos from Unsplash to your carousel can help you come up with ideas for edits you want to make. For example, I could take the forest photo from up above and add some text like “Get Back to Nature with Our New Collection” while resizing it to better fit the carousel. Unsplash gives you permission to change images like this.
Our list of 10 Best Free Photo Editors for eCommerce can help you find the editing tools that are right for you! Once you’ve made the changes you need, upload the new version of the photo back to your Shift4Shop store.
Adding Images from Unsplash to the File Manager
Now, let’s look at how to add images from Unsplash to your store’s File Manager. While logged into your Shift4Shop Online Store Manager, you’ll see your name in the upper right corner. Click this to open a dropdown menu as shown below, and then click File Manager.
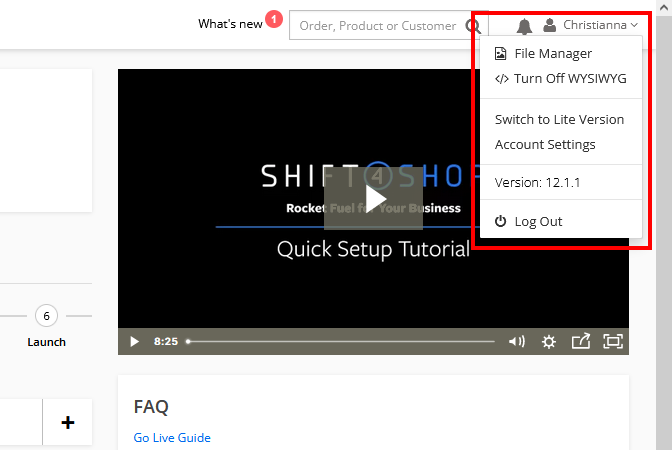
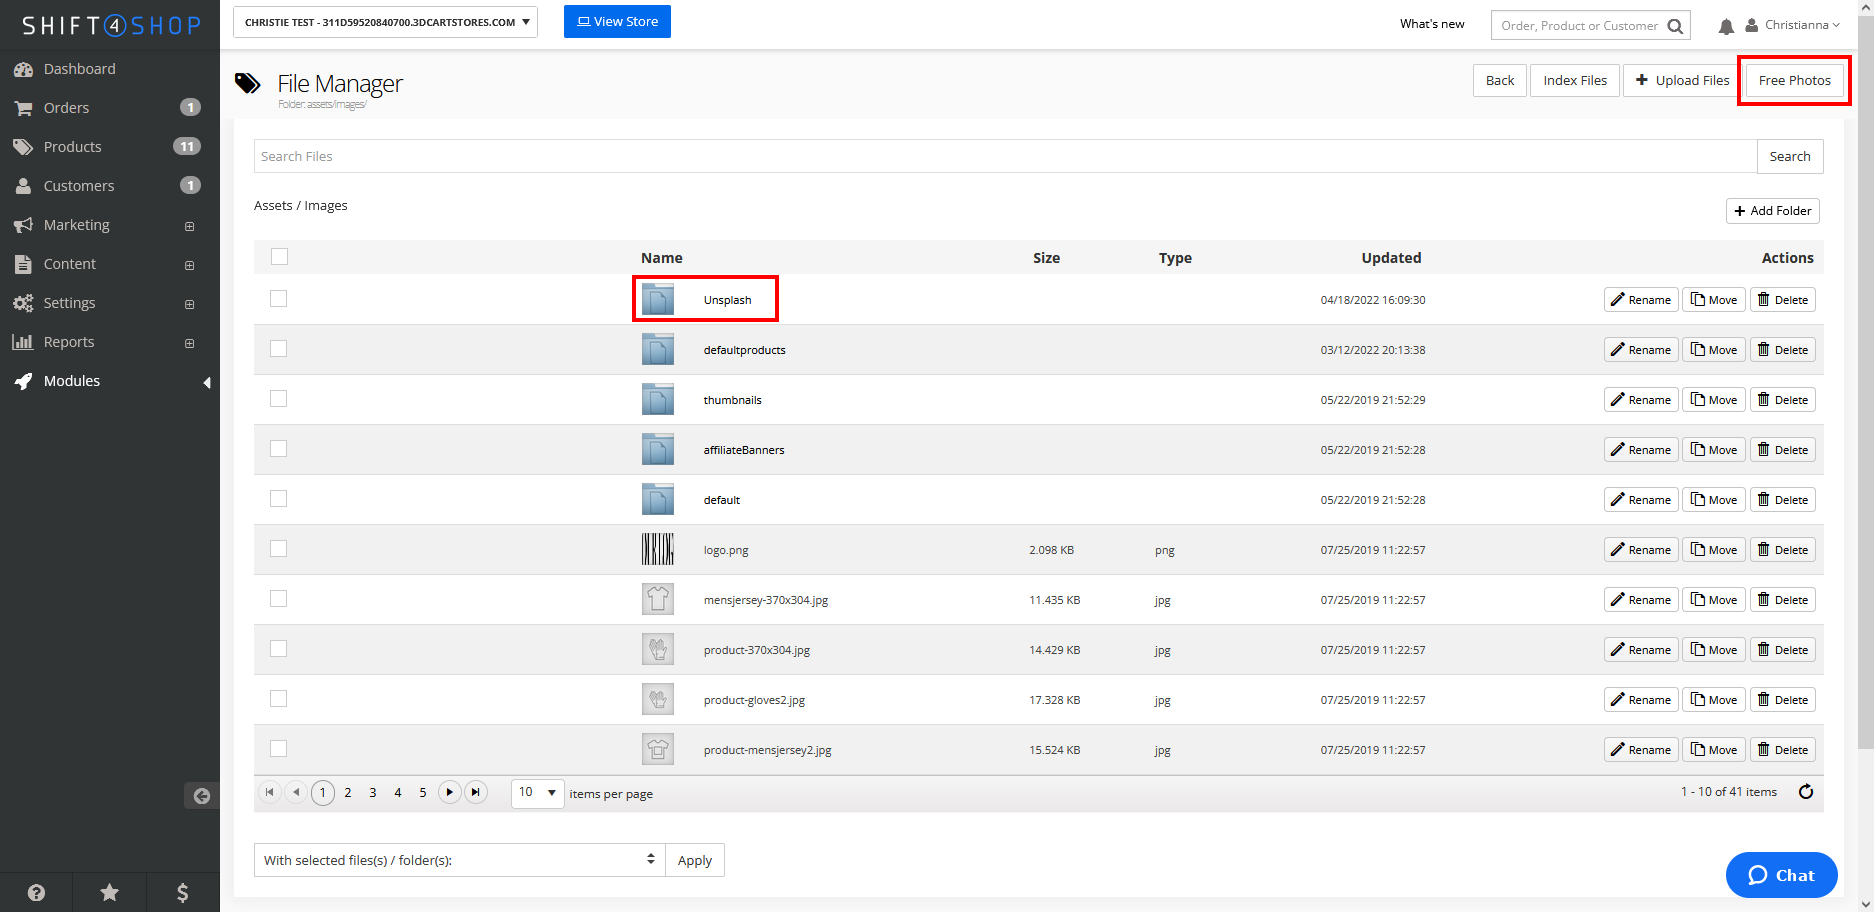
The File Manager will open up as shown below. In the upper right, you’ll see a Free Photos button alongside some other buttons.
Also highlighted in the screenshot below is the Unsplash folder, where all the images you downloaded from Unsplash will reside — both their large and small versions. If you don’t see an Unsplash folder, try clicking the Index Files button (also in the upper right) and this should make the folder appear.
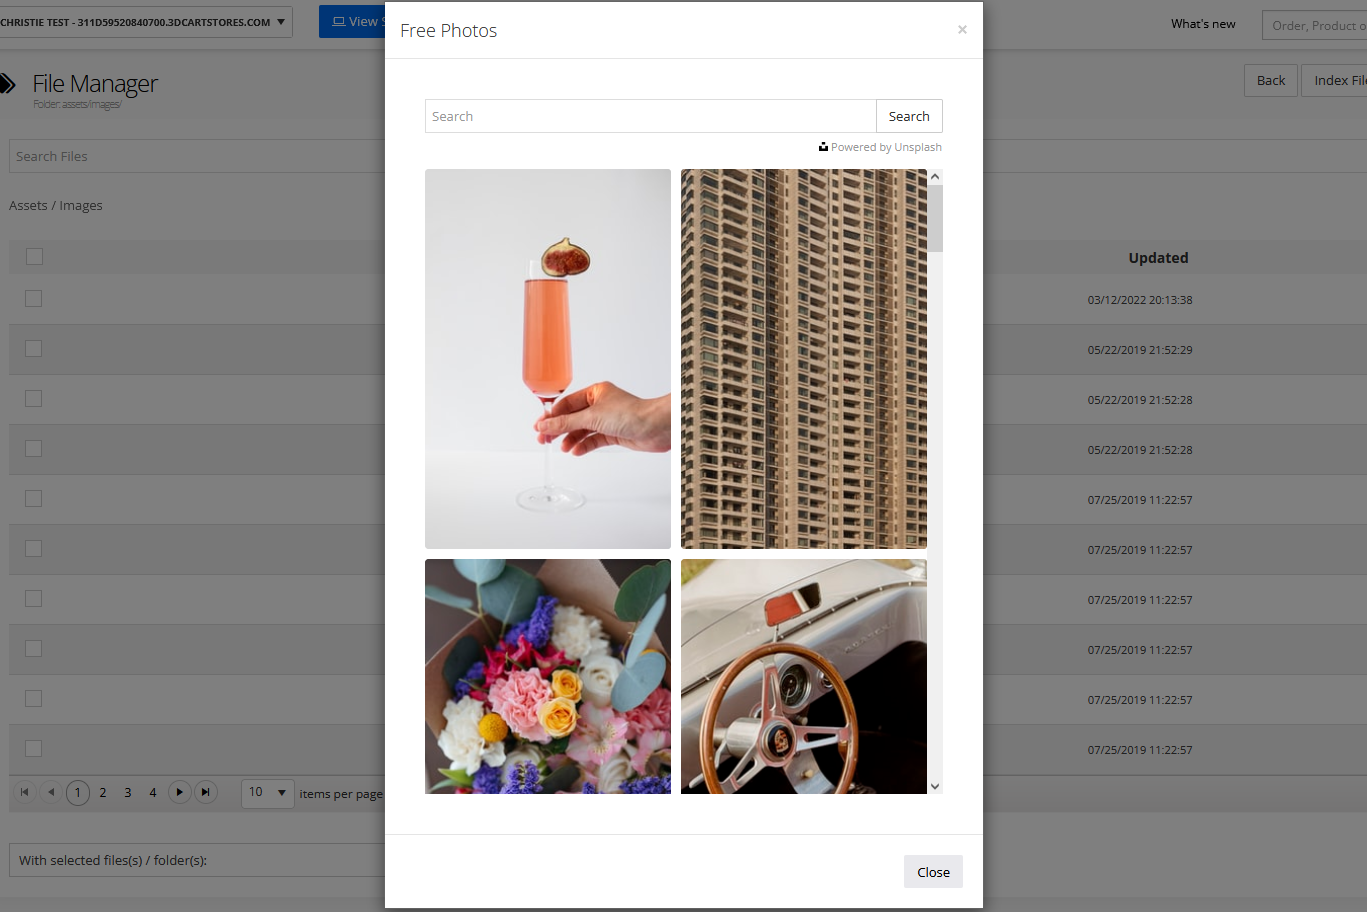
Click the Free Photos button to bring up the Unsplash interface. It works just like the Homepage Carousel version; you can enter a search term, scroll through the results, load more, and download an image by simply clicking it.
You can close the Unsplash interface with the Close button at the bottom or just click anywhere outside of it.
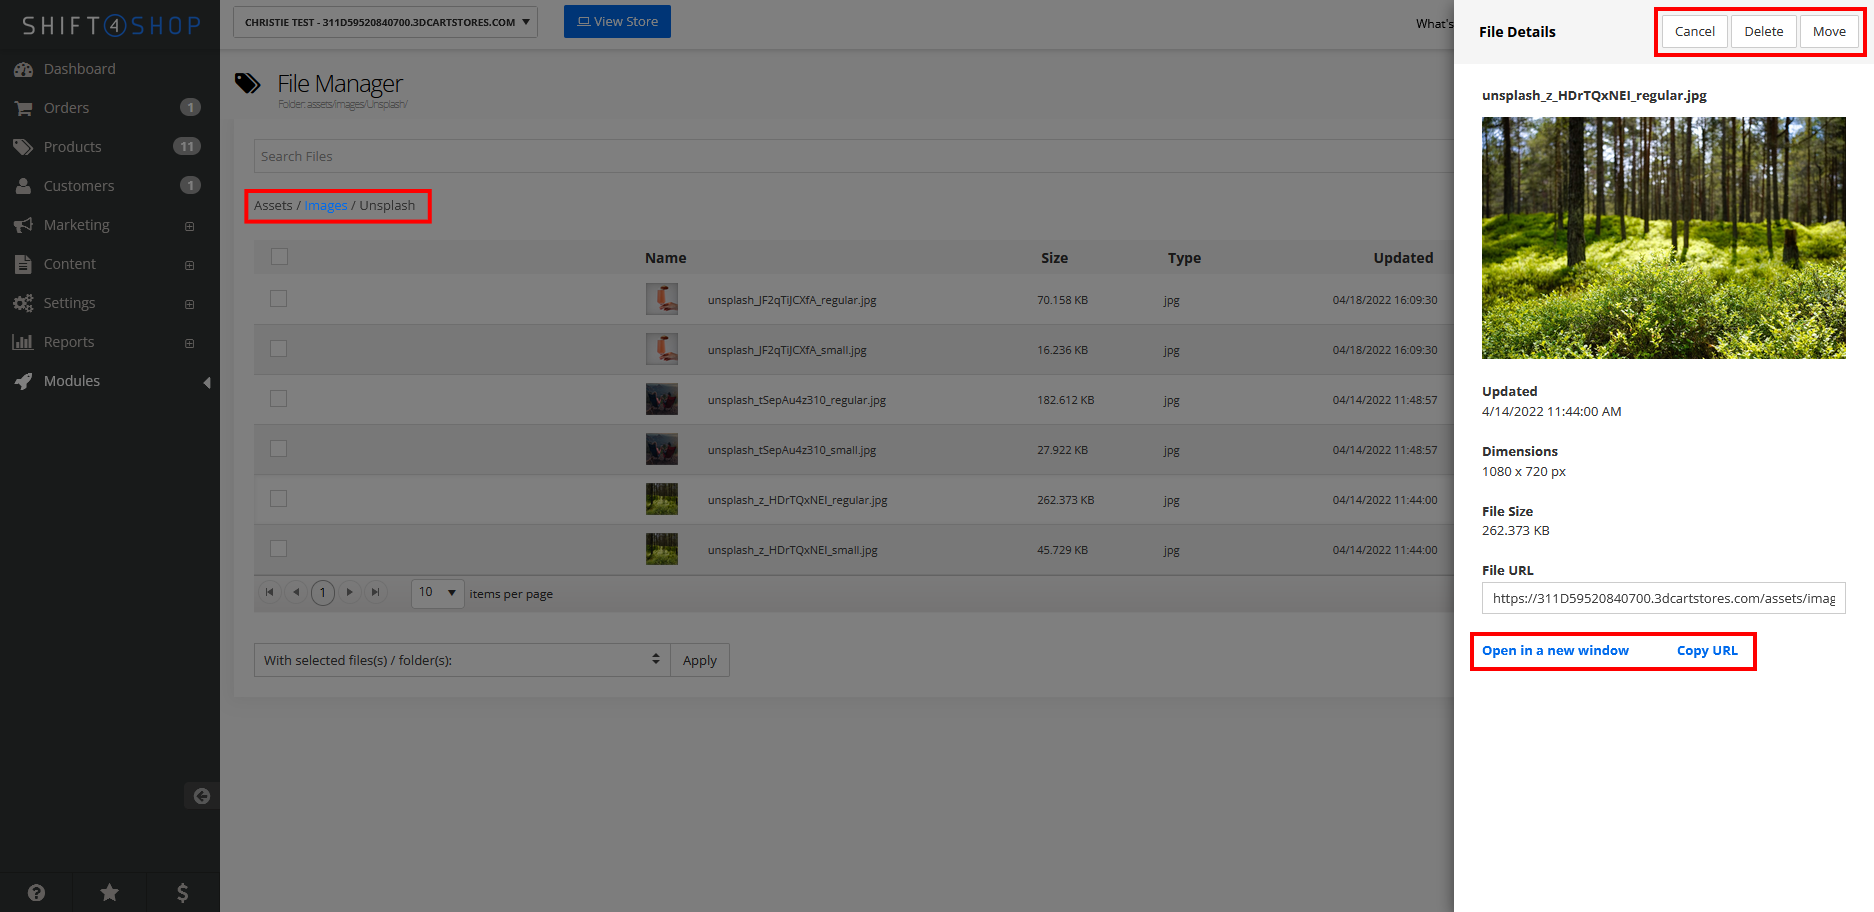
Now, let’s take a look inside the Unsplash folder. On the left, you’ll see the file path to remind you that you are in Assets / Images / Unsplash. Clicking any image will open an information panel as seen on the right. Here is the info panel for the first forest image from earlier in the demonstration.
The buttons above allow you to delete or move the image, while Cancel simply closes the info panel (or once again you can just click somewhere else on the page to close it). Below the image is information about the image file, and at the bottom are links to open the image in a new window or to copy its URL. Opening the image lets you view it at full size, and you can also right-click it to save it to your computer for editing. Copying the URL is useful when you want to embed the image somewhere on your Shift4Shop store or import it into an online editing application.
Any image you edit can be added back to your site using the File Manager’s +Upload Files button.
Ready to Dive Into Unsplash?
As we mentioned near the beginning of this guide, humans are extremely visual beings. Images enhance your online store’s mood, branding, professionalism, and more. Shift4Shop’s Unsplash integration is meant to help you find amazing photos for your site, quickly — and for free. Whether you use them as-is or download them for editing, it’s time to unleash your creativity and enhance your online store’s looks and performance.


Leave a reply or comment below